 Instagram Inspo Halloween is a popular holiday in the United States and many folks love to get into the spirit. One way to insert a little spooky into your life is to create Halloween inspired layouts in your bullet journal. Check out these Instagram posts.
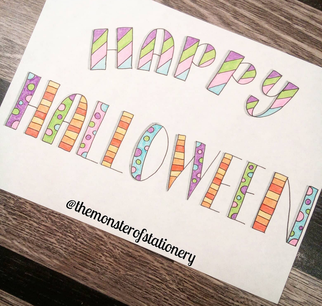
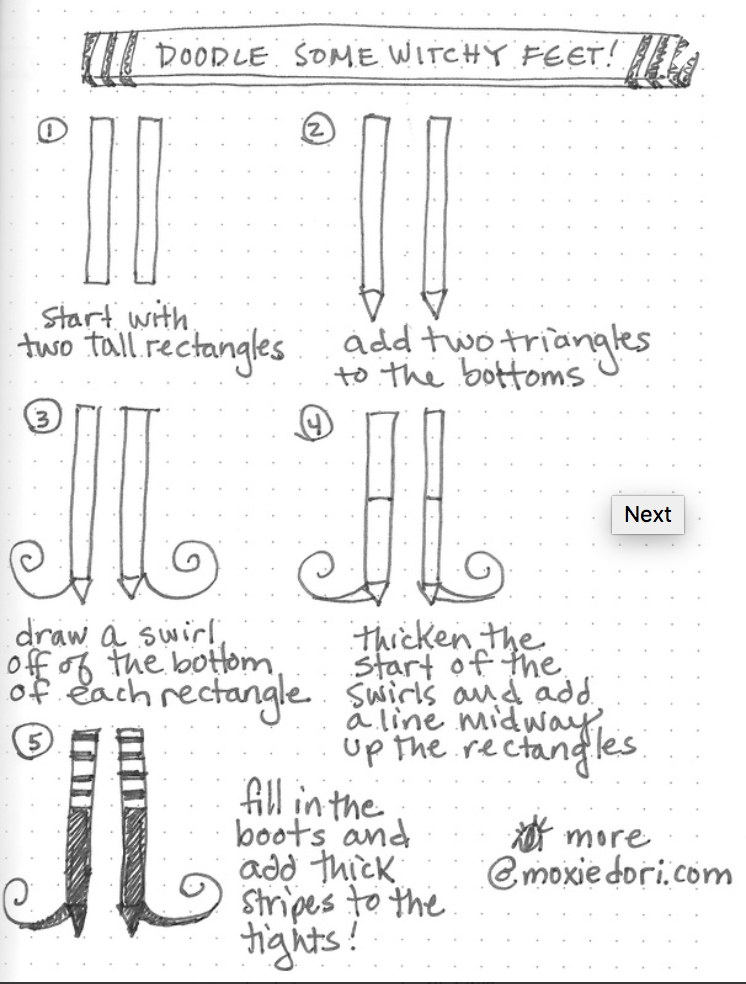
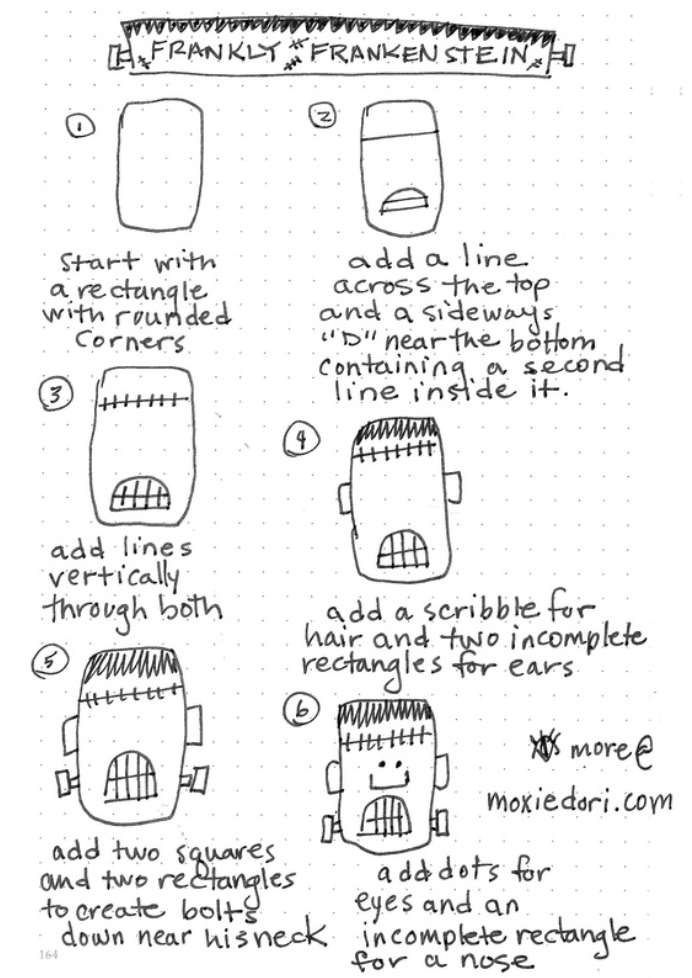
Halloween DoodlesAnother way to add Halloween flair to your bullet journal is to draw some spooky doodles on your layouts. Here are a few of our faves. Follow us on Insta over @moxiedori for more spooky doodles.
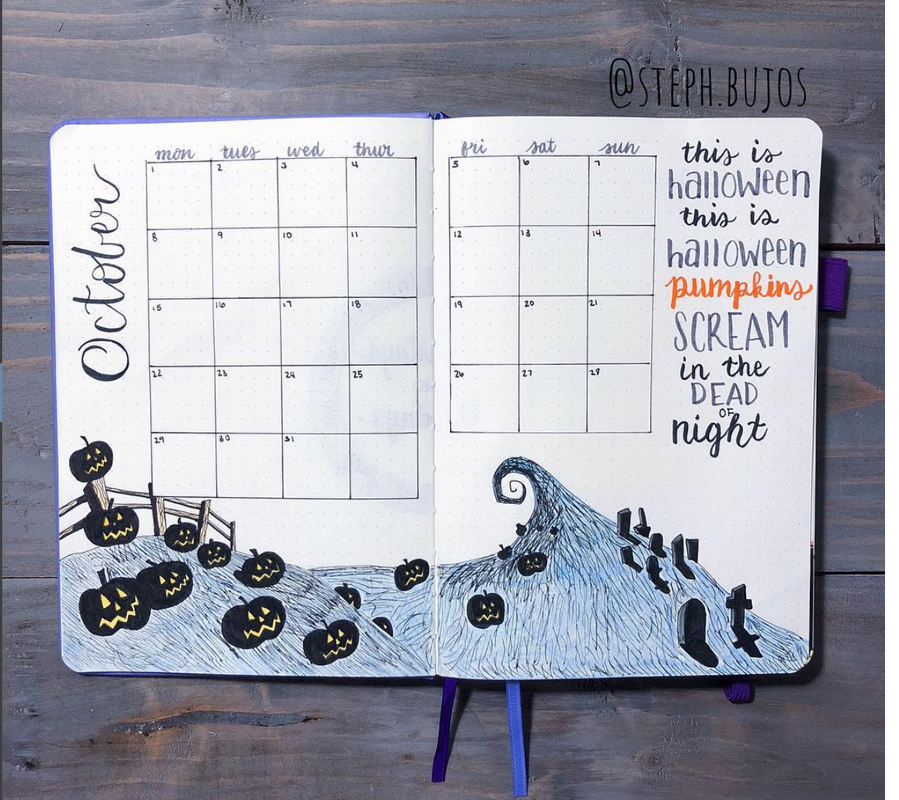
October CalendarThe Halloween bullet journal stencil is shaped like a cat and contains six spooky elements. This video tutorial will show you how to make this October calendar using the gravestone element. The Tombow MONO Drawing Pen 03 is great for adding detail lines at the bottom of the gravestone You can also use a grey Mildliner to create a drop shadow on one side of the gravestone. 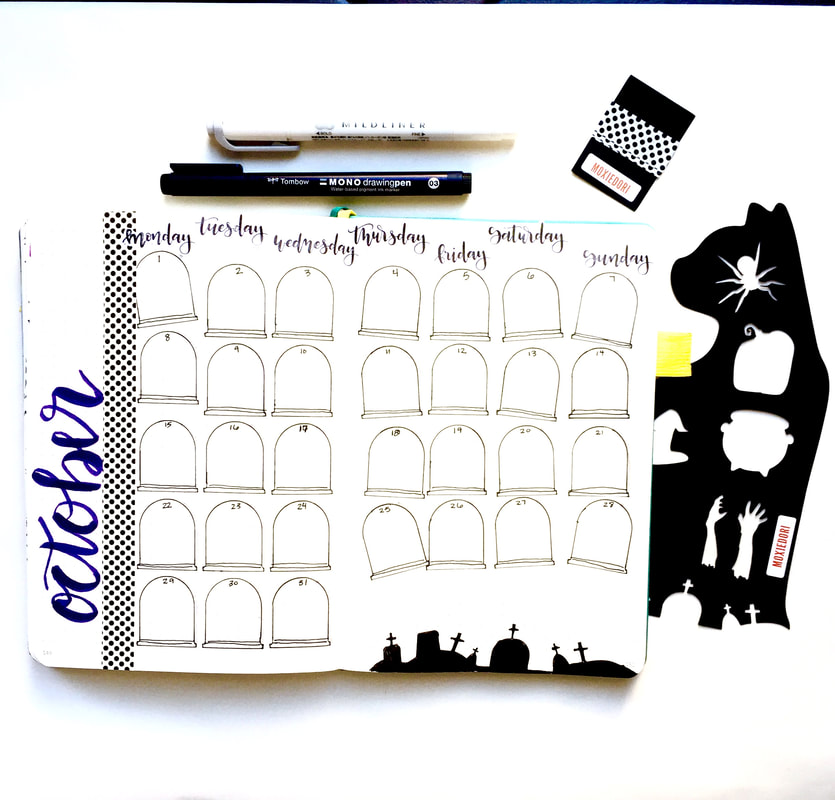 October Bucket ListThis October word art is a spin on the traditional bucket list. Using a pencil, trace the outer edge of the Halloween stencil to create cat shaped container for your words and phrases. Pen your bucket list in various fonts and in varying directions. I suggest you use a Tombow MONO Drawing Pen 05 to pen your word art so the lettering is thick enough to create the overall cat image. When you are finished, erase your pencil markings.  Geometric Bat Mood TrackerDraw a bat on your journal page and use a straight edge to create 31 geometric pieces inside the bat. Decide on your color coding system and create a color coded key for your moods. 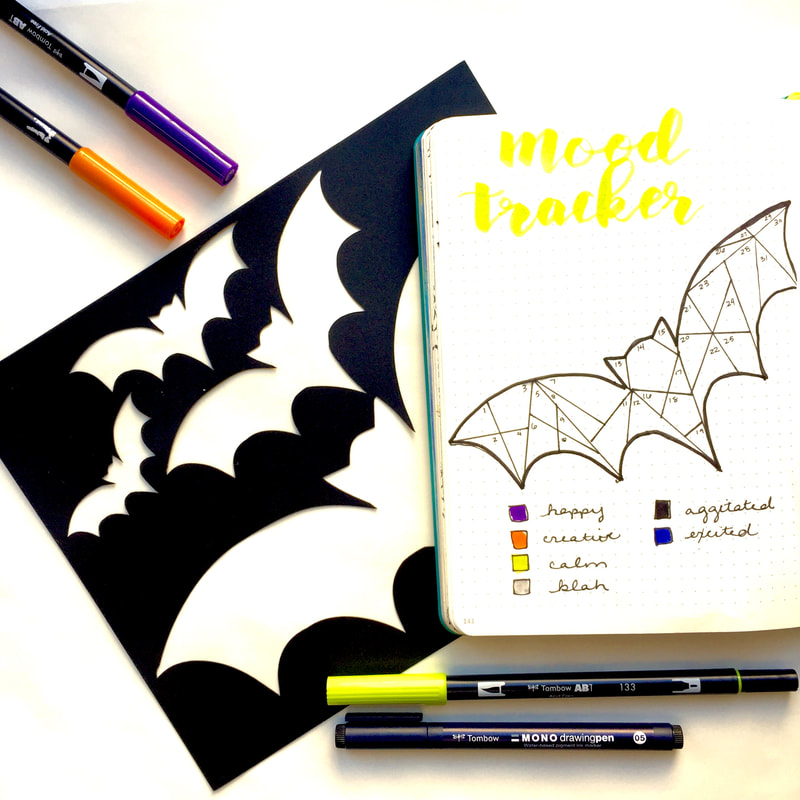 Zombie October Goals LayoutLooking for a fun way to create your monthly goals page? Zombies!!! This layout is created with the zombie arms on the Halloween Stencil. Just daube the zombie arm element with Distressed Ink in Wilted Violet and Twisted Citron. I find that outlining in an 03 or 01 black pen makes the Distressed Ink really pop off of the page. 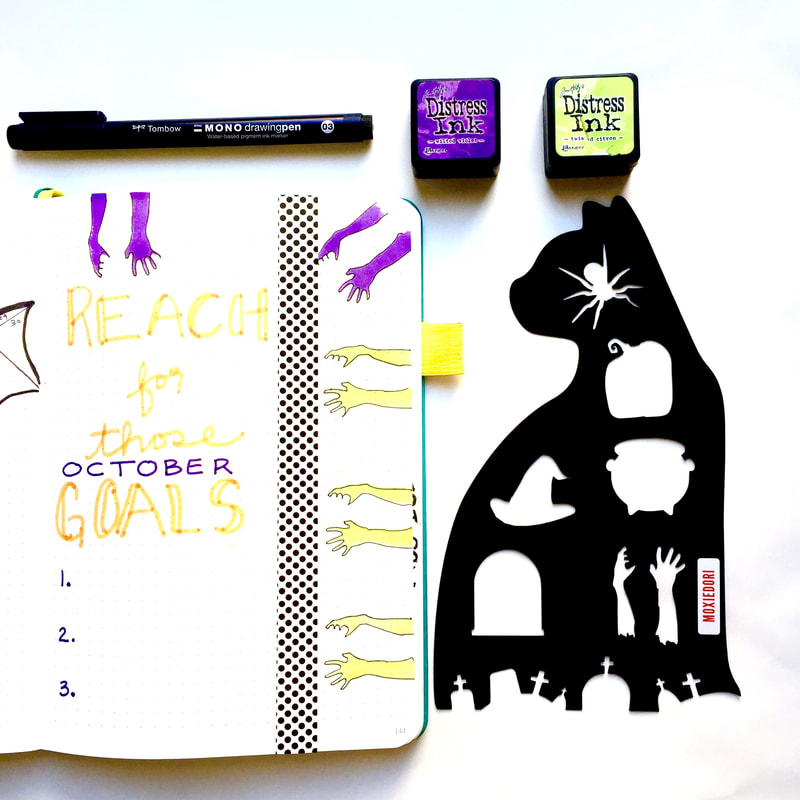 Spooky Bat WeeklyThis spooky bat weekly is so much fun! Draw a bat onto a piece of black card stock. Cut out the image and glue it to your journal pages using a Tombow adhesive. Next use a Sakura White Gelly Roll 08 to pen the days and dates on the bat. These large card stock bats can also be used as home decor. Place some double stick tape on the back of the body, fold the wings a bit and adhere to your wall. 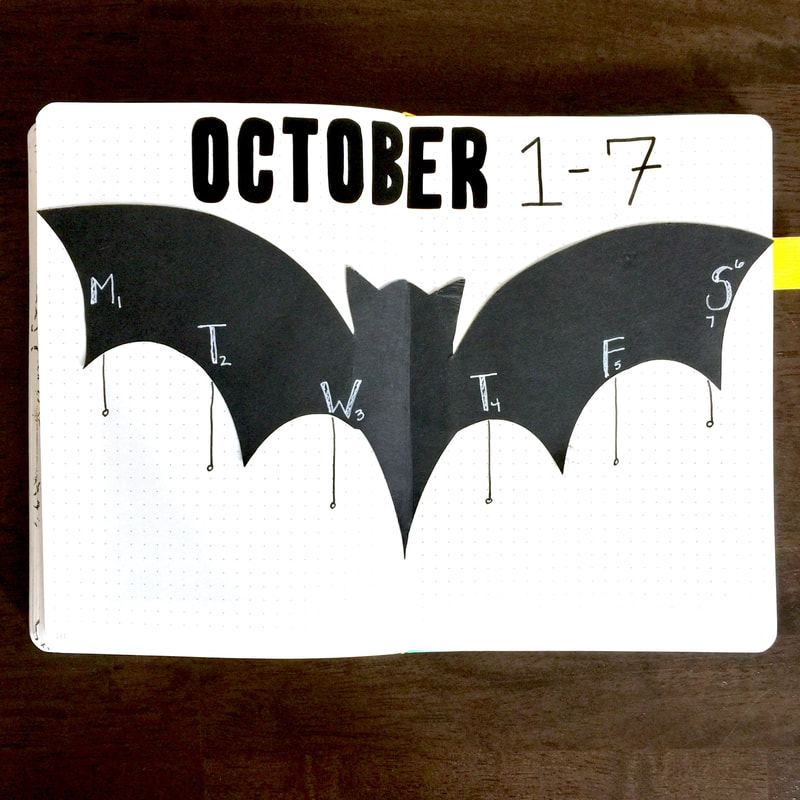 More Halloween InspirationYou can find even more Halloween journaling inspiration on this Halloween Bullet Journal Pinterest board. Remember to follow us on Pinterest as we are always adding more great links to our over 40 bullet journaling boards.  Want to learn how to make the most effective habit tracker? Chances are you've played around with a few different types and perhaps haven't found the one that works best for you. You might find the right fit in one (or more) of these three habit trackers. 1. Weekly Grid Habit TrackerThe Weekly Grid Habit Tracker hones in on six or fewer habits. Maybe these are the habits that glue your life together. Maybe three of these habits are old hat and three are behaviors you are trying to turn into habits. Or maybe you are just paying attention to how many times per week you do these things.
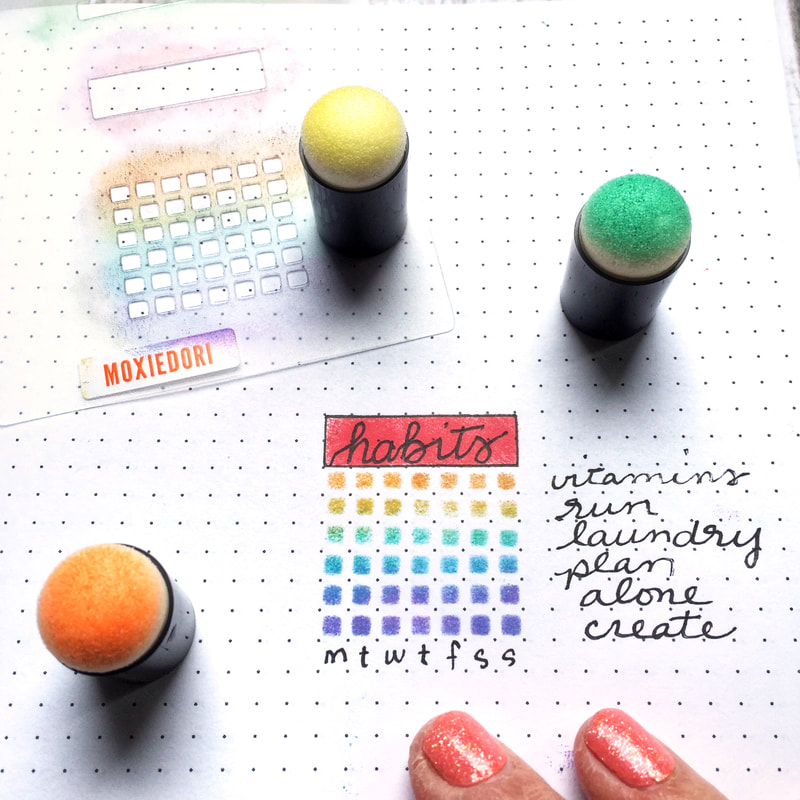
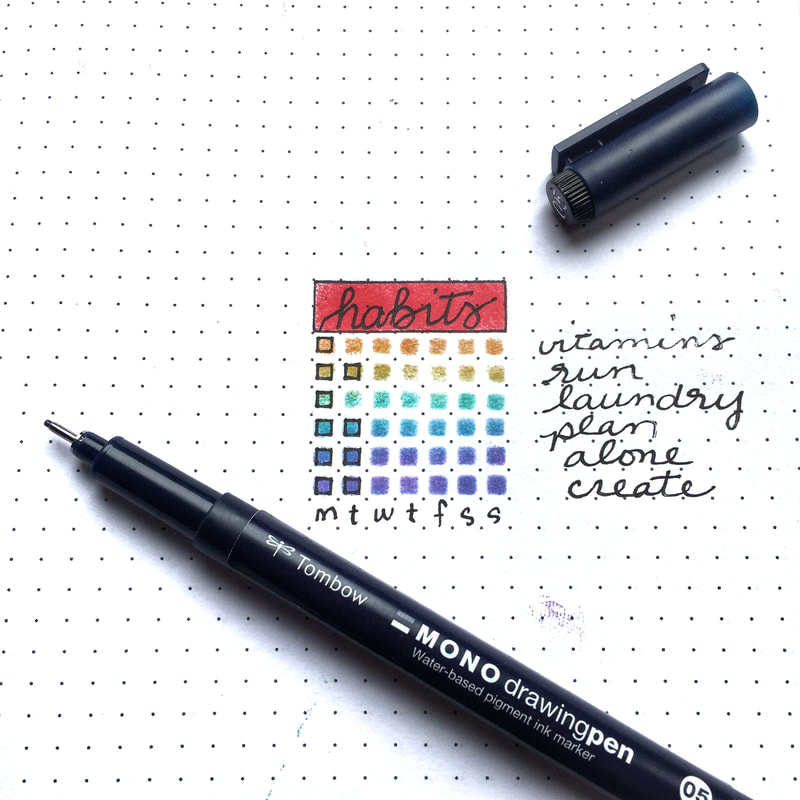
Regardless, this handy little 6 by 7 grid box tracker can be made quickly with The 4 Piece Essential Stencil Set. You can use Distress Inks or a damp makeup sponge and watercolors to create a colorful grid. Then you can trace the box in black pen once you've completed the habit. (Pro tip: I find if the habit tracker is a bit of eye candy, I tend to use it more.) This tracker will more than likely live on your weekly spread, where it will be easily seen and therefore worked. Seeing the tracker there will be the trigger to get the behavior chain going and the habit formed. 2. The Graduated TrackerSome habits or tasks are not all or nothing, right? Maybe you didn't walk 10,000 steps today but dang it you walked 7,667! Or maybe you went above and beyond and walked 15,000. The Graduated Tracker shows if a habit/goal/task is complete or if it is partially done. It also allows room for growth to show that you surpassed your initial goal. For example, if I decided to tackle Mt. Laundry on the day in the photo below, I could use the 4 Piece Essential Stencil to pen in another square or 2 and color them in as I completed additional loads. Likewise, if I wash and fold but don't put away, I only get to color in part of the box. Make the plan, work the plan. Wash, rinse, repeat. 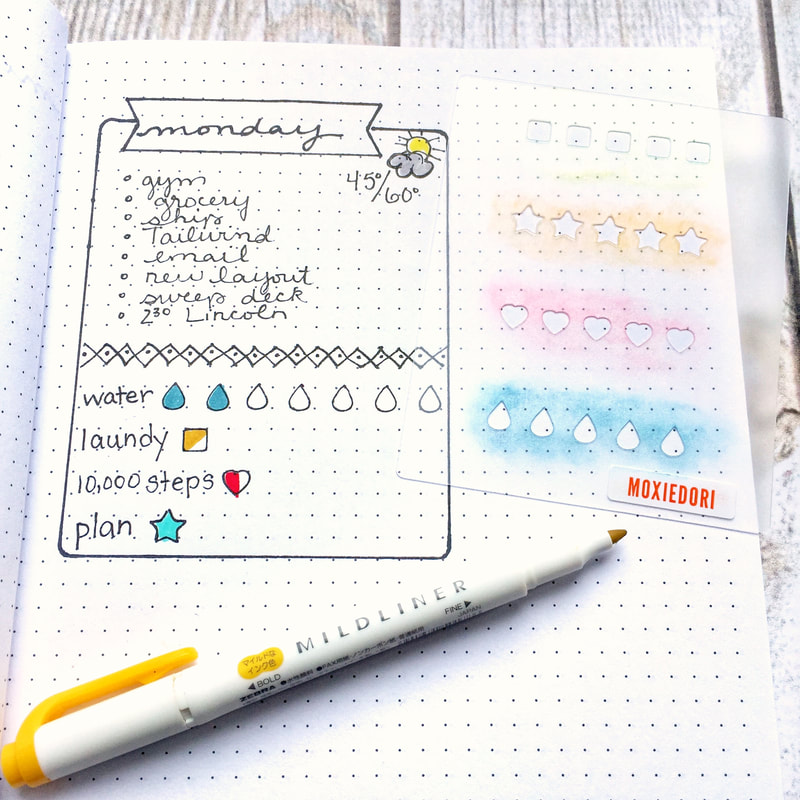 3. Completed Task TrackerThe Completed Task Tracker is an alternative to the full page monthly habit tracker. Just looking at all of those tasks exhaust me and I never remember to flip to that page and fill the boxes in. The result is a depressing page of incomplete tasks every month. The Completed Task Tracker is more of a "Done" list than a "To Do" list. You list the habits or tasks you would like to complete. Then you pen a box (or a star, heart, or water drop) after the task and color it in when you complete it. If you want to reset your goal, draw another box and go for it! This way you'll see a tracker of the habits and tasks you have completed. 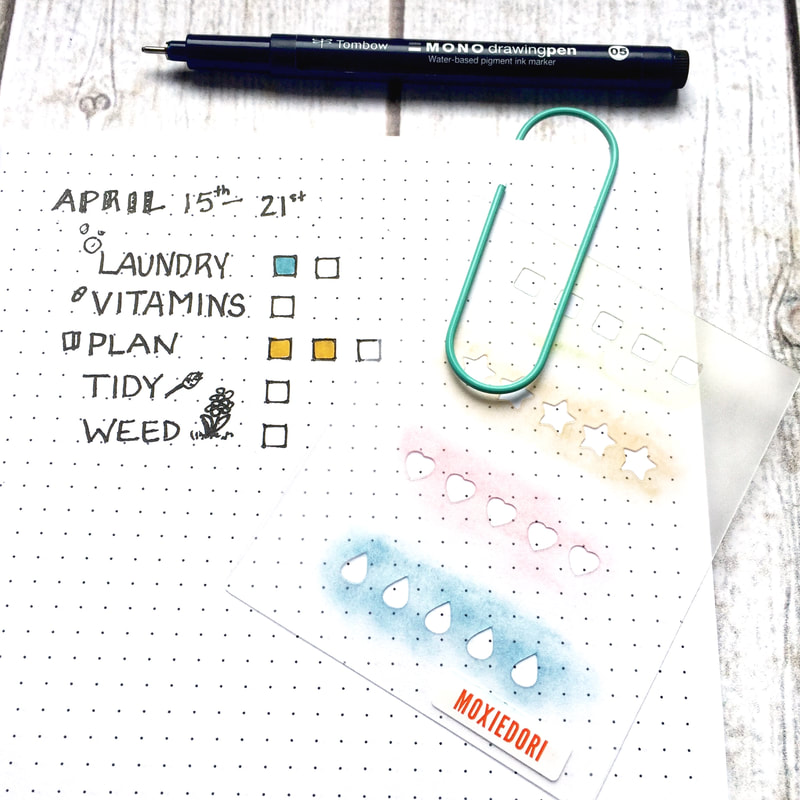 Habit Trackers are great ways to maintain or create new habits. They serve as triggers for the desired behavior and act as accountability. Your challenge is to find the tracker that works for you and not the other way around. Best of luck! If you have any questions or want to see more tips and tricks like the ones you saw here, hop over to our Facebook Group Bullet Journaling Tips and Tricks. We also have a curated Pinterest Board of Bullet Journal Trackers over here. Being present in the moment has numerous emotional and physical benefits. Besides facilitating an overall feeling of well-being, mindful presence can lower blood pressure, reduce stress levels, improve sleep and much more. It most likely won't surprise you to hear that your bullet journal is a fantastic tool to help you be more in the now. Here are five tips in using your bullet journal to stay present in the moment.  Document the Past |
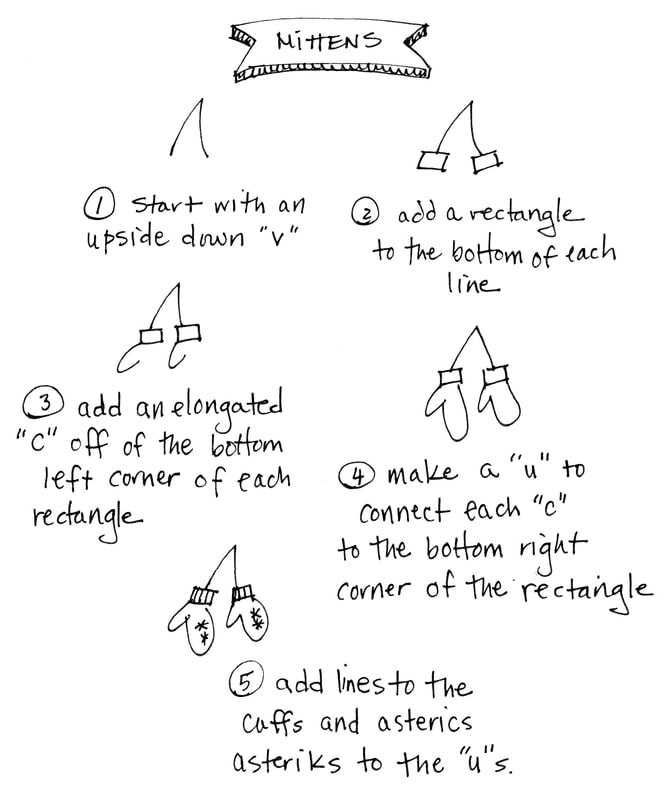 | 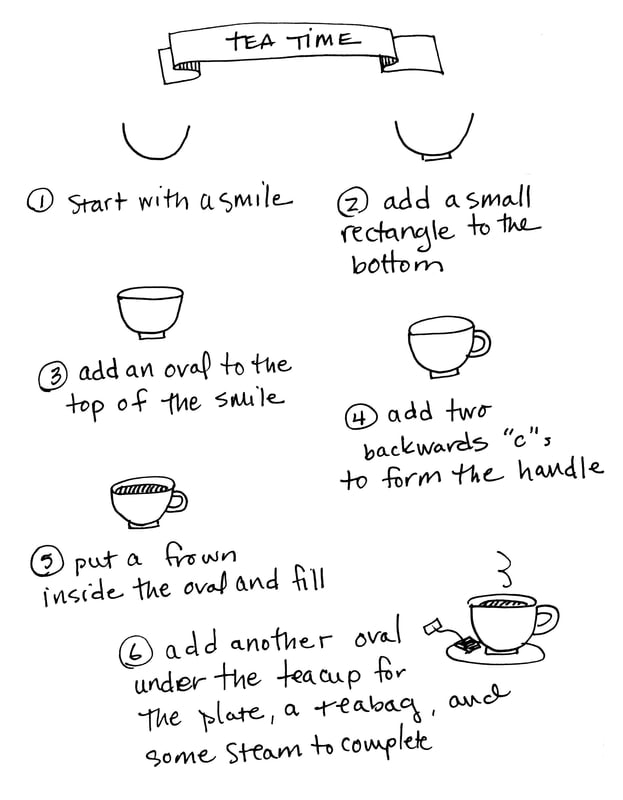 |
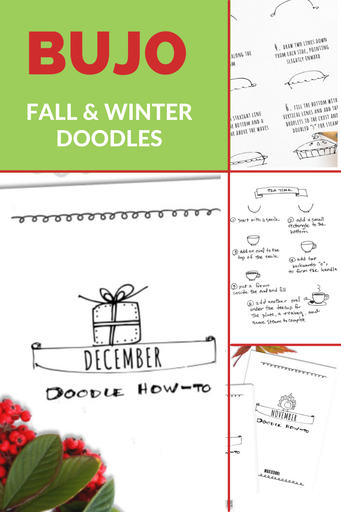
36 Fall & Winter Step-by-Step Doodles
| Want to keep on doodling through December? Add thirty-six fun November and December doodles (Thanksgiving, Fall, Christmas, New Years, Winter, etc.) to your calendar, journal, or planner today with these easy how-to guides. Get your immediate Fall & Winter Doodle Book here. | 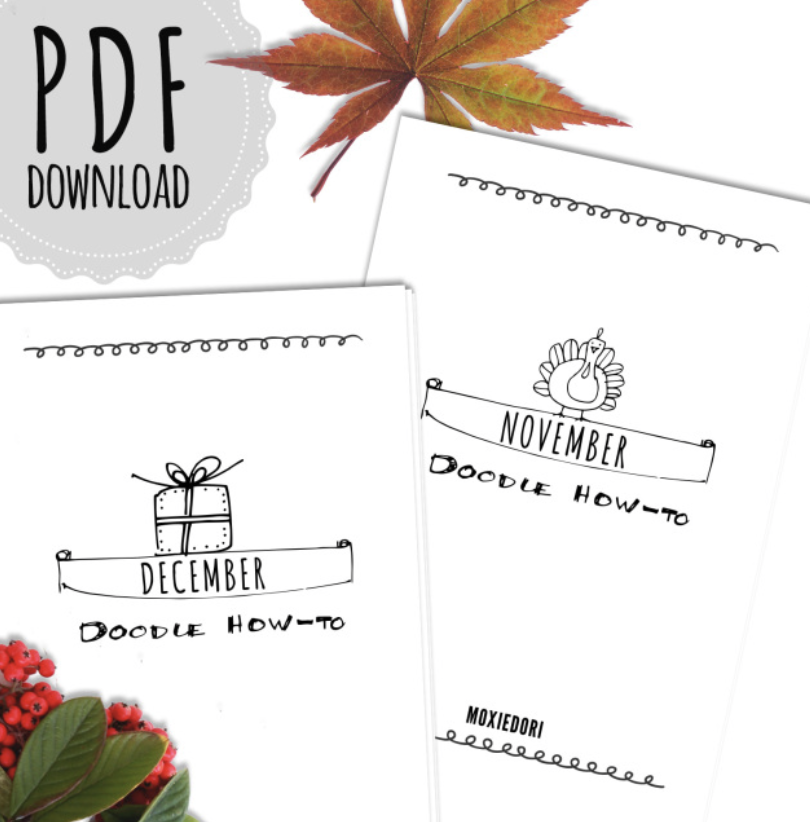 |
If you need some additional hot beverage flair in your journal, this Coffee and Tea Stencil is super fun.
As ever, if you are looking for more bullet journaling inspiration, support, or community, please join our FB group Bullet Journaling Tips and Tricks. You will find over 26,000 kind, helpful bullet journalists who love to share the bujo love.
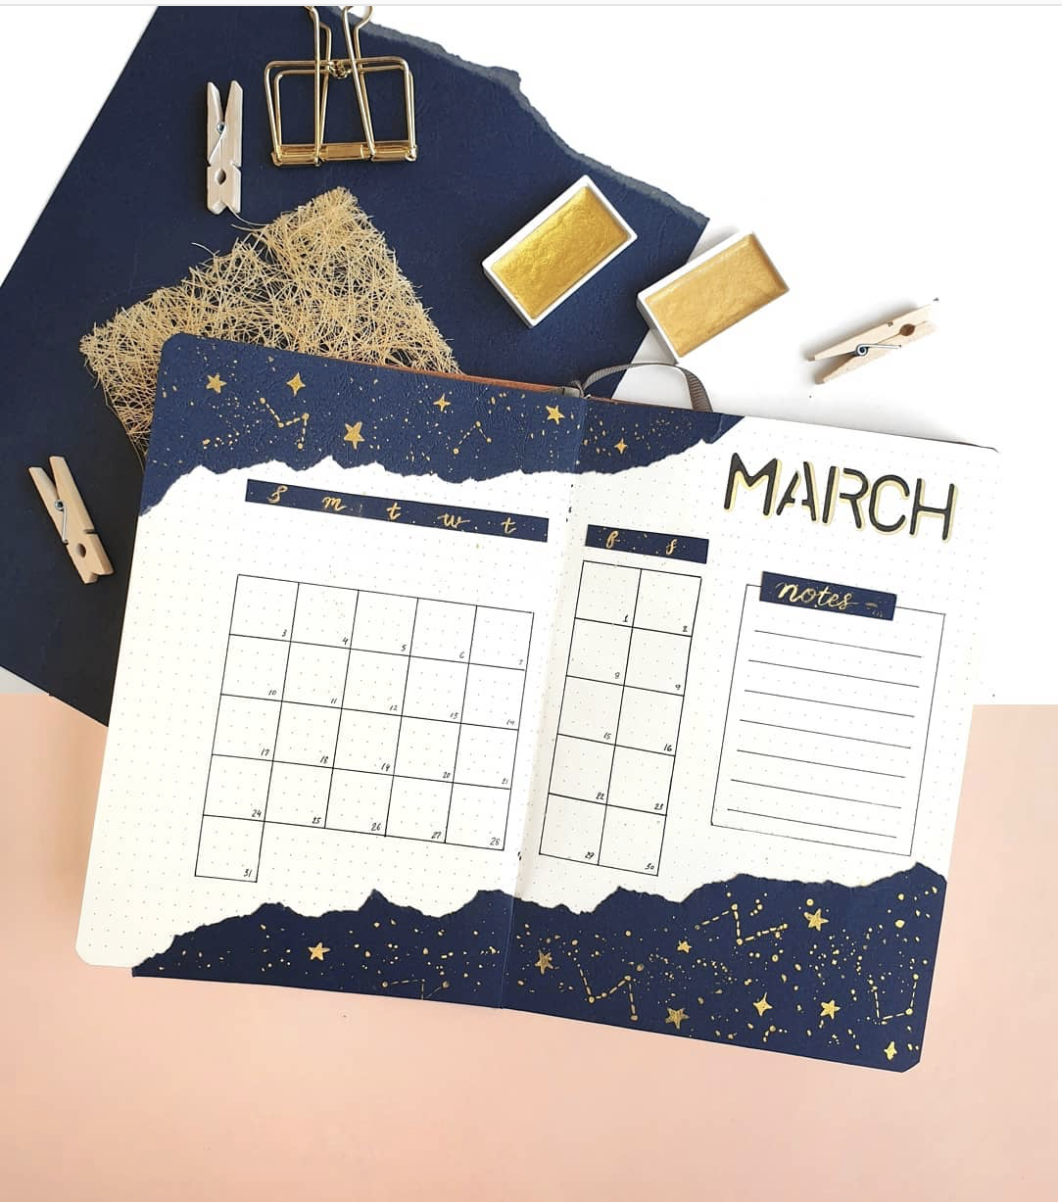
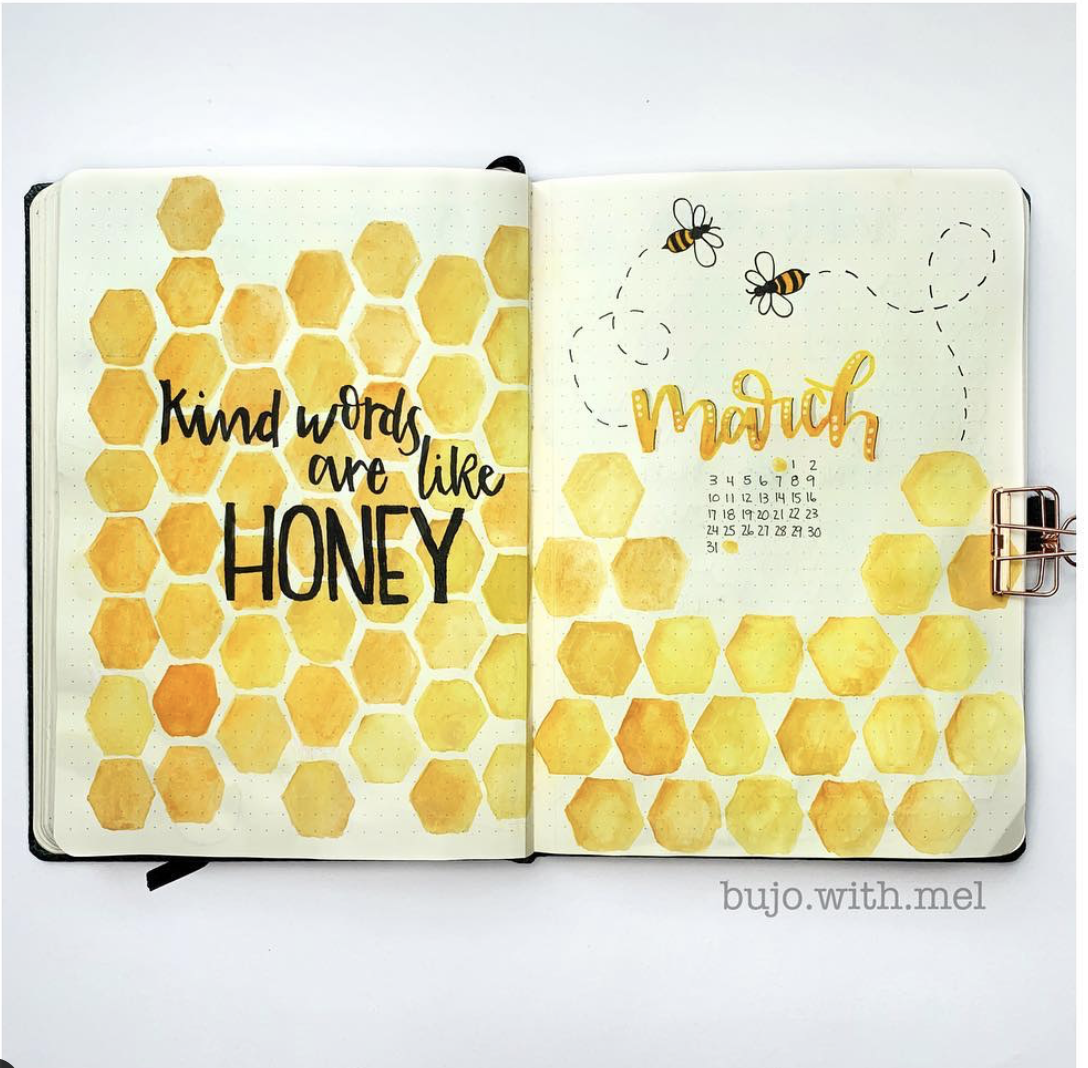
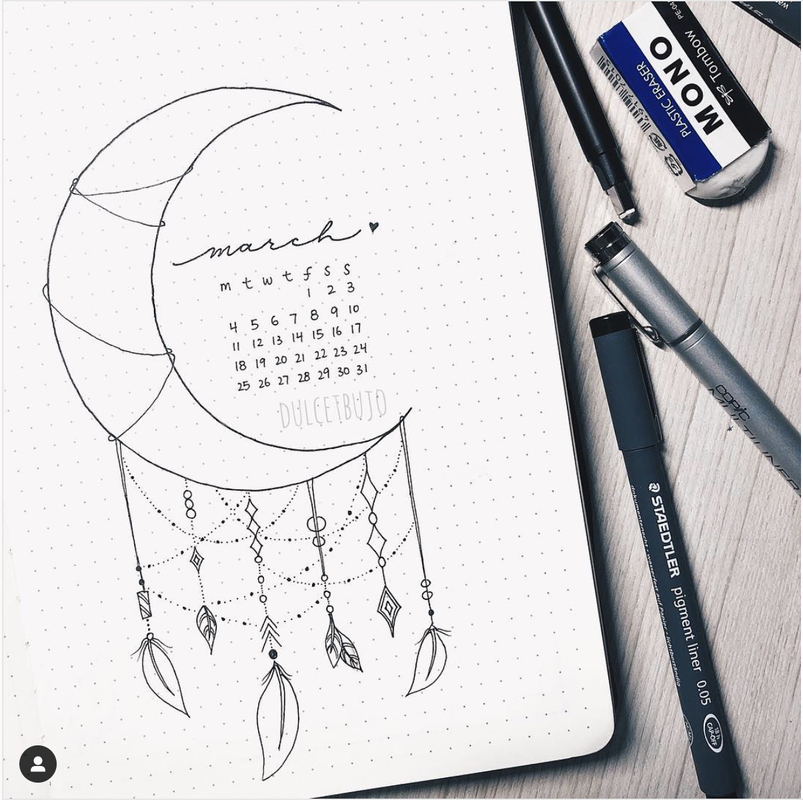
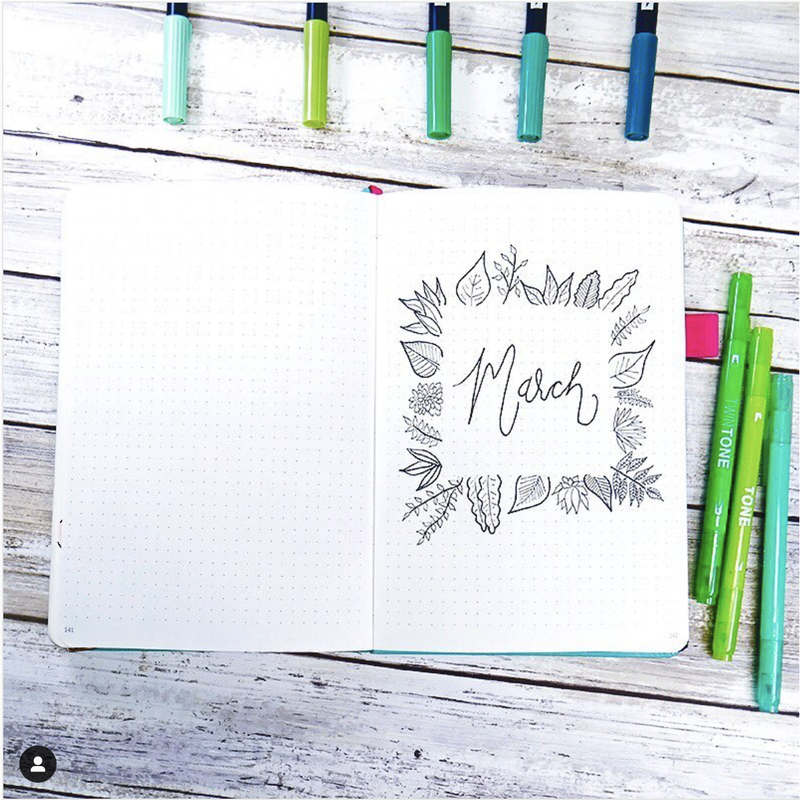
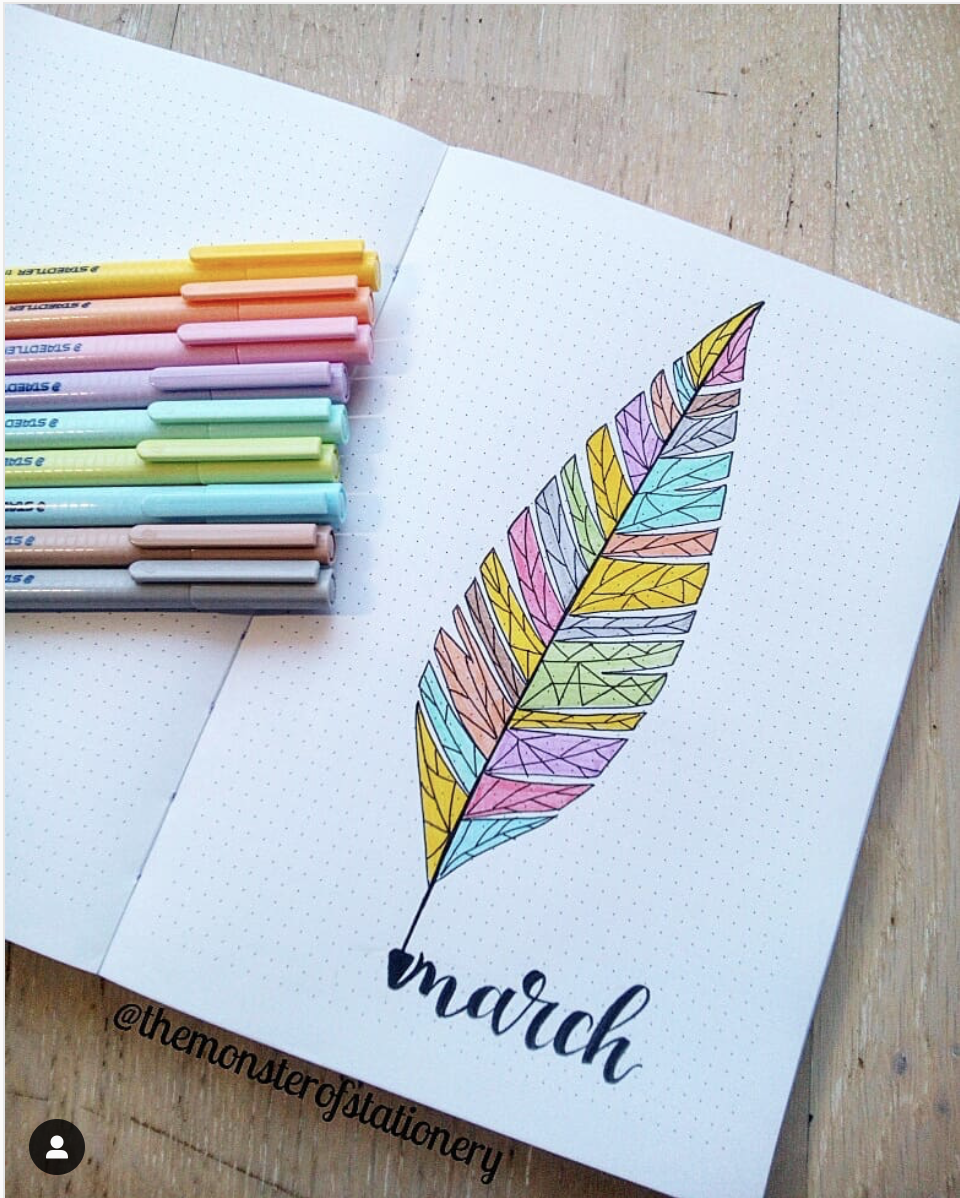
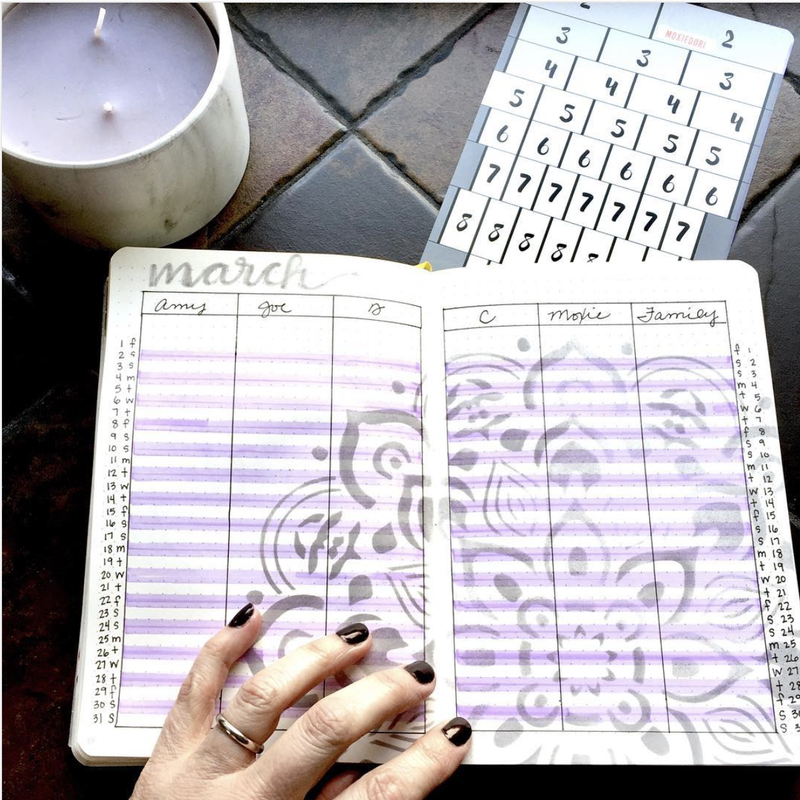
Looking for a fresh theme for your March layout? Here are 10 inspiring layouts with gorgeous elements that can be expanded upon throughout the month of March.
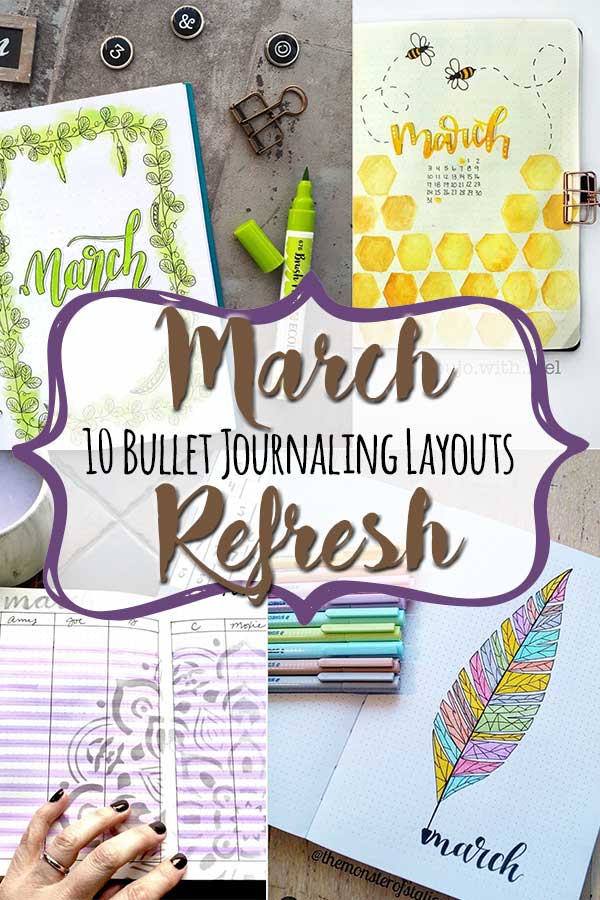
Stars
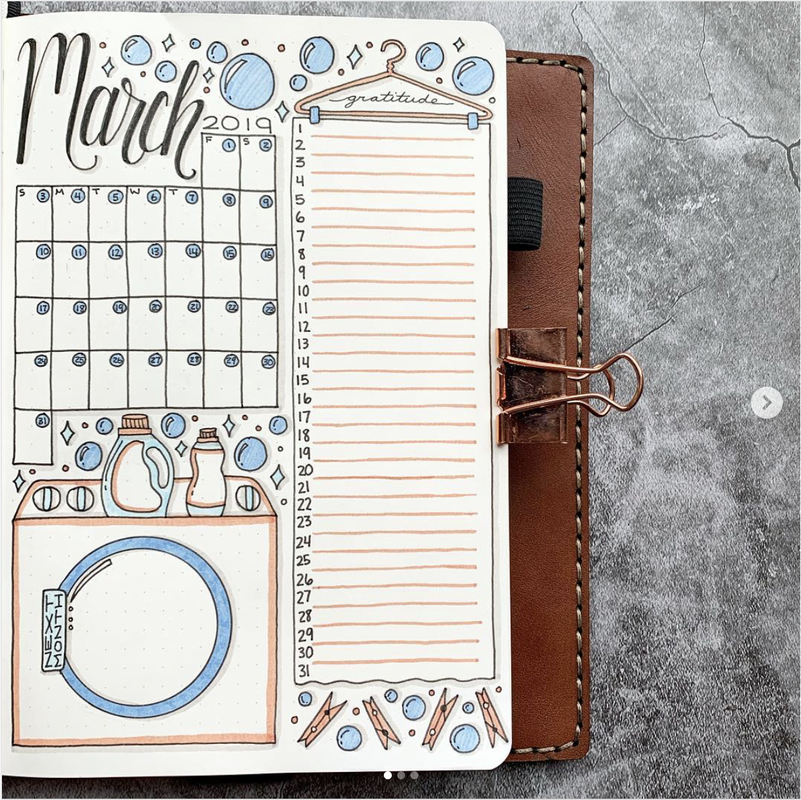
Spring Cleaning
Floral
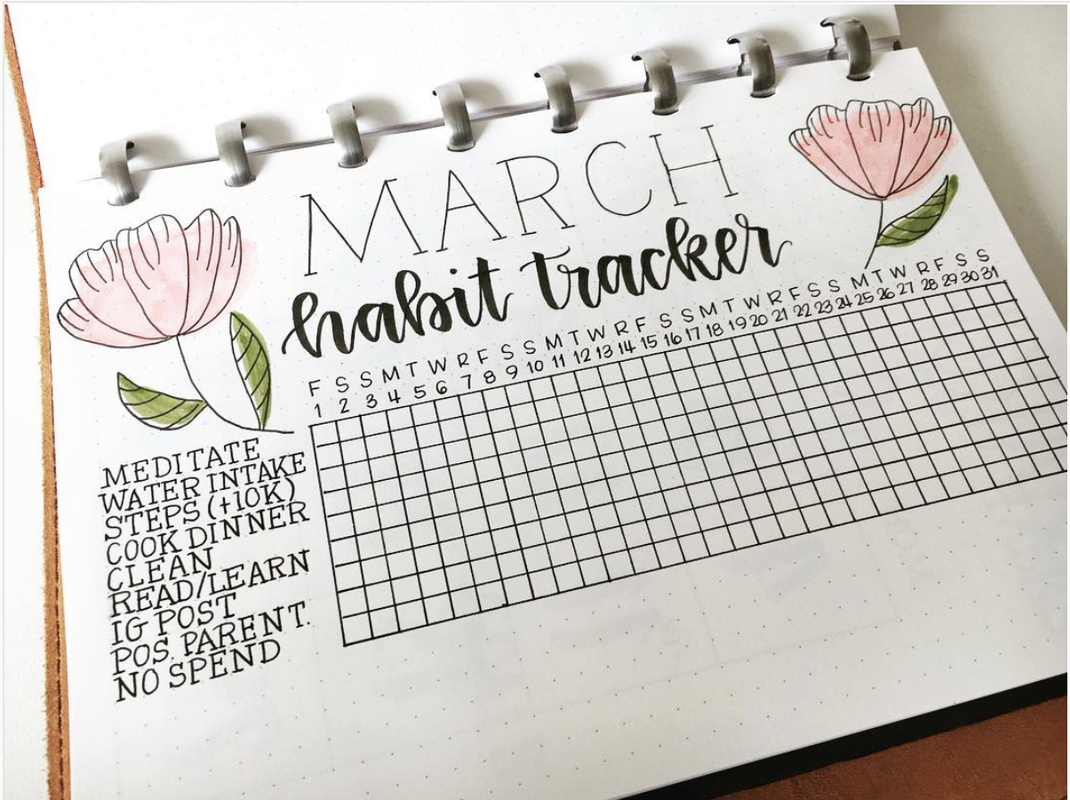
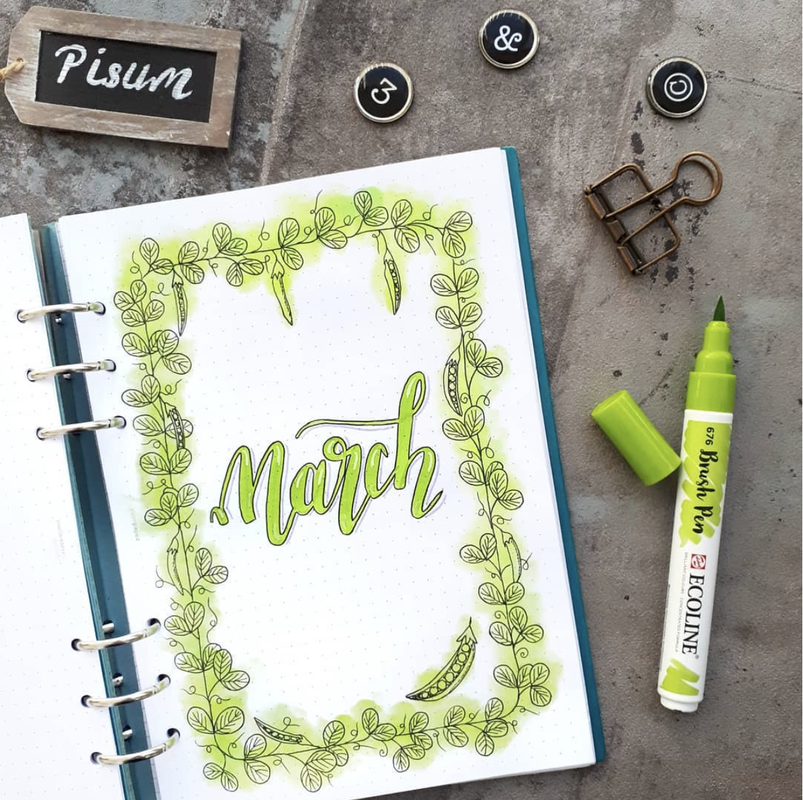
Spring Green
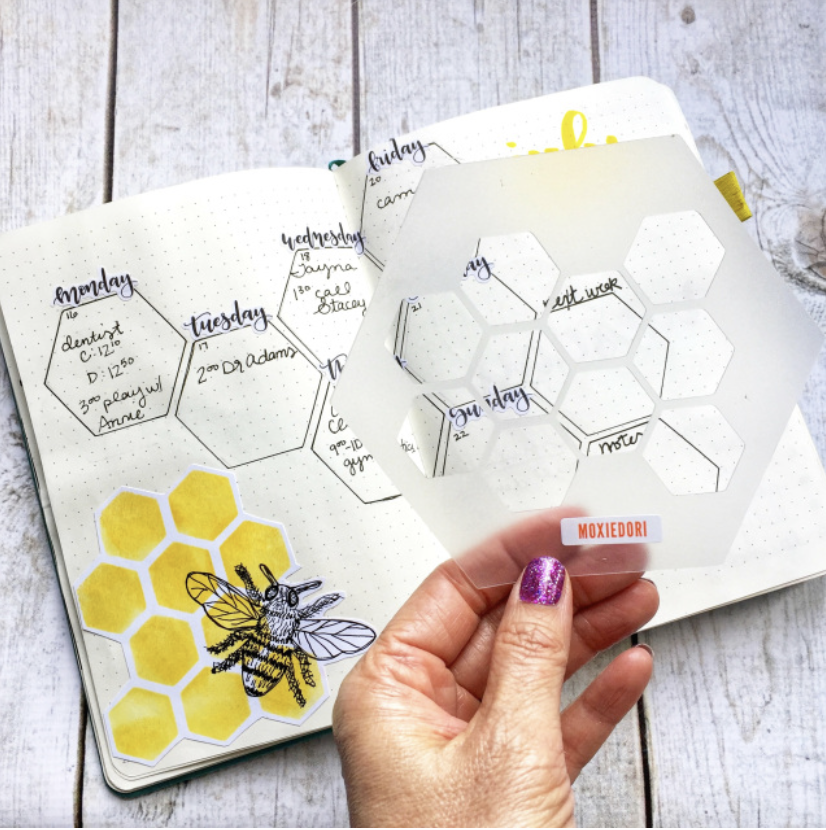
Honey Bees
Dream Catcher
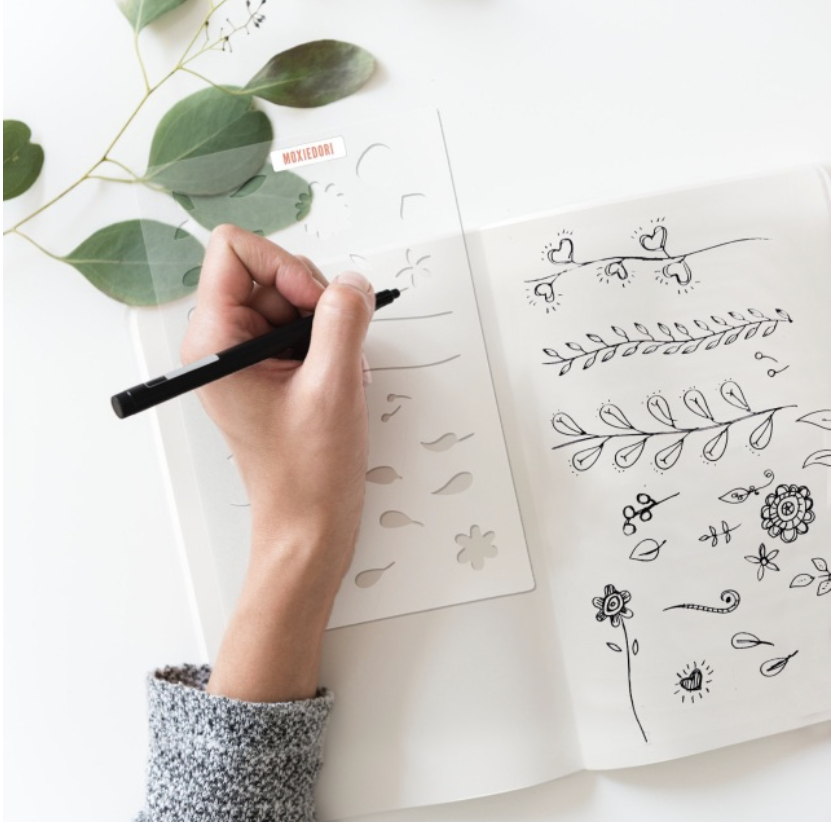
Plant Doodles
Feathers
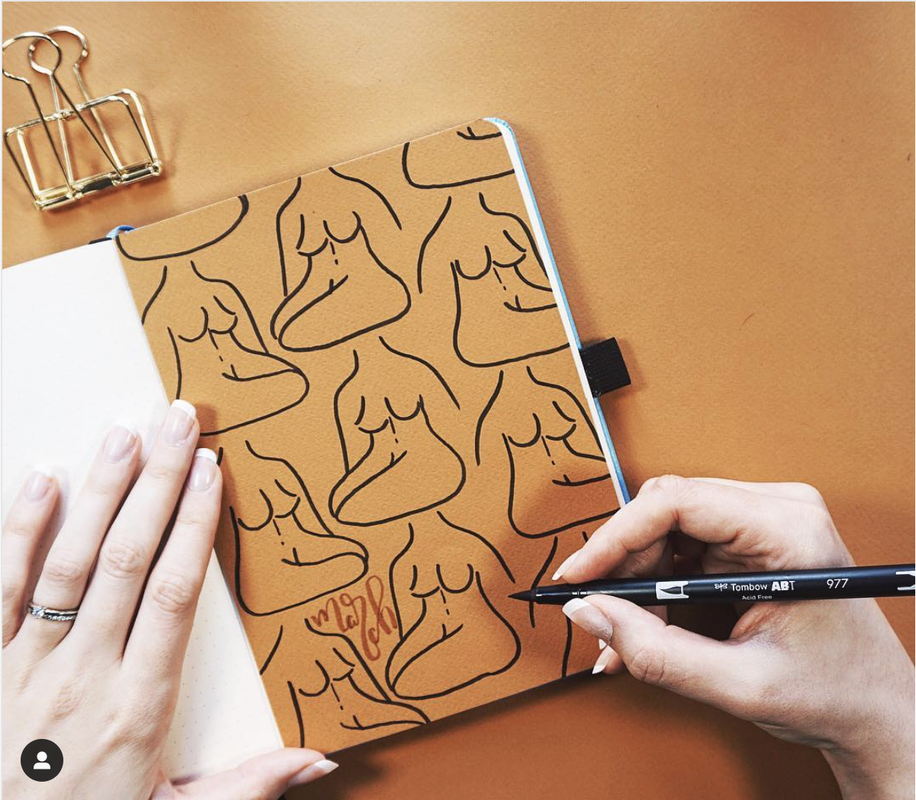
International Women's Day
Mandala

Ready to get going on your 2022 bullet journal set up? Before you start, maybe take a look back. These three simple tips will help you make the best of your 2022 bujo.
1. What worked?
Look back through your 2021 bullet journal and take a look at the layouts that worked for you. Make a note of the layouts with lots of scribbles and check marks. The most used layouts are usually the messiest ones. Did you live in your weeklies? Are those dailies where you nailed your time blocking? Did your tracker keep you honest with yourself? Whatever worked in the past will most likely work in the future, so plan to do that again.
2. What didn't work?
Now flip through those 2021 pages again. Which spreads did you use? Did you set up that "Books to Read" layout and never use it? Did you consistently fill out that tracker or did it stress you out and you left it blank? Nix all of those layouts that you didn't use, the ones that made you feel bad, the ones that felt like a chore with little return and move forward. No guilt.
3. Try something new
If you are Productive Patricia or Artsy Ann or someone in between, attempt something new in your 2022 bujo. Life is ever evolving and sometimes a different layout will work for you when it didn't before. Bullet journaling can be a great productivity tool and a creative outlet. Navigating the continuum is a bit like pushing the gas and then pumping the breaks. You'll never know until you try.
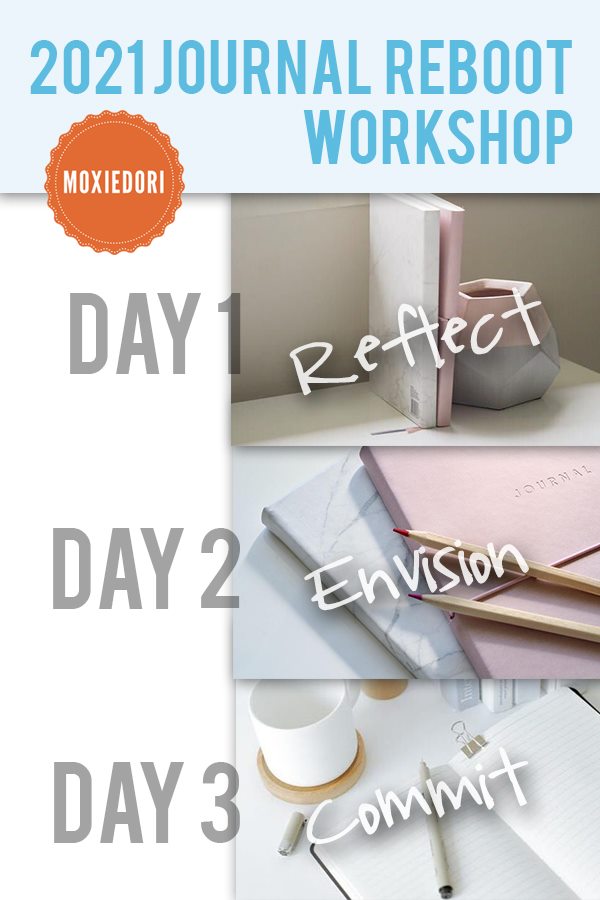
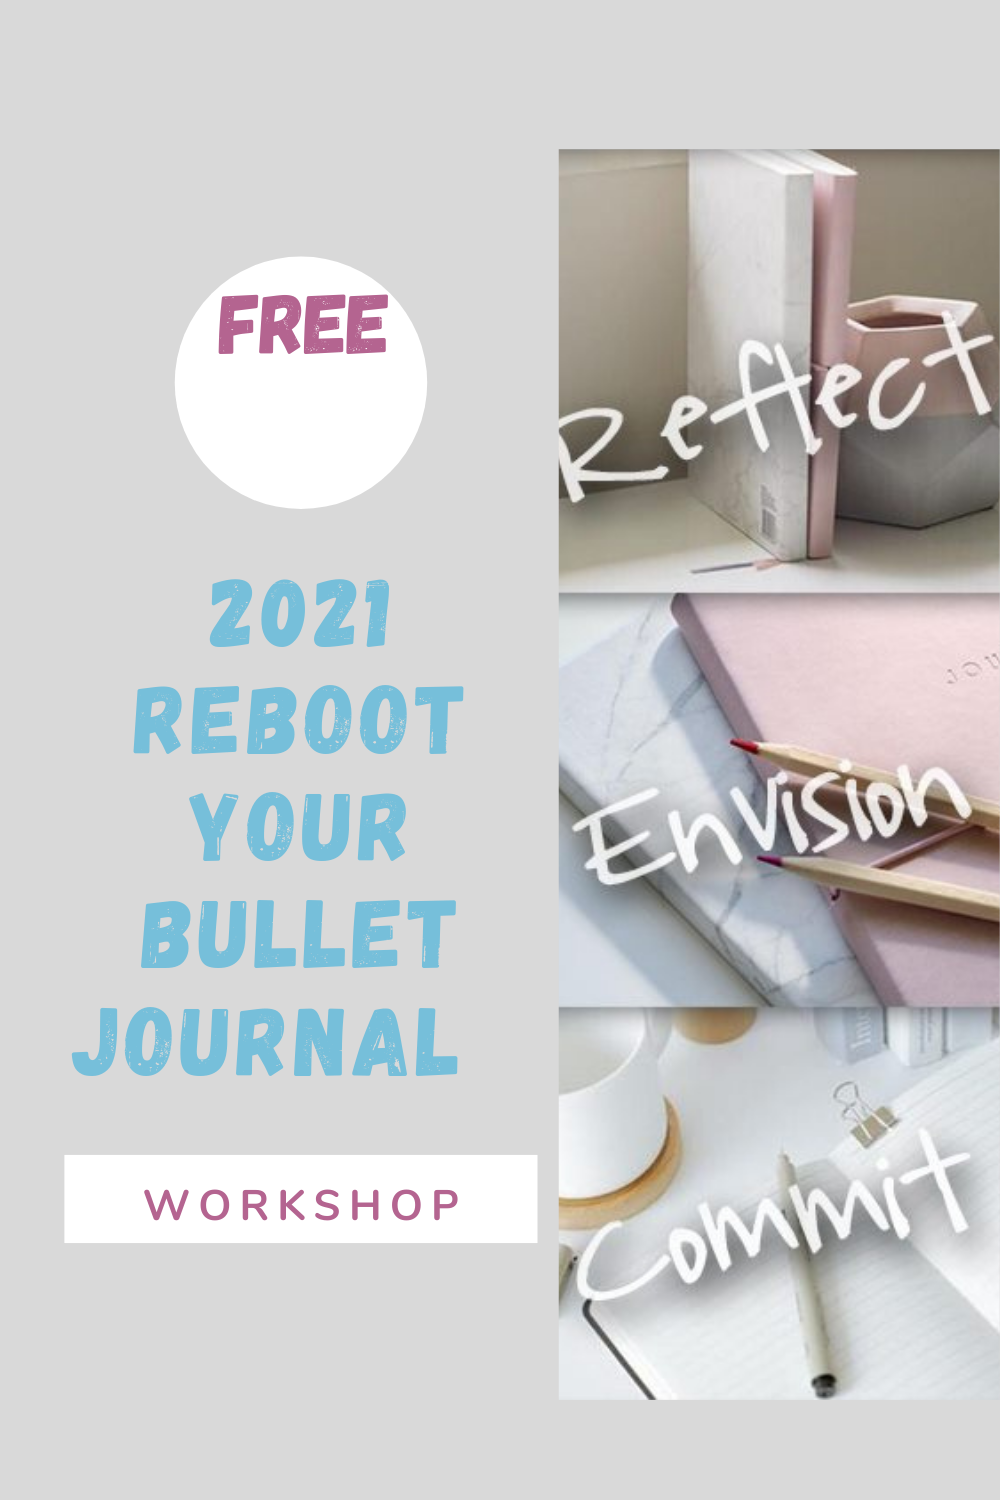
Want to take a deeper dive? Elevate your 2022 journal with the FREE 2022 Bullet Journal Reboot Workshop right here. Join us for a 3 part pre-planning strategy session of video lessons and pdf downloads.
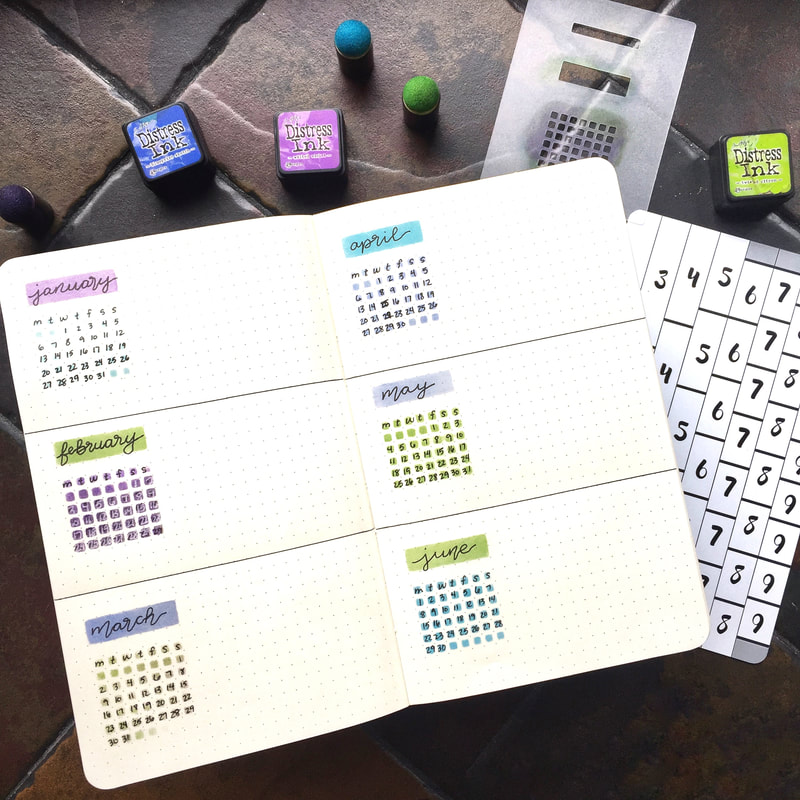
Join us in getting our 2022 bullet journal all set up and ready for success. Let's start off with the Future Log, which is an extended view of the year where you can write down future important events, birthdays, holidays, appointments, deadlines, etc.
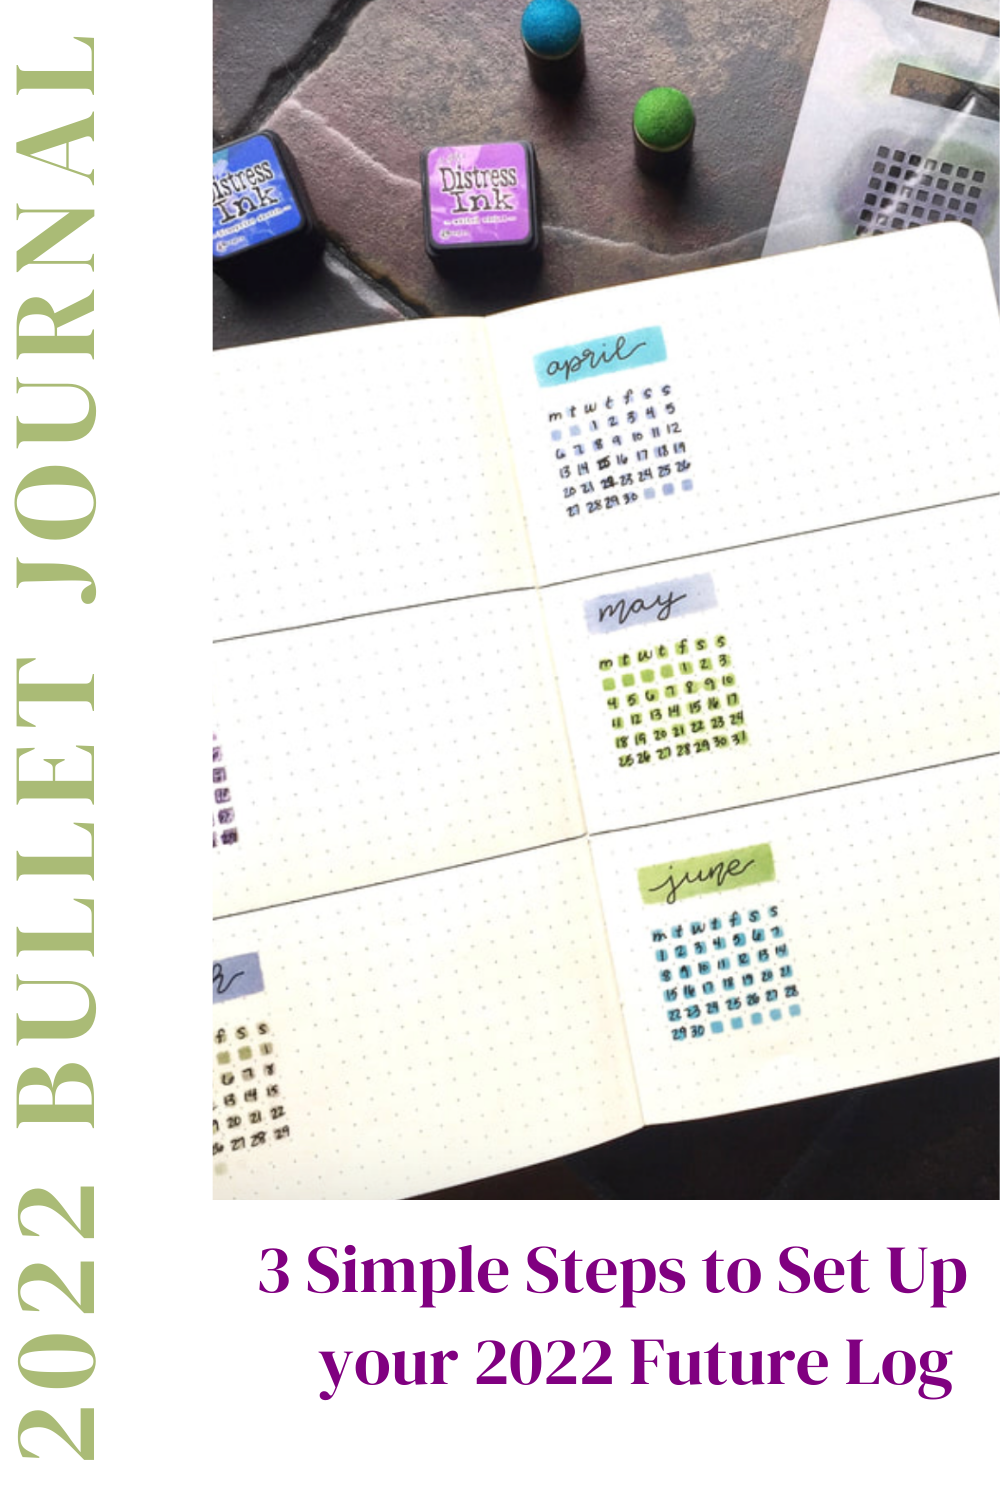
1. Divide Your Page
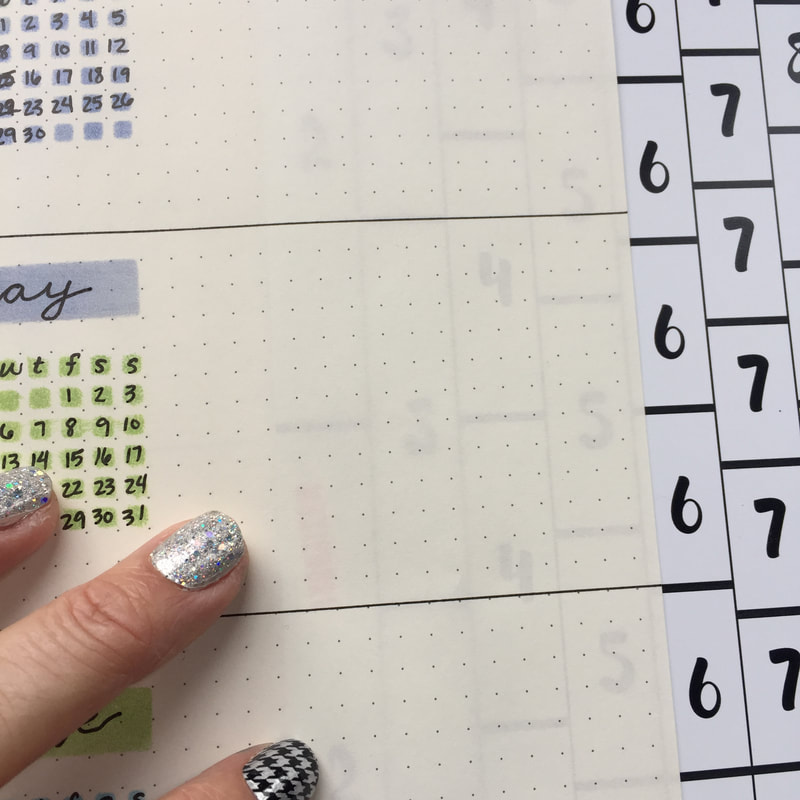
Divide your page horizontally or vertically (your choice)into three equal sections. I prefer a horizontal layout and only make my future logs 6 months in advance. You do you. The Rows and Columns Card makes this super fast and easy.
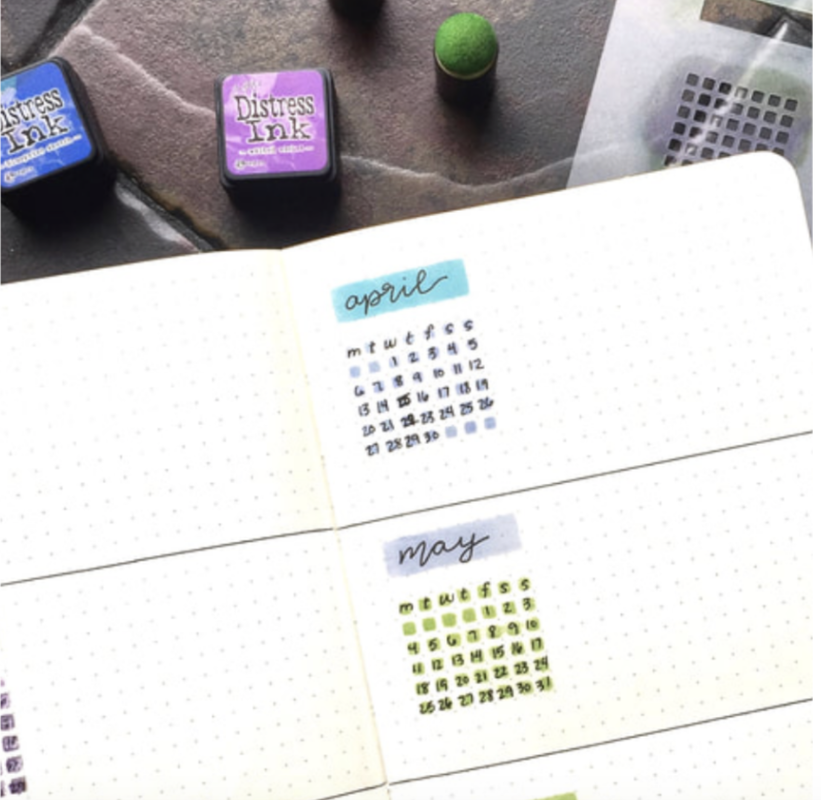
2. Create your Mini Calendars
Decide if you would like to have a Sunday or a Monday start. Label the month and the days of the week. Figure out which day of the week the 1st falls on. Continue down that column with 1, 8, 15, 22, 29 (except February when it is not a leap year.) I used the Mini Calendar Stencil in the 4 Piece Essential Set and Distress Inks to add color under the month name, days and numbers.
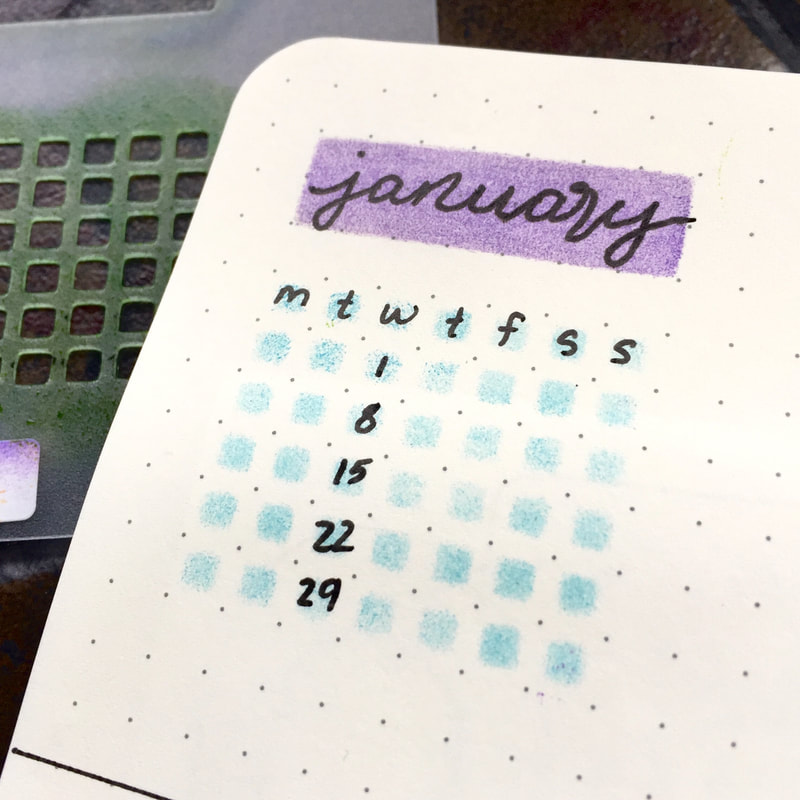
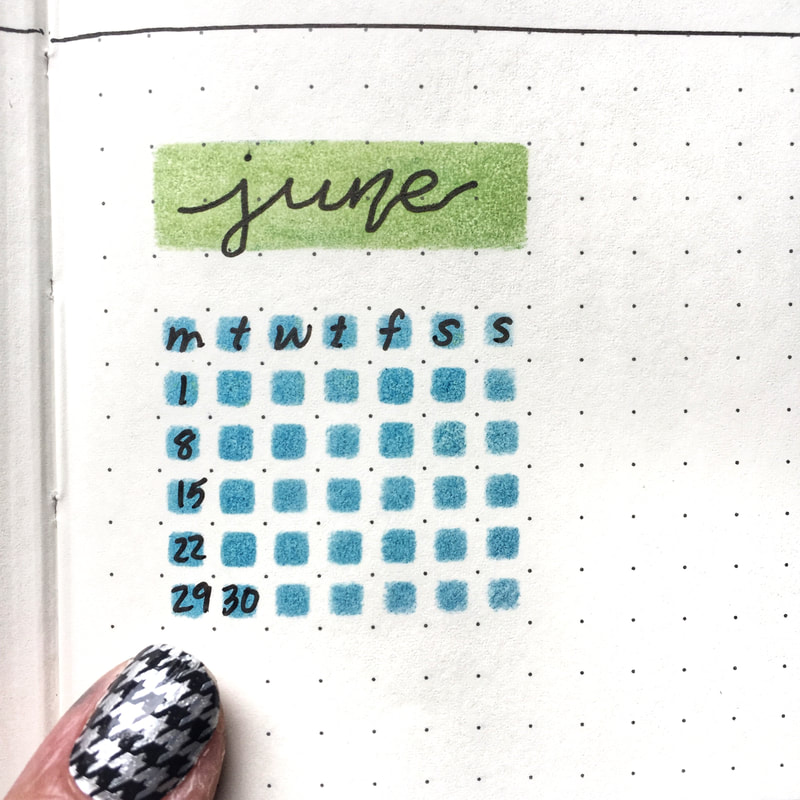
Next write the final numbers for the month - the 30 and 31. I find that writing the dates in this way creates the fewest mistakes. Finally, fill in the remaining dates.
3. Log Important Dates
Log birthdays, deadlines, appointments, holidays, etc to be referenced when you make your monthly layouts. All of your necessary information all in one place. Feels good, doesn't it?
Want more support setting up your bullet journal? Hop over here to Setting Up Your Bujo for 2022 for a step by step set up for next year's bujo.
Starting a bullet journal? Save time and frustration by avoiding these newbie mistakes.
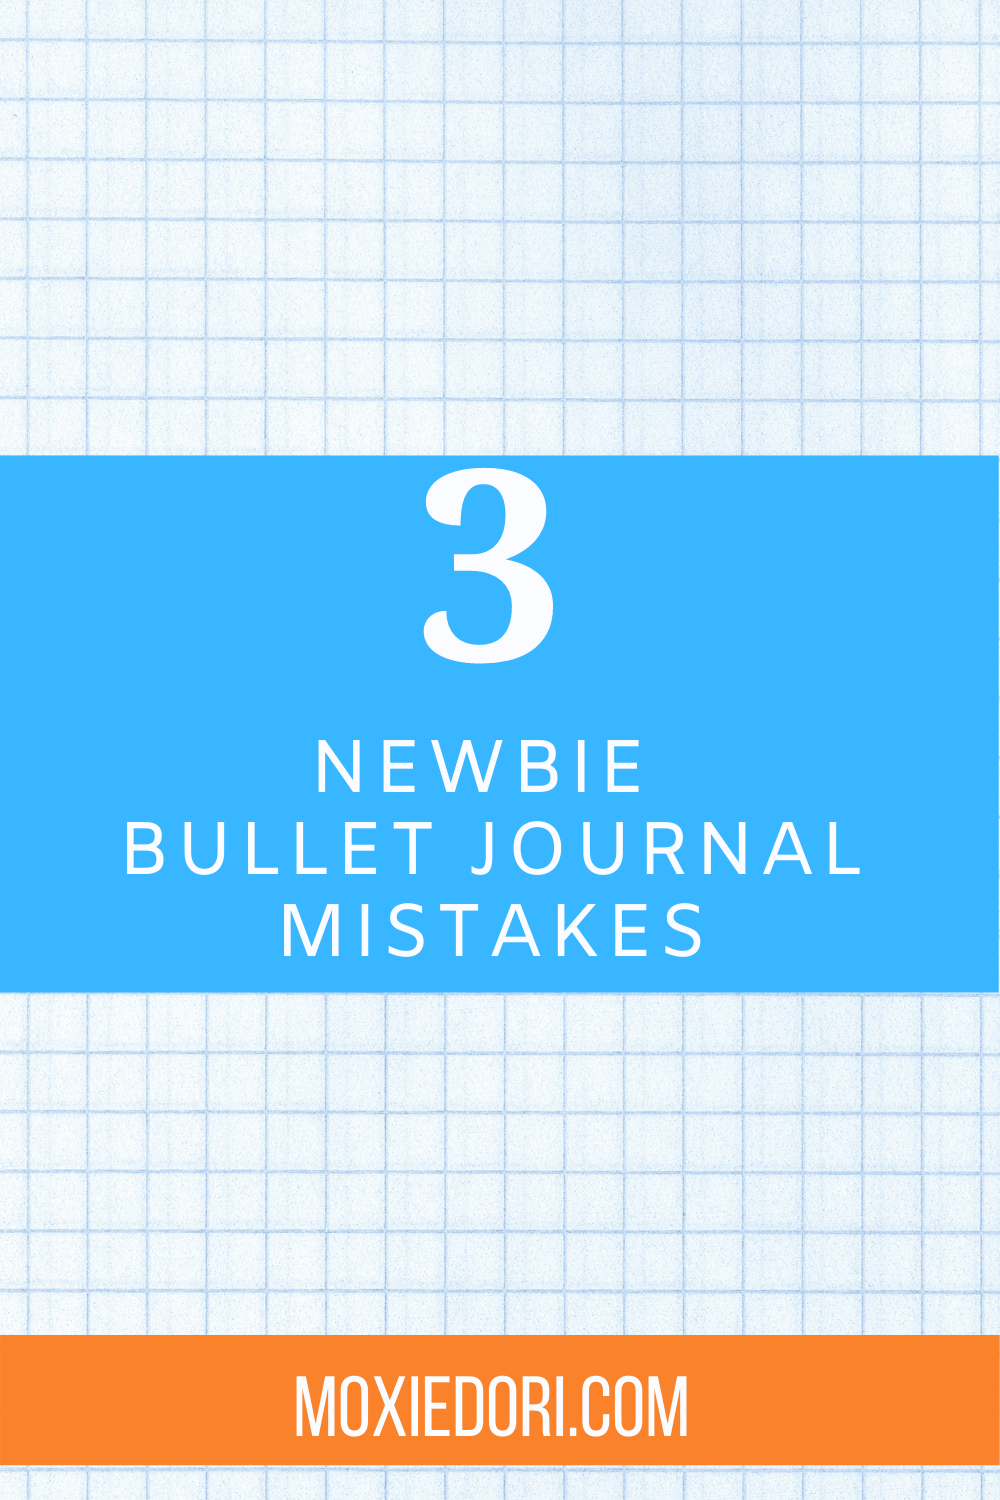
1. Don't fixate on perfect.
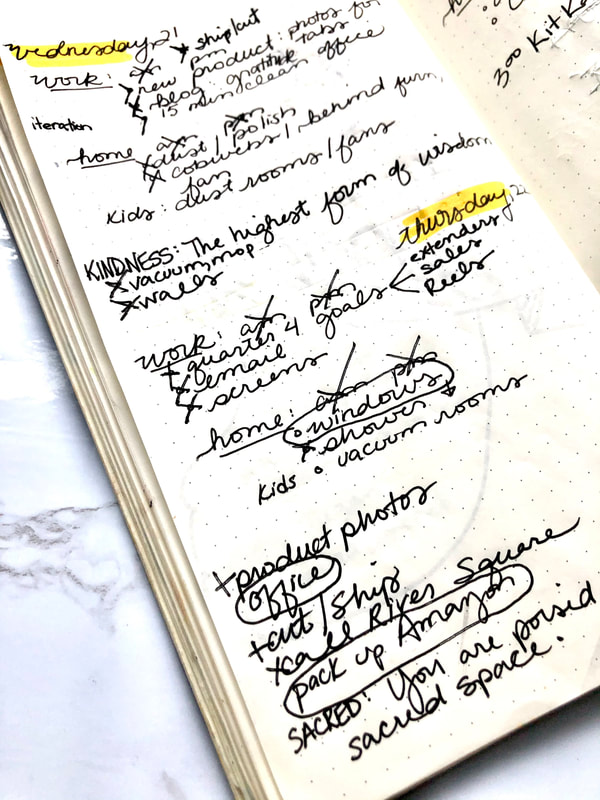
Mistakes will happen, so expect it. A working bullet journal rarely looks like the pristine eye candy you see on social media. A bullet journal works for you, not the other way around. If your bullet journal assists you in why you started in the first place, you're doing it perfectly.
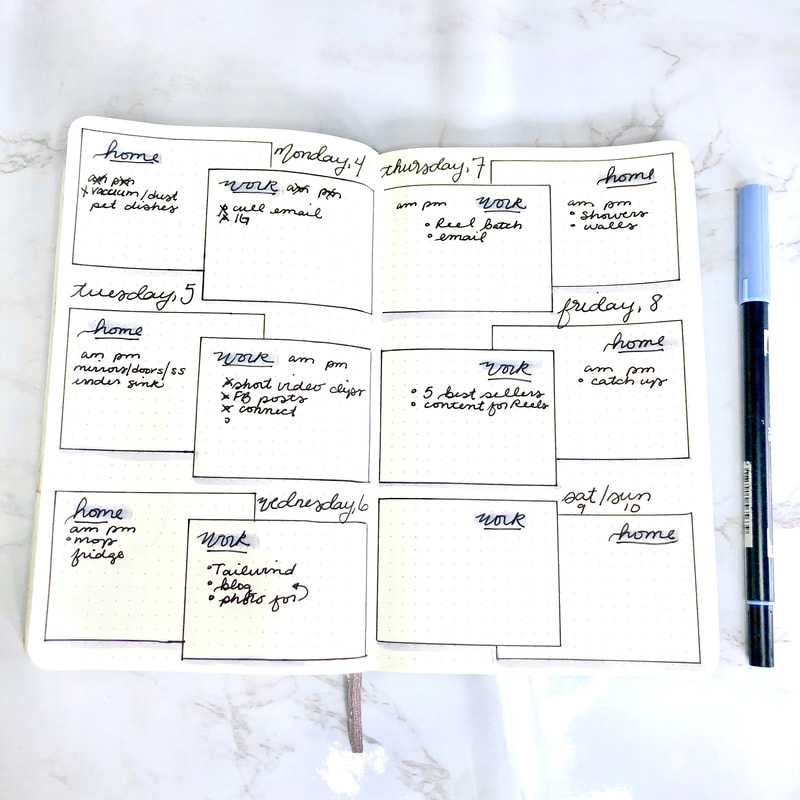
2. Don't make all of the layouts.
Creating layouts can be fun but said layouts can also then become a burden. Create the layout you know you'll use for sure. Once you get used to that practice, add one or two more on. If the new layouts serve you, continue with them. If they don't, drop them. No guilt and no shame about not filling in all of the layouts you make. You are learning what works for you.
3. Study the original system.
Study the basic system and practice until you feel comfortable. Learn how you can use the system to manage your life and well being. You can find an explanation by the original creator, Ryder Carrol over here: bulletjournal.com
Need more support? Join our FB group Bullet Journaling Tips and Tricks.
Do you love creative bullet journal layouts but you feel like you don't have the skills to make them? Have you tried to draw but it's been a disaster? Me too! In fact, this is why we started MoxieDori.
Everyone deserves the bullet journal they desire. If you want adorable woodland animals, graceful fall leaves or cozy cups of coffee on your bujo pages, you should have it.
Keep reading and watching to find out which tools and know-how you need to create gorgeous bullet journal layouts you will be proud of.
1. Woodland Animals
Jumping foxes, adorable hedgehogs and chattering squirrels grace your bujo layouts - even if you can't draw! Create fall wreaths, decorate your monthly calendar or include some fall feels on your weekly layout.
Check out the little how to video below to see exactly how to make a fox wreath.
Check out the little how to video below to see exactly how to make a fox wreath.
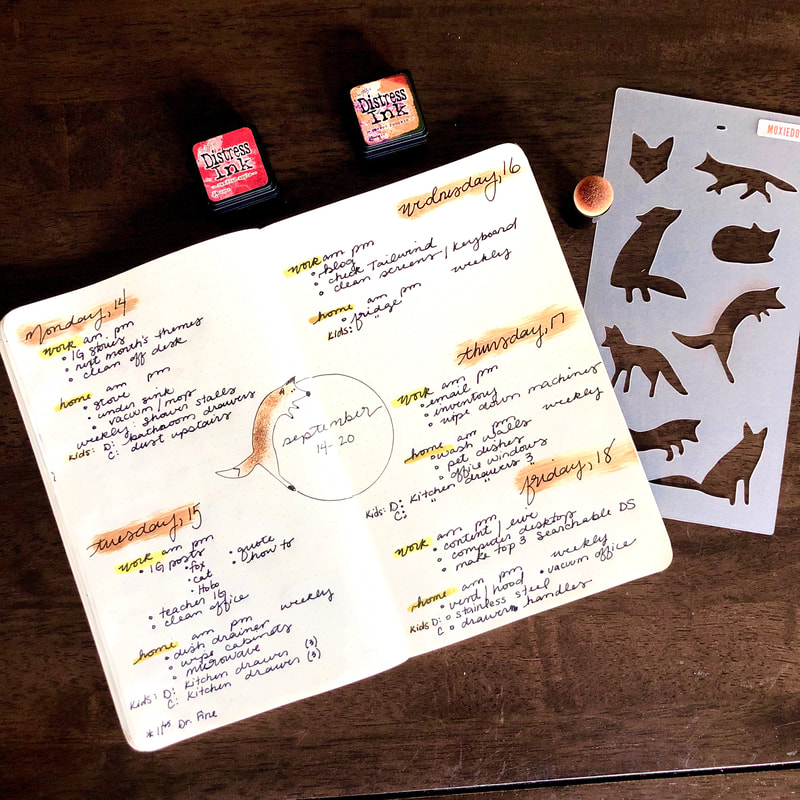
Everyone deserves a gorgeous and creative bujo if they want it. Here is a short video on how to create a foxy wreath using the Fox Stencil.
How about a cute little hedgehog?
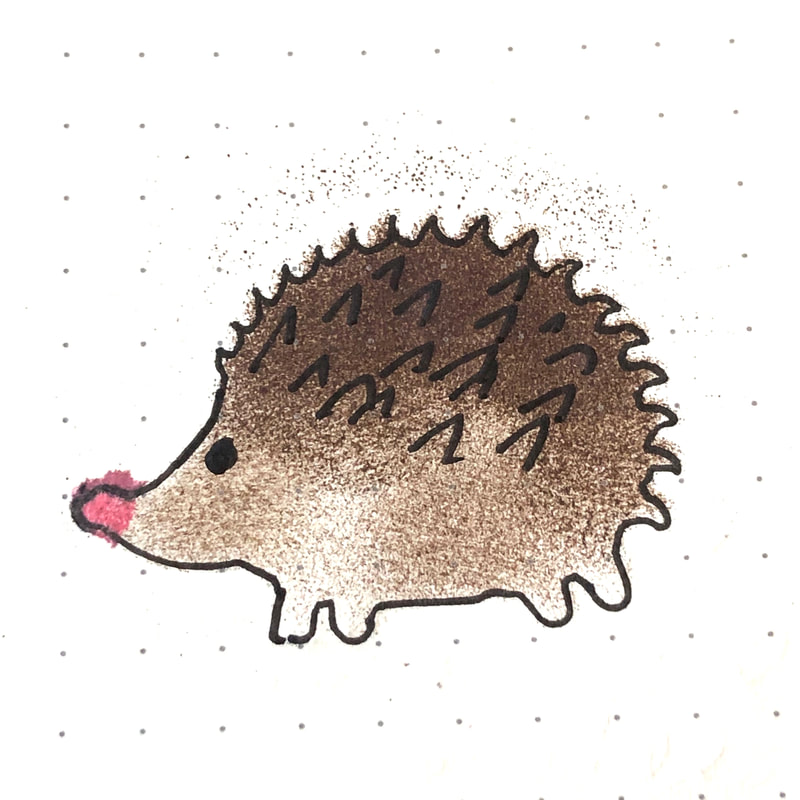
Here is the how to hedgie video.
2. Fall Leaves
Include nature's fall splendor in your bullet journal layouts using Distress Ink and the Fall Leaves Stencils. Grab your yellow, orange and red stamp pad and a dauber. Watch the video below to see how easy stencils make decorating your bullet journal.
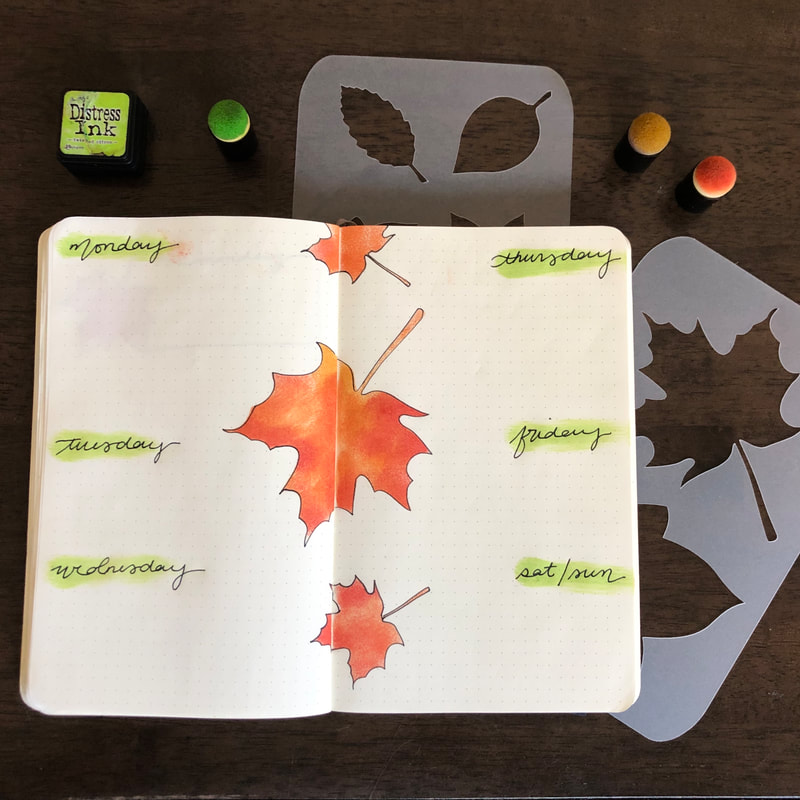
Fall leaves are easy to include in your layouts.
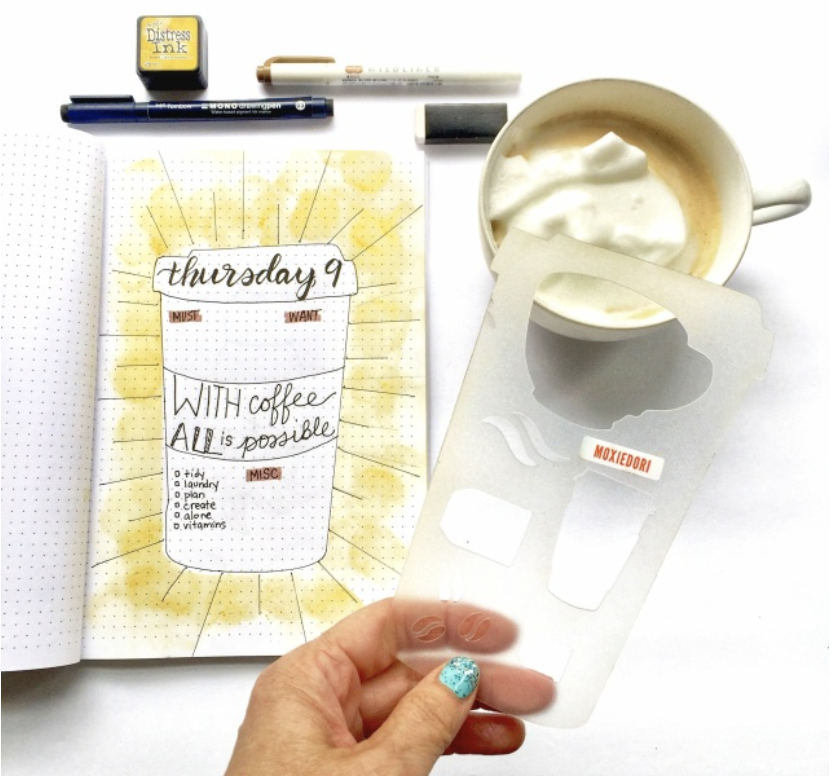
3. Hygge
Tea or coffee? No matter your preference you can include an ode to your favorite hot beverage in your bullet journal. The Coffee Stencil makes cozy bevvie layouts a cinch.
You can create the bullet journal you want. If you want to make creative layouts with flair but can't draw, invest in a few bullet journal tools that will help you achieve the results you want. I can't draw but I made all of the layouts in this post.
You CAN draw and you can create gorgeous bujo layouts!
XOXO,
Amy and Kris
You CAN draw and you can create gorgeous bujo layouts!
XOXO,
Amy and Kris
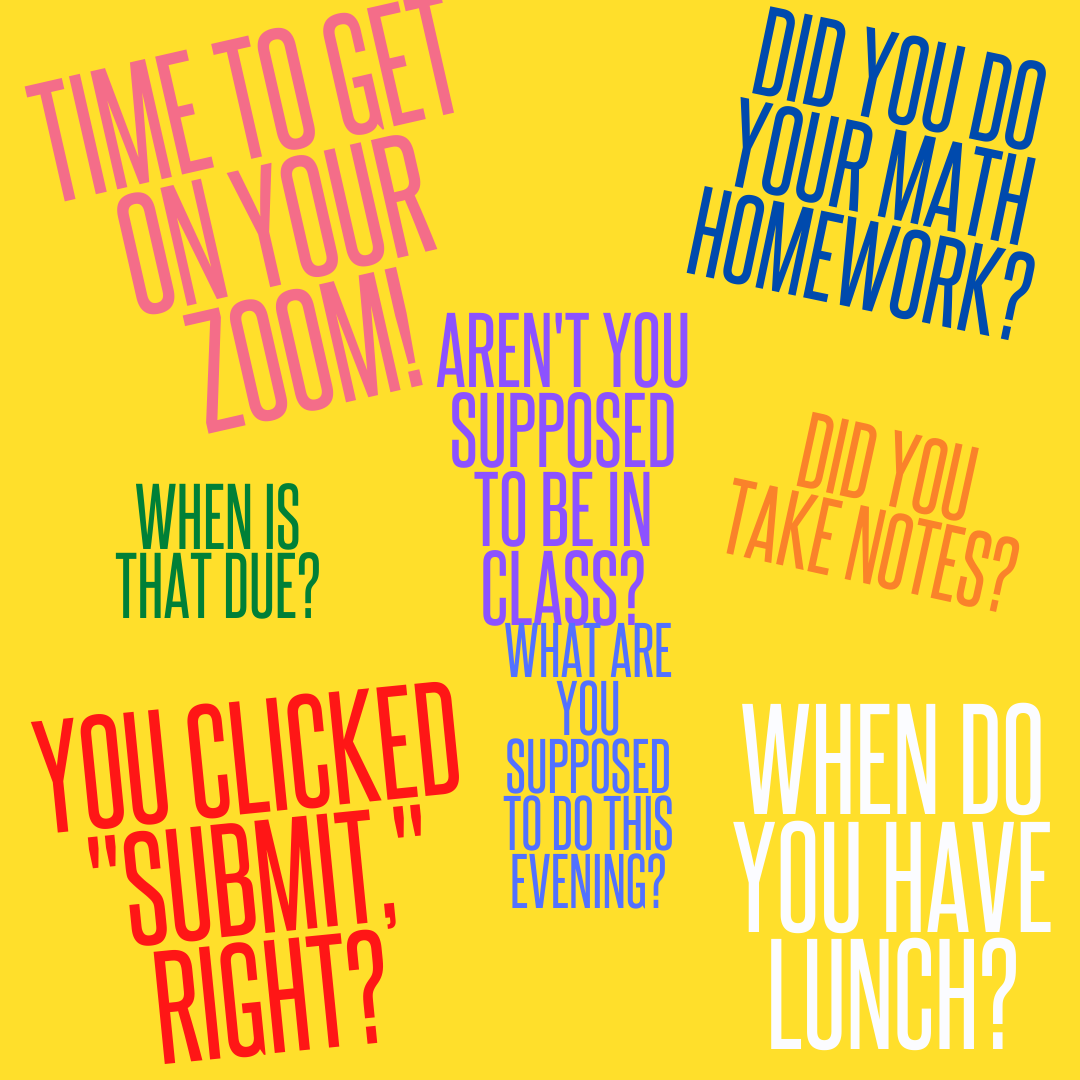
Back to school 2021-2022 is upon us!.
Is your student need support prioritizing and ordering the steps in a project?
Are assignments coming in from multiple platforms?
Does your student need to take class notes but they are not sure what to write down?
Are you exhausted and stressed from keeping all of this straight? Sad from the strain it is putting on the relationship with your child?
Use a Student Planner Notes Guide to create a notebook that organizes:
*schedules
*assignments
*class notes
*project details
* task lists
A student planner:
*teaches kids how to document and keep information straight
* helps them remember their schedules and assignments
* fosters independence
* forces responsibility
Finally, a student planner provides the academic accountability needed so you as the parent can step back from the intense monitoring and prompting.
Sound good? Of course it does. Let's do this.
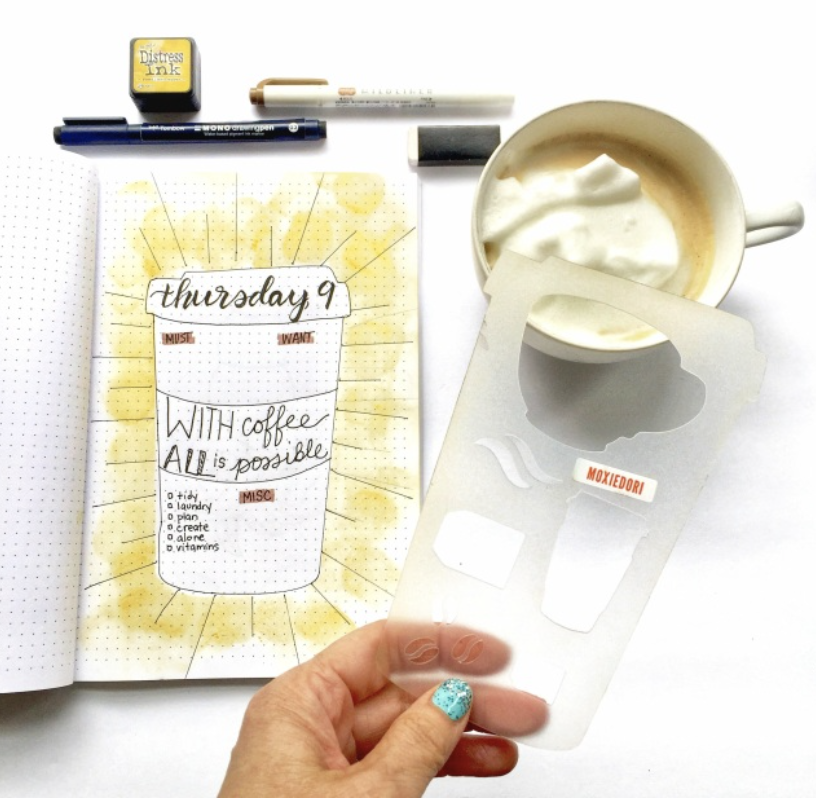
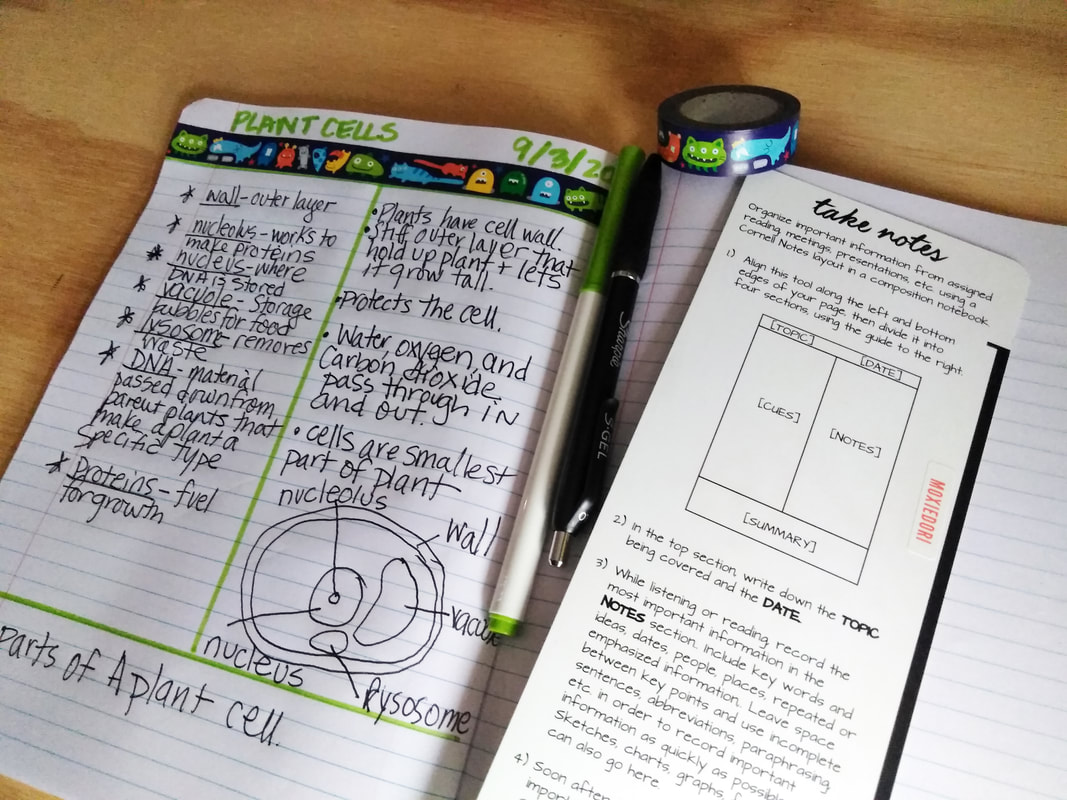
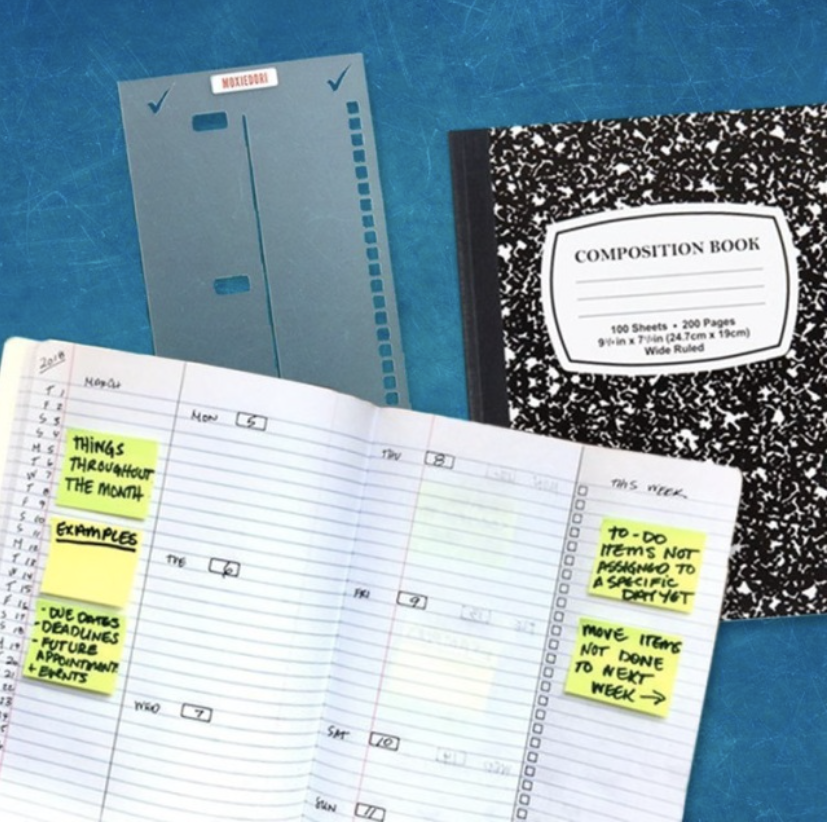
Grab a Composition Notebook
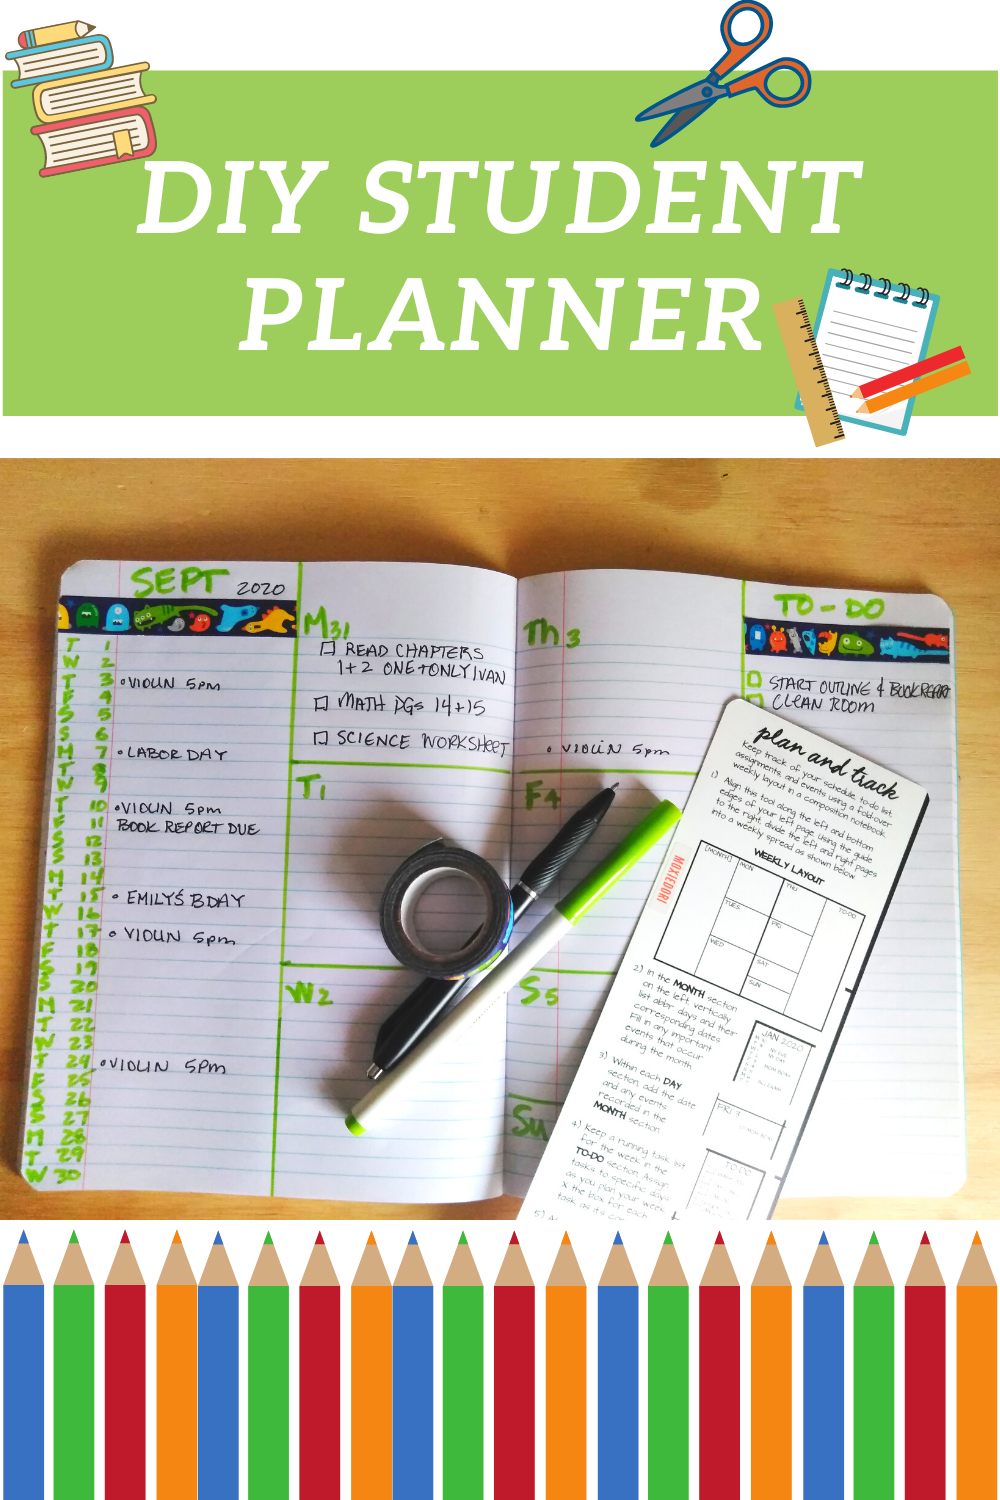
Composition notebooks make great, inexpensive student planners. You can create monthly and weekly layouts to organize schedules, activities, to do lists and assignments.
Composition notebooks make great tools to take class notes as well.
Not sure how to set up or where to start?
No worries - we have created a tool just for you. The Student Planner Notes Guide is a tool that creates layouts AND provides step by step directions for note taking. It was designed by an educator (Kris!) specifically for kids to use.
This student planner tool breaks it down and creates layouts that are proven to work. Finally - a place for everything and everything in one place!!!!
Watch this 2 minute video to see how the Student Planner Notes Guide works. Make student layouts fast and easy. Most importantly - help your child become more independent and responsible for their learning.
Grab Your Student Planner Notes Guide Now!
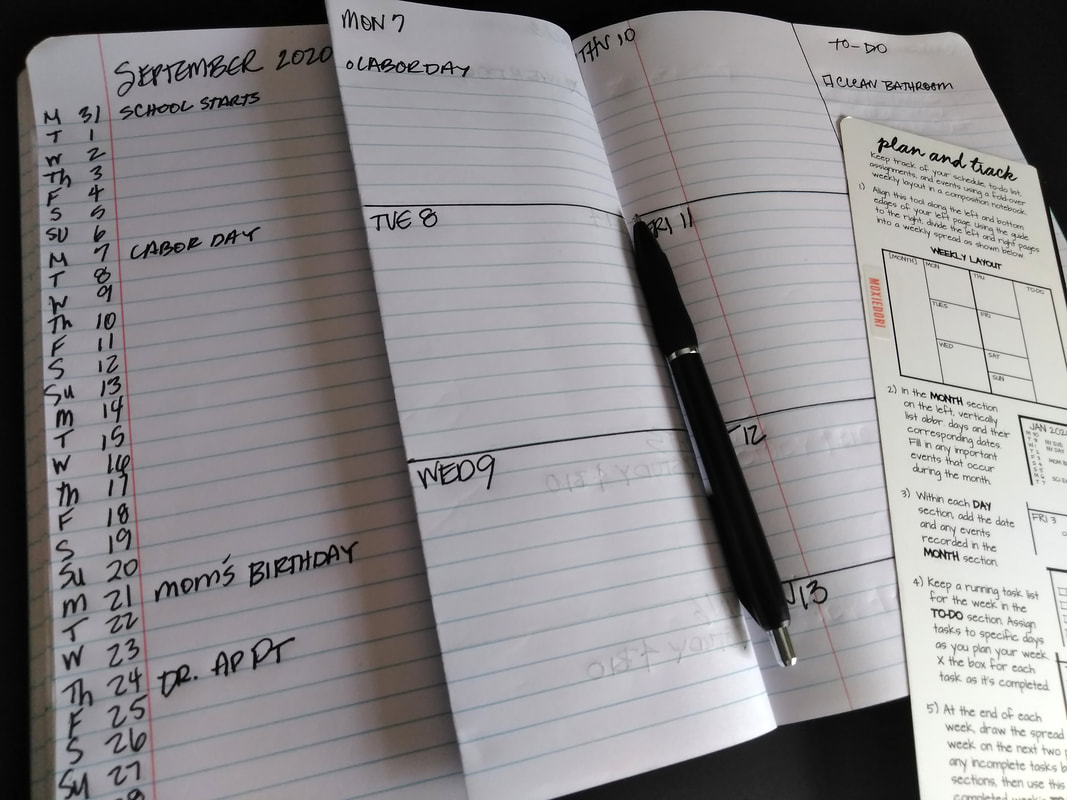
This durable, waterproof, flexible tool doubles as a straightedge and a two-sided guide for creating your own weekly planner and how to take Cornell Notes, all in an affordable College Ruled Composition Notebook.
Use the Student Planner Notes Guide to create the academic independence and responsibility that your entire family needs.
Happy 2021-2022 School Year!!!
Best,
Kris & Amy
Use the Student Planner Notes Guide to create the academic independence and responsibility that your entire family needs.
Happy 2021-2022 School Year!!!
Best,
Kris & Amy
2020 has many people feeling a lack of control over their lives. Overwhelm and adjusting to a "new normal" has many of us struggling in the executive functioning department. While we might not have a lot of events and appointments to document in our bullet journals, we can use our notebooks to guide us through these confusing times.
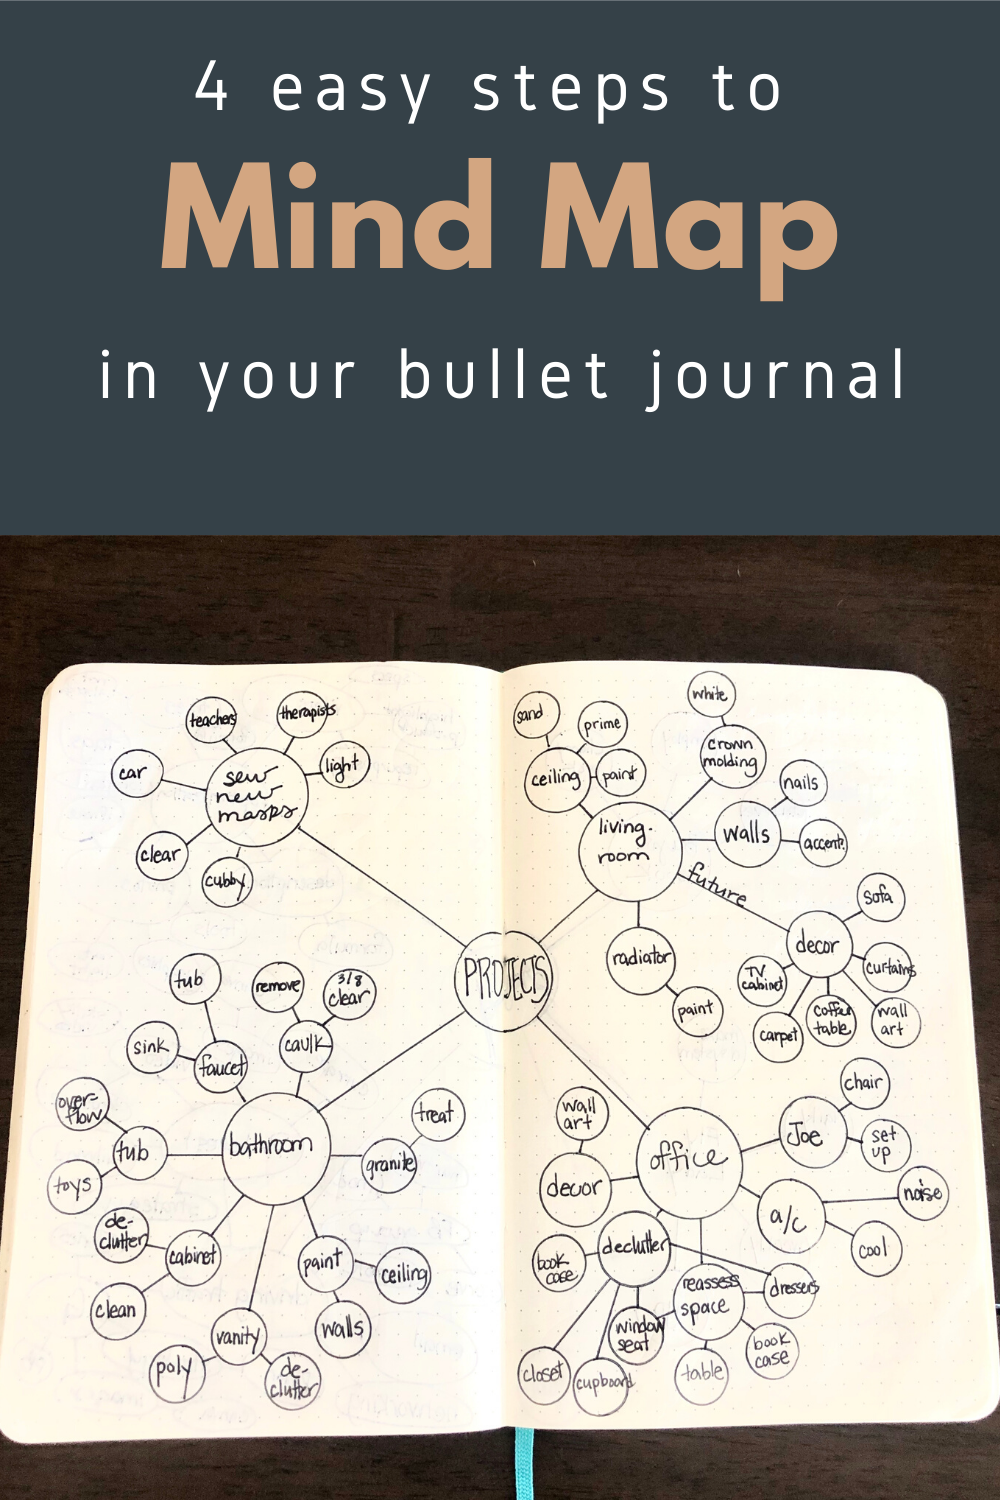
Mind maps are a great way to get cognitive clarity. They are used to visually organize information and the relationships between concepts. They serve as a mind sweep and a path of action.
So grab your bujo and a pen and let's create some clarity out of chaos.
Mind maps are a great way to get cognitive clarity. They are used to visually organize information and the relationships between concepts. They serve as a mind sweep and a path of action.
So grab your bujo and a pen and let's create some clarity out of chaos.
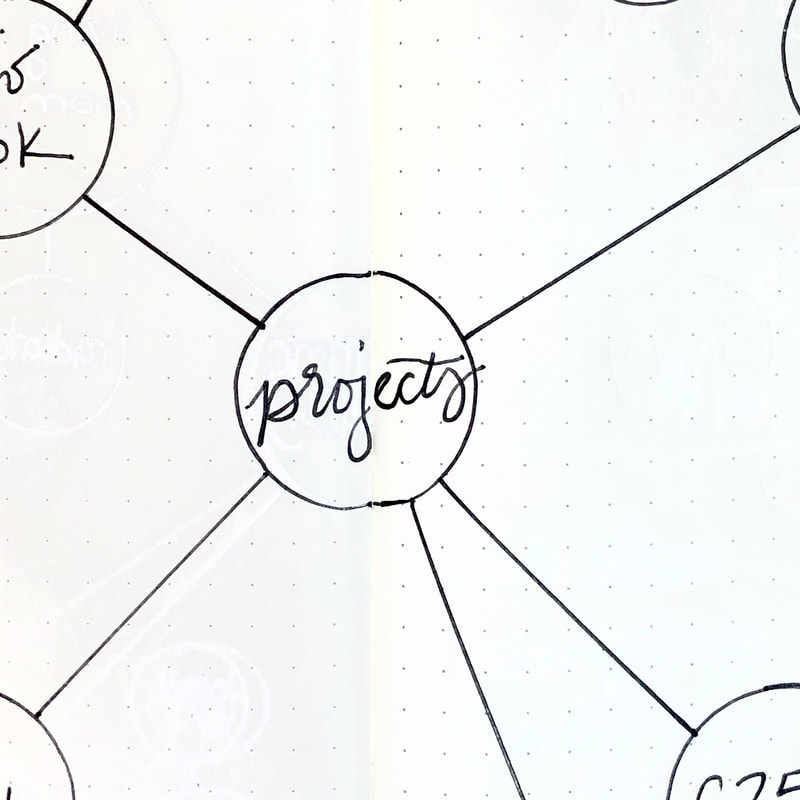
Step 1: Choose a Focus
Your mind map will be about one large concept. Think about the thing that will give you the most mental relief or the thing that is bothering you the most. Draw a circle in the middle of your page and write that concept in the circle.
Usually if you create a plan of action about that thing, your path to peace of mind becomes more clear. I needed to make headway on a few household projects that were feeling like a whack a mole game, so that's what I chose.
Usually if you create a plan of action about that thing, your path to peace of mind becomes more clear. I needed to make headway on a few household projects that were feeling like a whack a mole game, so that's what I chose.
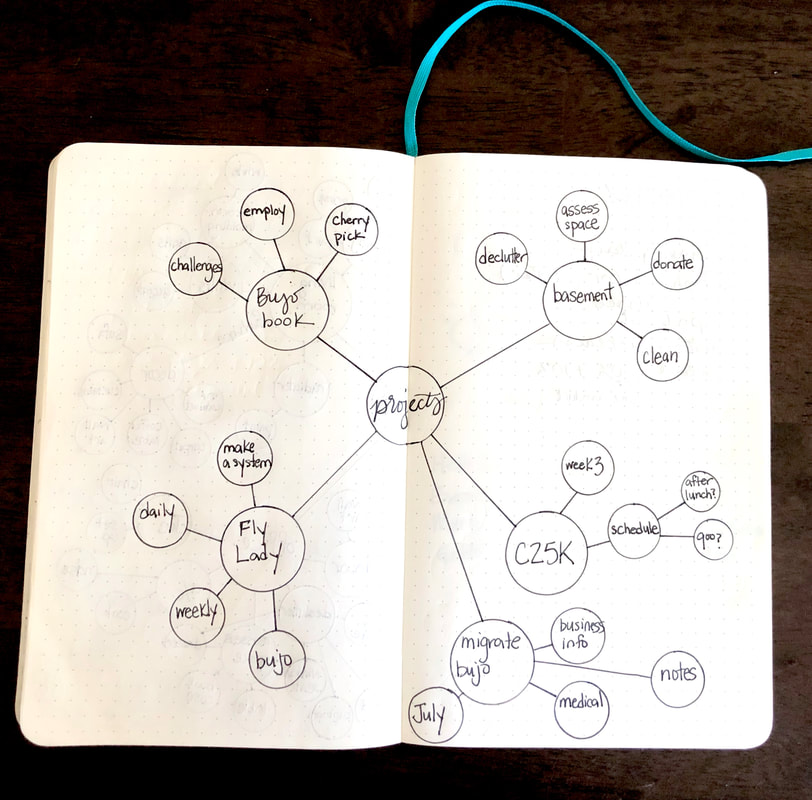
Step 2: Pick 3 or 4 Key Areas of Action
Next, break down your primary concept into three or four key areas of action. In my case, I choose to focus on four projects that are hanging over my head: creating a better office space for me and my husband, completing a few bathroom repairs, sewing new masks for my family and making our living room more of a sanctuary.
Draw lines from your center main focus to your four key concepts to document these areas of action.
Draw lines from your center main focus to your four key concepts to document these areas of action.
Step 3: Action Steps
Finally, take some time to brain dump all of the steps that each area of action requires. Again - draw radiating lines and bubbles from the area of action to each separate step that will add up to completion.
Step 4: Work the Plan
There's nothing to it but to do it. Work one key area at a time to completion. Resist the urge to pop all over and complete things here and there. (I speak from much experience here.) You will feel so much better once you start working and completing tasks that add up to a bigger goal. If you feel good about something, you are much more apt to continue working it.
Now go get it!!
We would love for you to share your mind maps with us in our bullet journaling FB group called Bullet Journaling Tips and Tricks. We host a group of 26,000 kind, supportive and inspiring bullet journalists over there.
Now go get it!!
We would love for you to share your mind maps with us in our bullet journaling FB group called Bullet Journaling Tips and Tricks. We host a group of 26,000 kind, supportive and inspiring bullet journalists over there.
 | Over the last seven weeks, we've donated mask extenders to quite a few Cleveland nonprofits and healthcare institutions. Yesterday we paired 25 of our mask extenders with 25 white cotton masks that we received from the state of Ohio that aren't needed by our own employees. I had the privilege of dropping this donation off in person at Edna House, an organization in Cleveland that gives women an opportunity to recover from alcohol and drug addiction by providing a safe, sober place to live. |
| Jenn Lasky, Edna House’s Executive Director, was recognized in 2019 as one of Cleveland Crain’s Business Magazine’s “Notable Women in Nonprofit”. Providing these services, especially during these exceptionally challenging times, is so incredibly important. Thank you to Jenn and all her staff, for what they do, each and every day. To learn more about Edna House visit https://ednahouse.org/ |  |
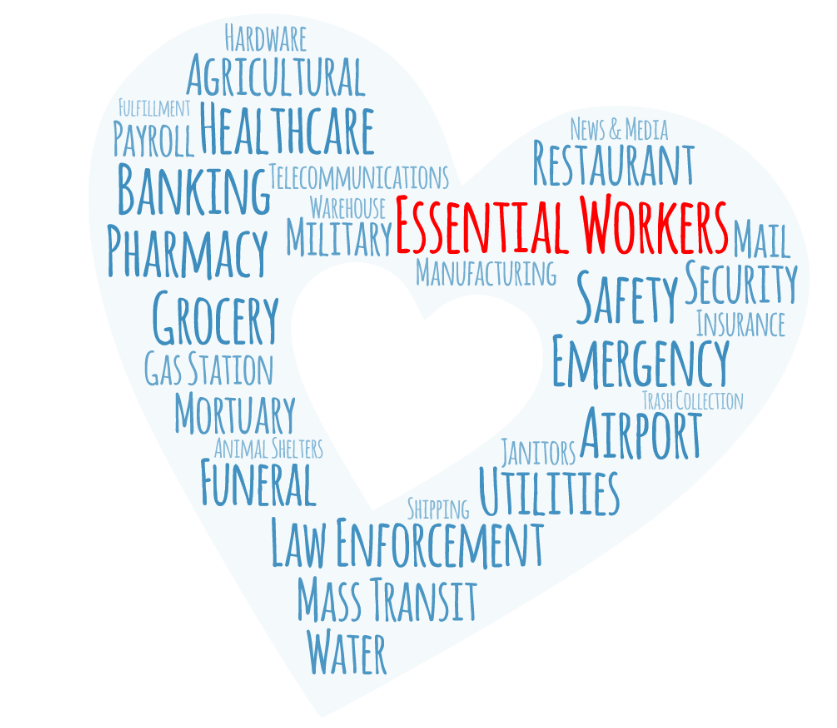
We are all grateful for the essential workers - the nurses, grocery store workers, bank tellers, restaurant workers, gas station attendants, doctors, Instacart shoppers, custodians, respiratory therapists, truck drivers, baristas, store personnel, vet techs, health office managers - ALL of them.
They keep us nourished, healthy, safe and alive. They sacrifice their safety and their family's safety and comfort for us. We see you and we are grateful.
They keep us nourished, healthy, safe and alive. They sacrifice their safety and their family's safety and comfort for us. We see you and we are grateful.
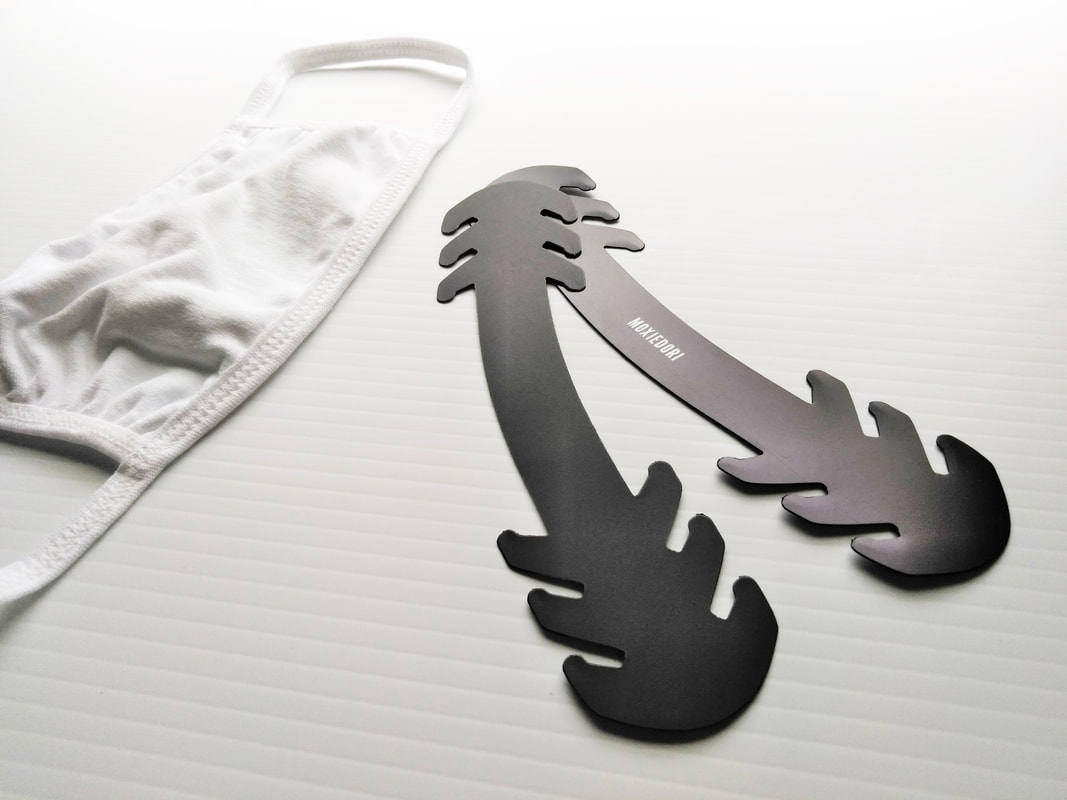
Many essential workers are experiencing ear pain from extended face mask wear and there is now a solution. For $7.50 you can gift 5 essential workers a Face Mask Ear Guard. It takes the pressure of the straps off of the ears and also ensures the proper mask fit.
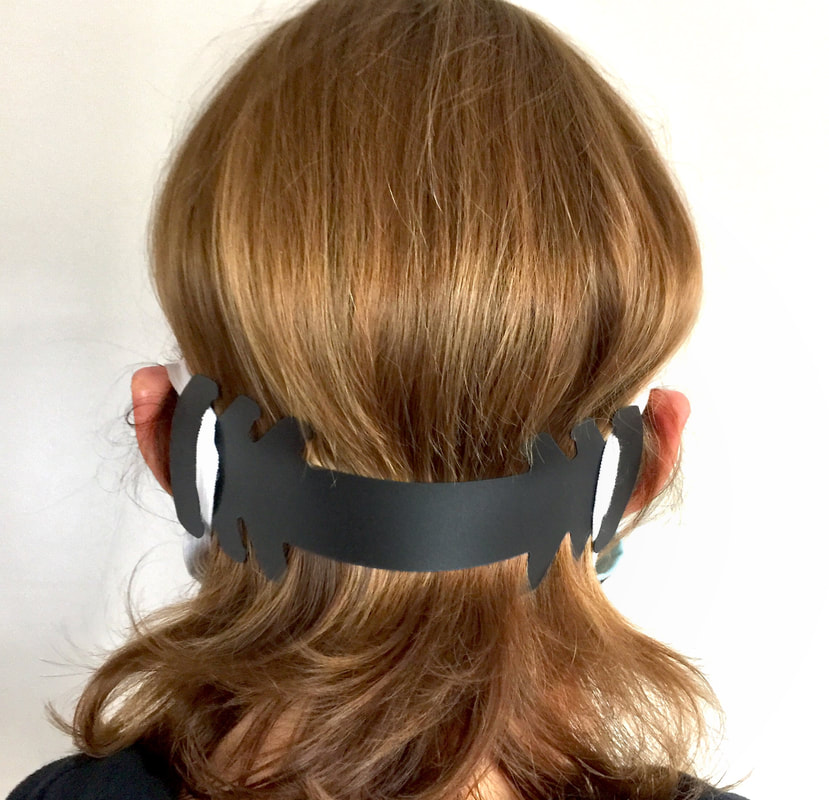
We are very happy to offer the Face Mask Ear Guard at a very affordable price. We use pliant yet sturdy material that will not put pressure on the head.
If you would like to place a bulk order for a hospital, restaurant, grocery store or other workplace, please contact us for a special rate. Our hope is to get these in the hands of the people who provide our food, keep us safe and nurture our health.
Who is your favorite essential business worker? Give them a shout out on the MoxieDori FB page. We would love to fill our page with stories of gratitude and hope.

Ahh, February - a month that can be depressing for many reasons; one being that all our January goals are in the crapper. Snacking less, spending less, saving more, toning up, cutting back, trimming down - all slacking by now, despite our best habit tracking efforts.
I'm with you. Or at least I was before I was recently introduced to the brain science behind habits and routines through the work of Charles Duhigg, author of The Power of Habit: Why We Do What We Do in Life and Business. Multiple whitepapers, TED, and TEDx Talks later, I started thinking about how to bring Duhigg's Habit Loop to my journal as a way of stopping or forming those habits I'd been so optimistic about in January.
I'm with you. Or at least I was before I was recently introduced to the brain science behind habits and routines through the work of Charles Duhigg, author of The Power of Habit: Why We Do What We Do in Life and Business. Multiple whitepapers, TED, and TEDx Talks later, I started thinking about how to bring Duhigg's Habit Loop to my journal as a way of stopping or forming those habits I'd been so optimistic about in January.
Here's how I changed my habits (and you can too)
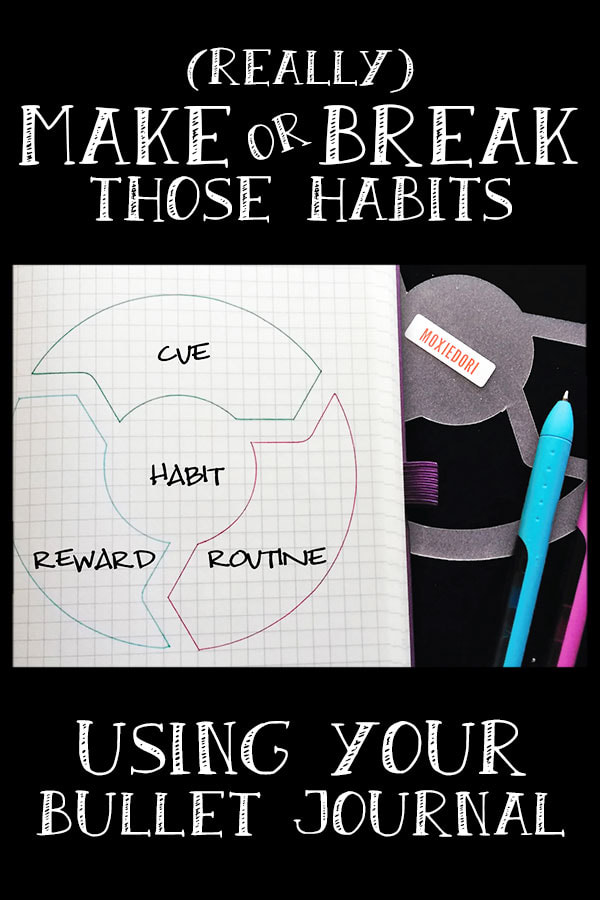
I started by making a three-part loop on my page. That's because, according to the brain science Duhigg references in his book, habits consist of three major components: CUES, ROUTINES, and REWARDS. I can't help but to create tools with a functional purpose, so I designed our new Healthy Habit Bullet Journal Stencil to help me quickly create the graphic element for my page. It looks a little like a funky spider, but it makes swift and tidy 3, 4, 5, or 6 part cycles that fit perfectly on my journal page.
 | |
 | Okay, so let's say I want to STOP A BAD HABIT. I start by writing the habit I want to break in the center of the Habit Loop graphic in my journal. 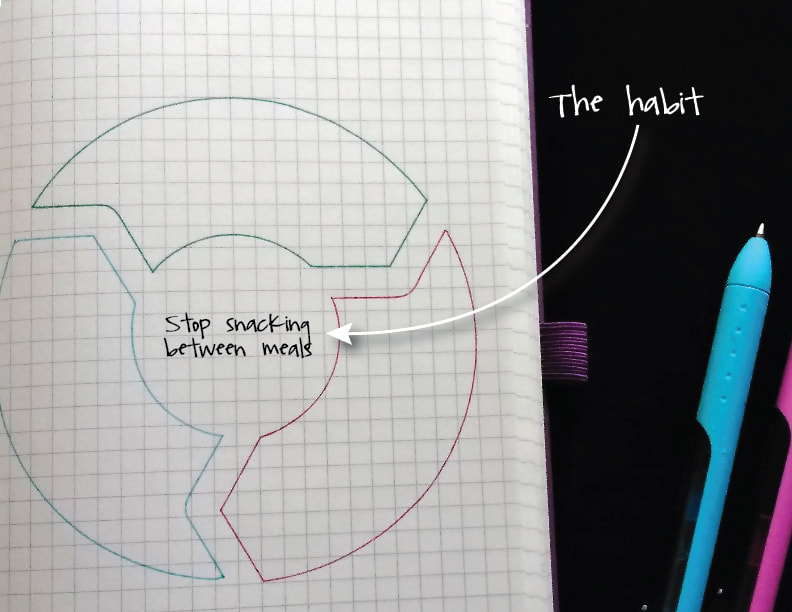 |
Step 1 - Identify the ROUTINE
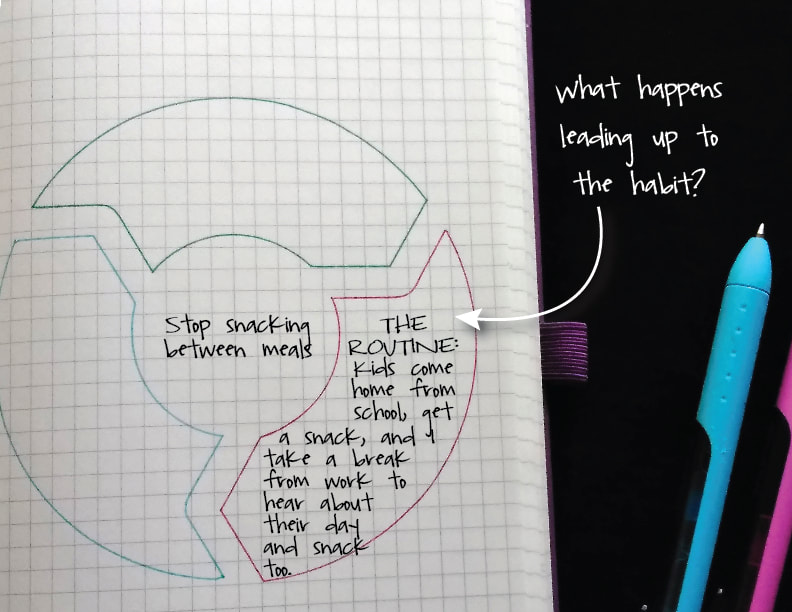 | Ask yourself what happens leading up to the habit you want to stop and write it down in the first part of the loop. In my case it was that every weekday afternoon, I would stop working and come downstairs when our kids got home from school, they'd fix themselves a snack, sit down at the table to eat it before starting their homework, and fill me in on their day. While there with them, I would also help myself to a snack - caloric intake I did not need. |
Step 2 - Identify the CUE
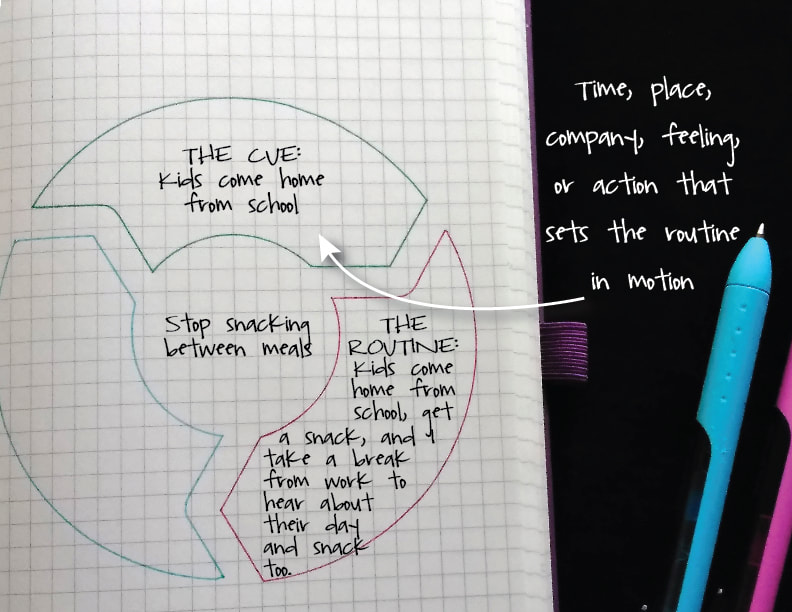 | Duhigg says to identify the trigger or CUE that sets the routine in motion. What time it is, where are you, who are you with, how do you feel, what have you been doing, etc. Write it down in the second part of the loop. For me I always seemed to snack when our kids got home from school. |
Step 3 - Identify the REWARD
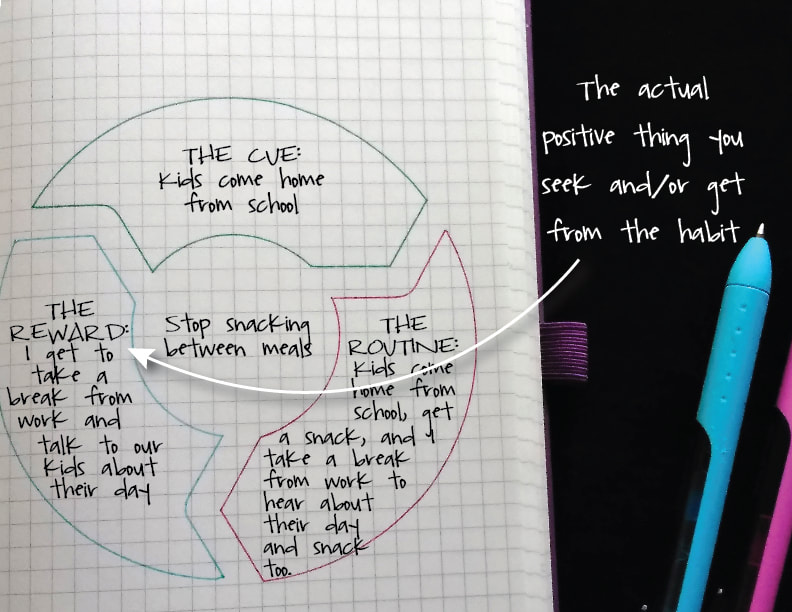 | For every habit, there's a feel-good reward - which is why it becomes a habit. The reward is not the drink, the snack, the sweet, the unnecessary purchase, the screen time, etc. We're depleting not treating ourselves with those things once they become habit. The reward is the actual positive thing you seek and/or get from the habit, like social interaction, a mental break, a sense of control, relaxing after a long day, etc. Duhigg says we need to figure out what the reward actually is, and we do that by varying our routine. |
So, for example, I tried sitting in the living room instead of the dining room, or another day I said, "hi" to the kids and headed directly upstairs back to work, I checked to see if I snacked at 3:30pm on a Saturday, etc. What I figured out was my reward, the part that felt good, was specifically taking a break from work and chatting with our kids about their day at school.
To break the habit of snacking during this part of my day during the week, just avoiding the CUE or the ROUTINE did not work. I would still crave the reward. Instead, I needed to alter the routine that leads to the reward.
To break the habit of snacking during this part of my day during the week, just avoiding the CUE or the ROUTINE did not work. I would still crave the reward. Instead, I needed to alter the routine that leads to the reward.
Step 4 - PLAN a new routine: When ________, I will ________ because I get to __________.
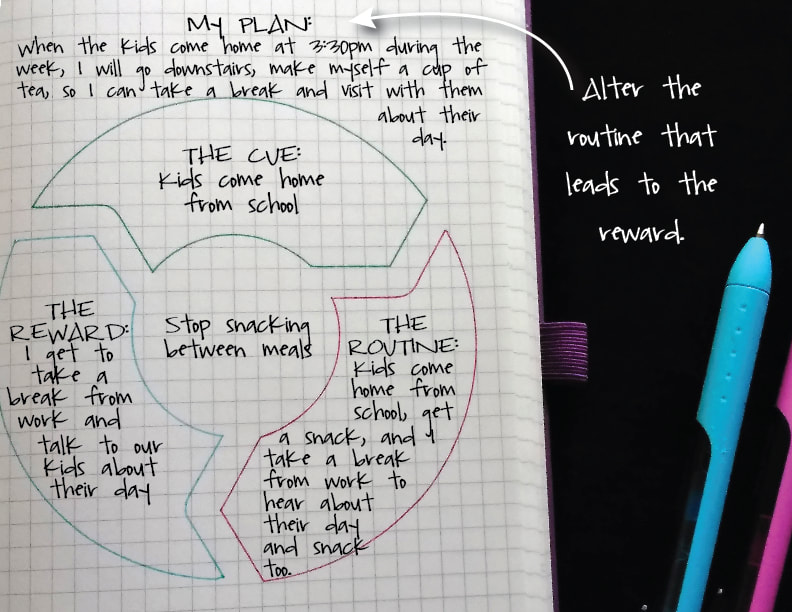 | My PLAN: When the kids come home at 3:30pm during the week, I will head downstairs and make myself a cup of tea because I get to take a break and visit with them about their day. By making a specific plan to replace the unhealthy part of the routine with something healthy, I break a bad habit and create a new positive habit in turn. Duhigg suggests we post the plan somewhere we'll see it every day (ahem, journal) and stick to it for about a week to give it time to replace the old routine. |
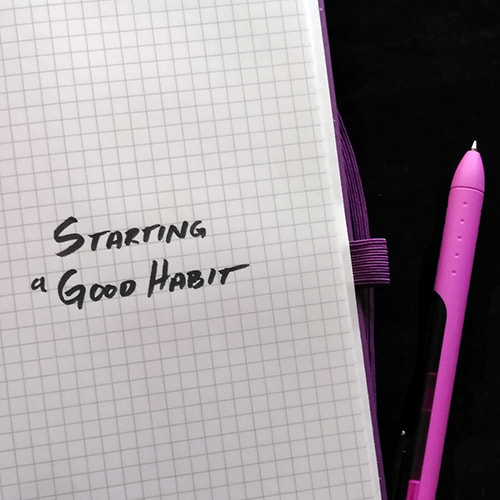 | The same approach can be used to START A GOOD HABIT. I fill in my habit loop with the habit I wish to start, a cue that will trigger a specific routine I visualize, and the meaningful reward it will provide for me. My plan: When it's 5:30am, I will wake up, use the restroom, put on my running gear, go down to the basement, pull up Family Guy on the old tablet that's mounted to our treadmill, and watch/laugh while I run for 30 minutes, getting the regular exercise my body needs. |
I put this plan somewhere I can see it every day and follow the routine for a least a week to help it become habit. Coming up with a specific plan that includes a cue, routine, and reward(s) is vastly different than just setting a goal of "I'm going to exercise every day" or making an exercise tracker in my journal (and then tracking my failure at regularly exercising.) For me, understanding the Habit Loop and planning a new, healthier cue, routine, and reward actually worked.
For more information about Charles Duhigg's approach, check out How Habits Work on his website.
(No we're not getting any affiliate perks - I've just found his synopsis tremendously helpful.)
And here's where to get your hands on our Healthy Habit Bullet Journal Stencil that I used for my layouts.
Hopefully this is helpful - give it a go and see if you can successfully master those habits too!
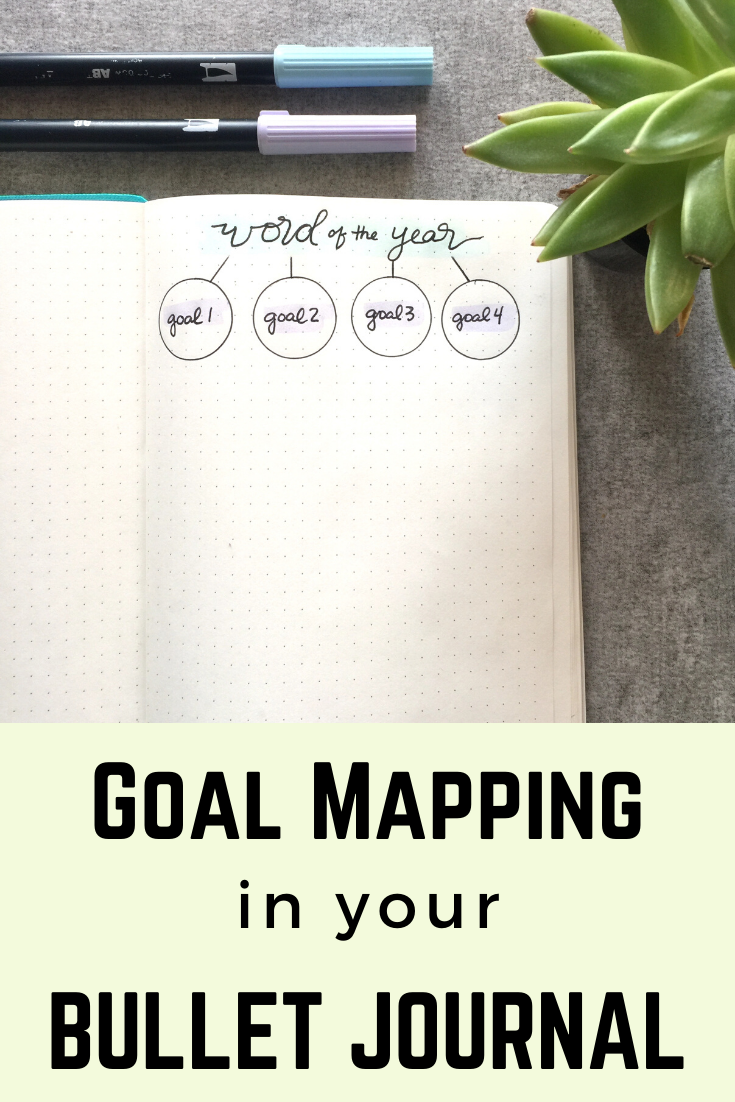
Happy New Year! Fresh bullet journal, fresh you, fresh goals - it's invigorating, isn't it?
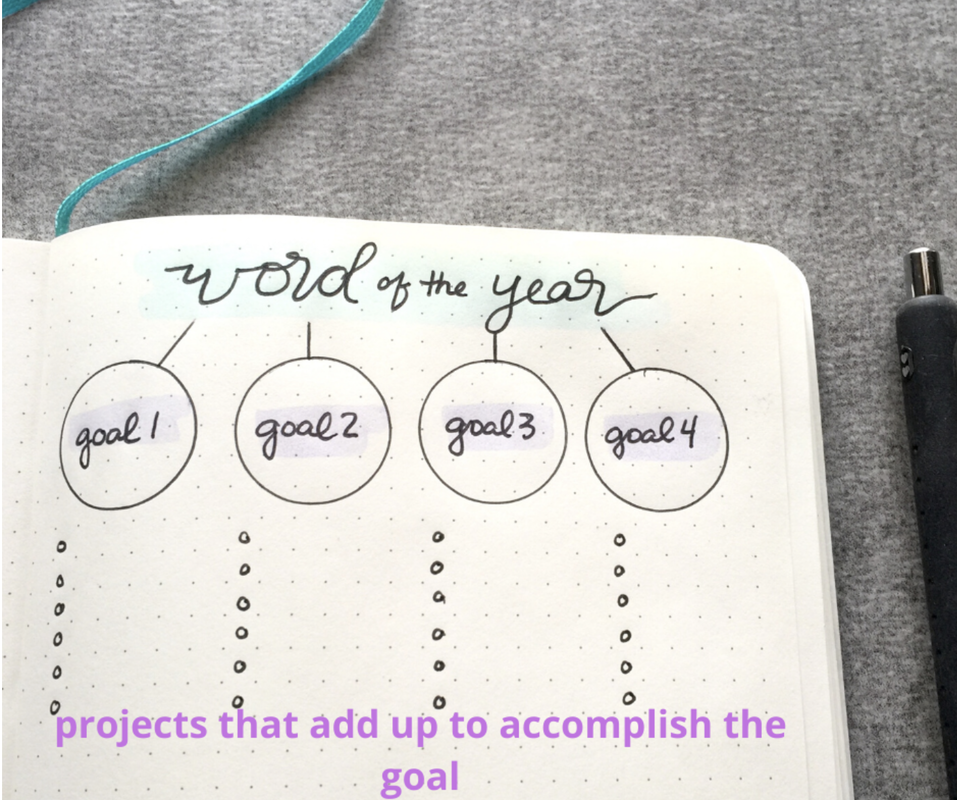
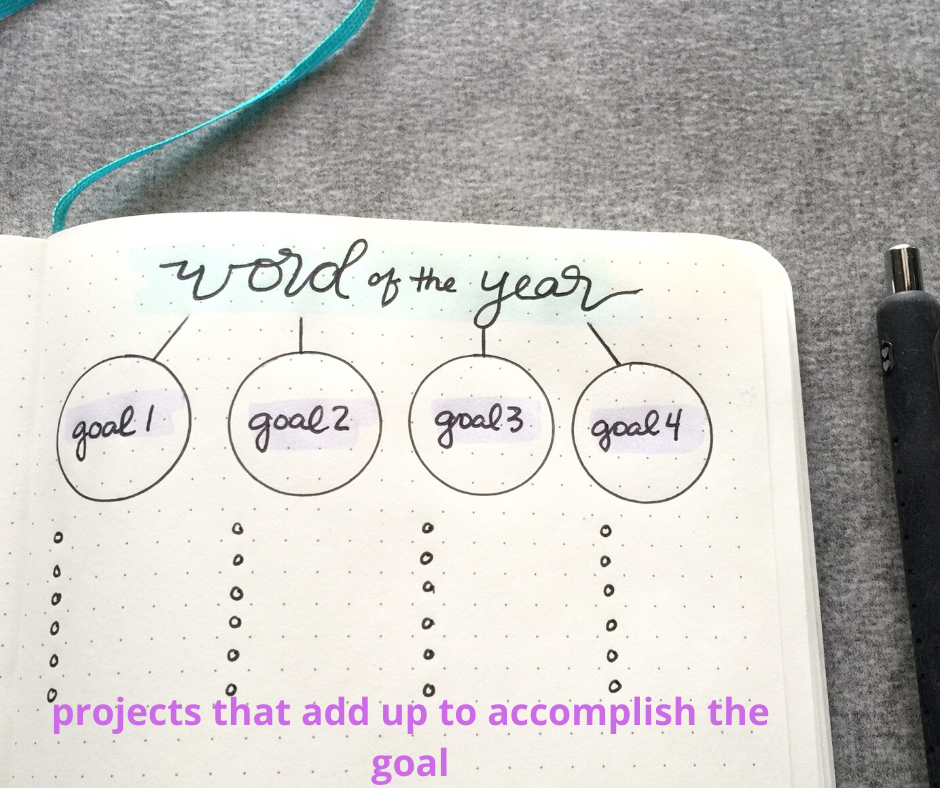
You've decided on your word of the year so now what's next? Not sure how to connect your big intention with your goals and projects? You are in the right place. We are going to backwards design your goals, projects and action steps based on your word of the year for 2020. Let's do this thing.
You've decided on your word of the year so now what's next? Not sure how to connect your big intention with your goals and projects? You are in the right place. We are going to backwards design your goals, projects and action steps based on your word of the year for 2020. Let's do this thing.
Pick your Goals
Once you have decided on your word of the year, think of three or four big goals you want to work on to manifest your word. These goals can be personal or professional or a mix of both. For example, my word of 2019 was, "Me." Yep - just "Me." After dropping out of my career for 10 years to nurture my children, it was time to get back to the old me. (The new, old me, of course.)
My top three goals that would bring me closer to my old self were: 1. Get comfortable in my own skin. 2. Facilitate the independence of my children. 3. Take a more active role in the success of my business.
My top three goals that would bring me closer to my old self were: 1. Get comfortable in my own skin. 2. Facilitate the independence of my children. 3. Take a more active role in the success of my business.
Brainstorm Projects
After I identifying your three main goals, think of projects to accomplish those goals.
For my goal "Get comfortable in my own skin." My projects looked like this: Get a check up. (for the first time in a decade), get an eye exam. (also first time in a decade), lose 15 pounds, invest in a few pieces of clothing not found at Target, walk the dog an hour a day, do something different with my hair, paint my nails more often, etc.
What projects need to be worked on to make progress in your goals?
Monthly Project Planning
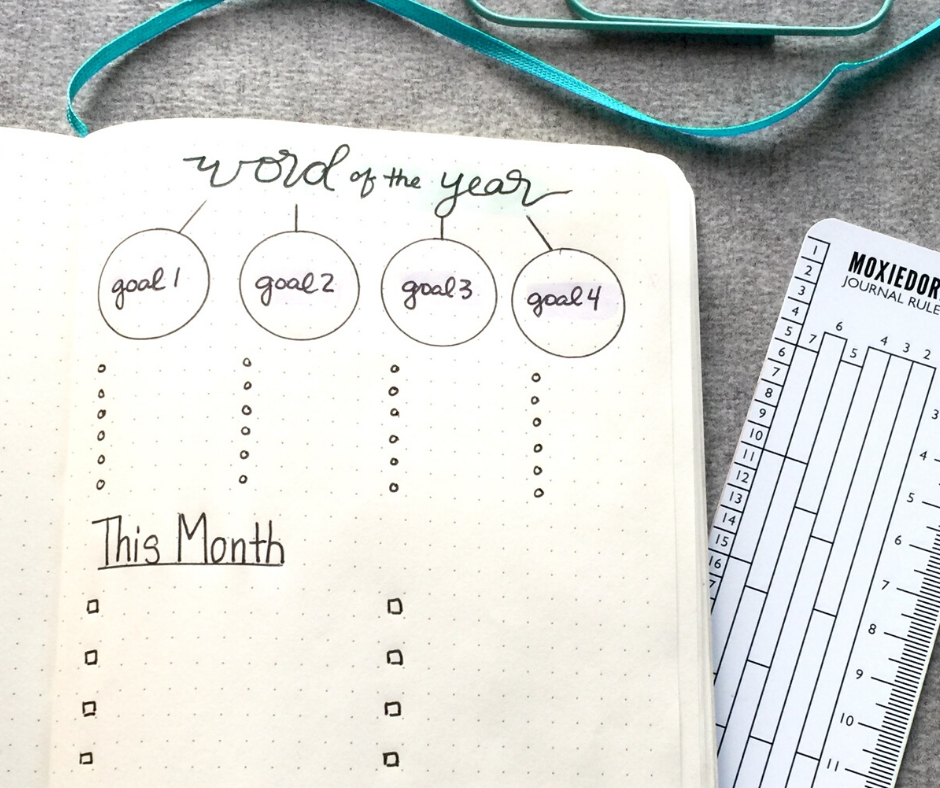
When working on your monthly layout, go back to your list of projects. Which projects do you want to work on this month? Which projects fit with the weather, your current state of mind, or current level of ambition?
Choose a few projects - a balance of personal and professional. Think about the amount of action steps each project will take and be realistic and kind to yourself. Some projects will need daily attention and others will need to be worked once or twice per week. Create a mix of projects that compliment each other. Be sure to not work so many that you become overwhelmed. It's better to undershoot, feel accomplished and add more later.
Choose a few projects - a balance of personal and professional. Think about the amount of action steps each project will take and be realistic and kind to yourself. Some projects will need daily attention and others will need to be worked once or twice per week. Create a mix of projects that compliment each other. Be sure to not work so many that you become overwhelmed. It's better to undershoot, feel accomplished and add more later.
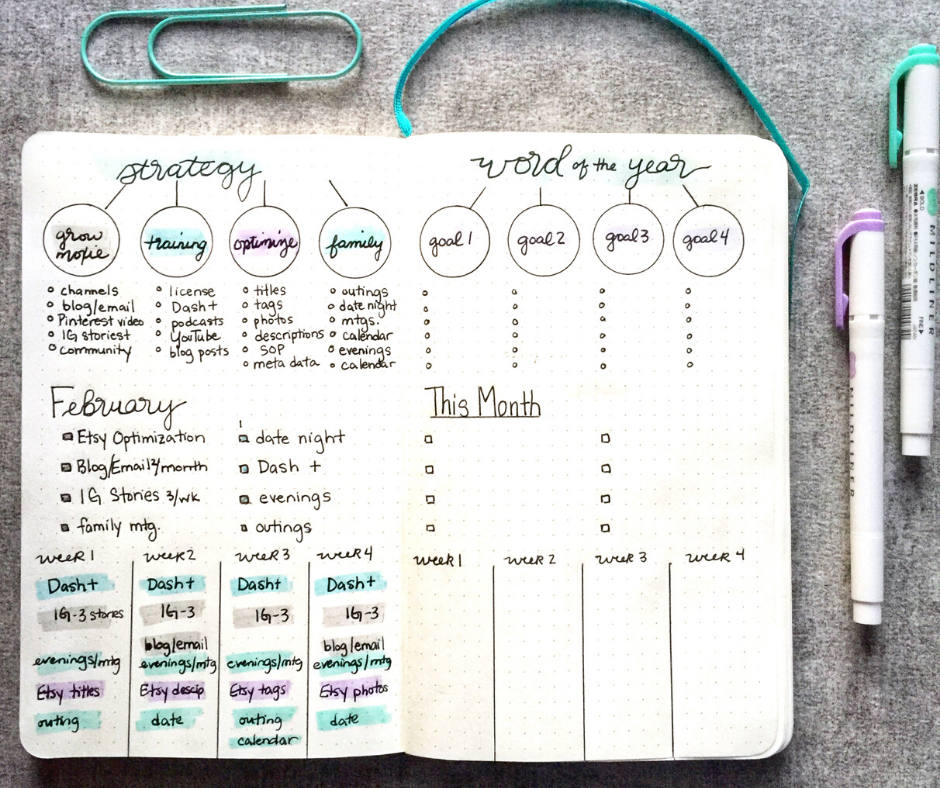
Weekly Project Tasks

Next consider the action steps you need to take to accomplish the projects you chose for a particular month. Create a draft of your weekly schedule of tasks that will progress you toward results.
For example, to facilitate the independence of my children, I scheduled to teach my son how to cook one new dish per week. I also scheduled a weekly family meeting where we all decide what we want to do on the weekend, what home tasks we need to accomplish and what engagements we have coming up. Each Sunday I scheduled for the kids to put away their laundry, clean out their mudroom lockers and empty out their backpacks that were still full from Friday.
As you can imagine not everything went perfectly but progress was made.
Tasks + Projects + Goals = Word of the Year
So from the bottom up, weekly tasks add up to projects. Projects add up to goals. Goals add up to your word of the year. Each month you can choose which projects to work on. By the end of the year, enough action steps will be completed to achieve the transformation and results you seek.
If you liked this and would like to join our newsletter for more bullet journaling ideas, please head over to moxiedori.com and sign up.
If you liked this and would like to join our newsletter for more bullet journaling ideas, please head over to moxiedori.com and sign up.
Love stencils but not exactly sure how to use them in your bullet journal? Here are 5 simple tips for getting the most out of your bullet journal stencils.
1. Fill in the Details
Stencils are made up of the negative space of the element. In order to make the elements come to life, you need to fill in some details. Find an example of the element you're working on and copy it. If you're looking for ideas, the MoxieDori Instagram account has tons of examples for you to follow.
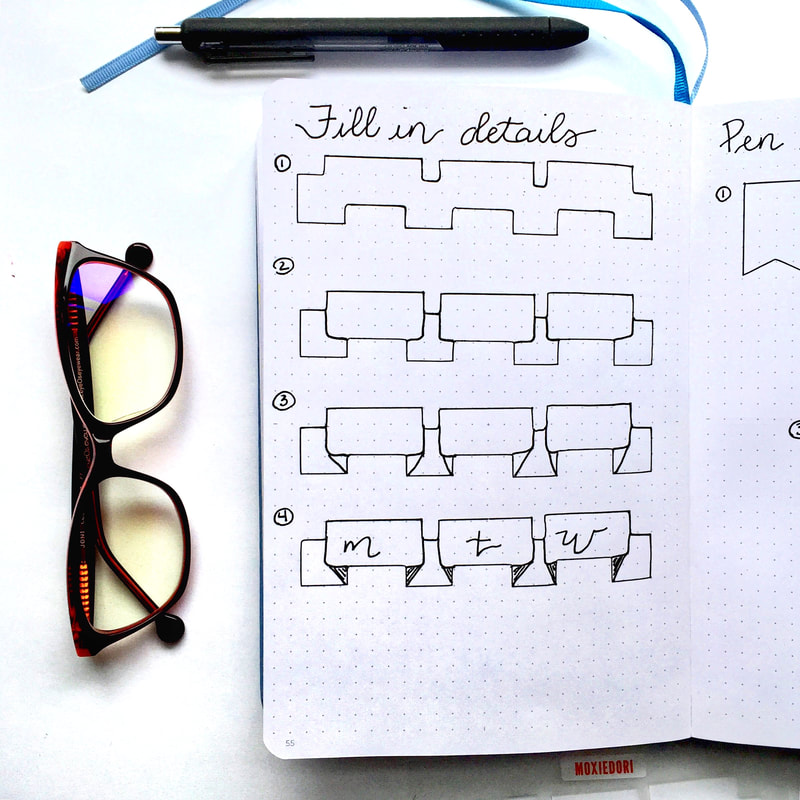
This horizontal ribbon element can be found on the Vertical Weekly Stencil.
2. Pen the front element first.
When you are creating a layered element, imagine which part of the drawing is at the forefront. Draw that part first. After that, draw the portion in the background, stopping when you reach the element in the foreground. Add shading and voila!

3. Drop Shadow
Add some dimension to your layouts with a drop shadow. This is super simple to do with a stencil. Simply pen the element on your page and then shift the stencil to the right and down just a titch. Draw a "shadow" of the right and bottom sides of the element. Connect the two lines with diagonal shading lines. The element appears to be 3D.

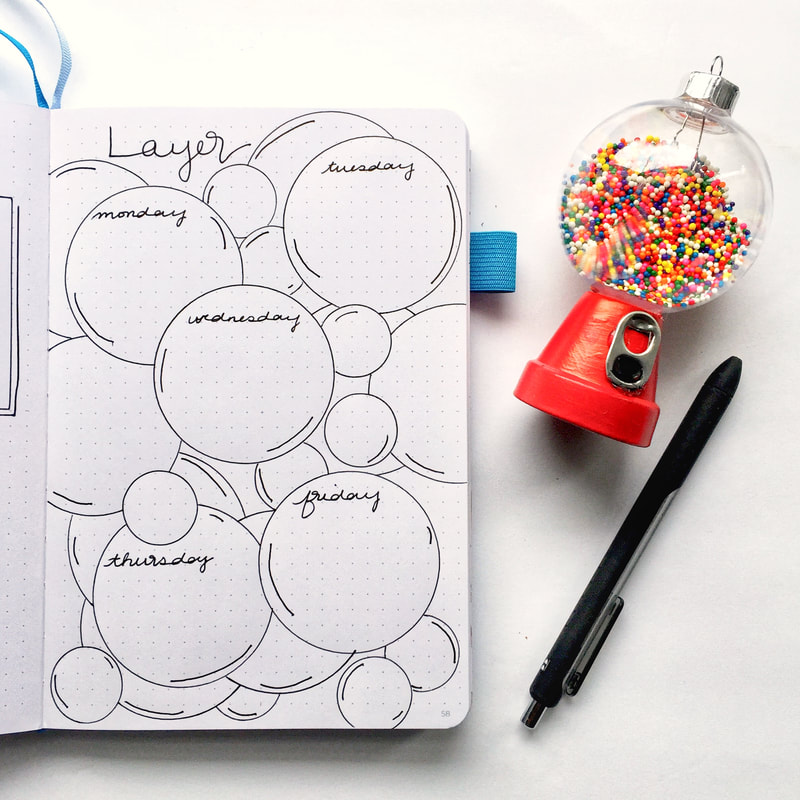
4. Layer Elements
Layering stencil elements is another way to create dimension in your layouts. Pick which elements you want to exist in the foreground of your layout and pen them in first. Tuck another layer of elements behind and maybe even another layer behind that one. Easily create fun layouts with depth and visual interest using just one or two elements on the stencil.
5. Use Distress Ink
Add color to your layouts using Distress Ink or a damp cosmetic wedge and watercolors. Daub the colors on the page using the stencil as a masque. When color is complete, outline in black pen. The effect is super impressive yet it is so fast and simple.
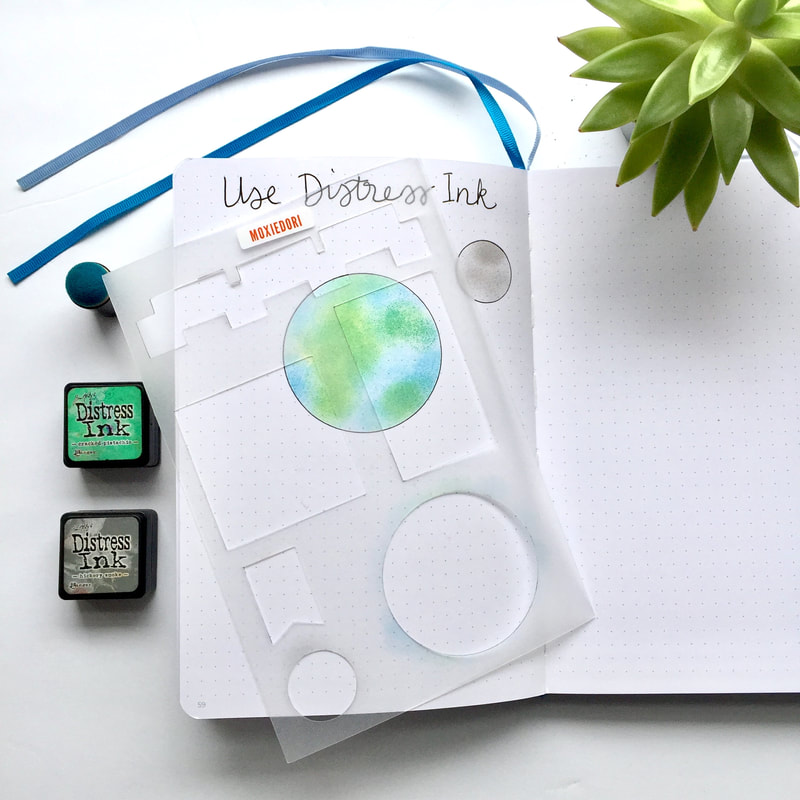
The Vertical Weekly Stencil has basic elements that create a cohesive weekly layout in an A5 journal.
If you're looking for more bullet journaling inspiration, head over the Bullet Journaling Tips and Tricks on Facebook. MoxieDori hosts a supportive, kind and creative group of over 22,000 bullet journalists. We'd love to see you there!
A bullet journal is more than a date book. It is an all encompassing notebook that holds all of your information in one place. Think of it as your external brain. There are many benefits to putting pen to paper and downloading your thoughts. Here are 20 reasons you should start a bullet journal in 2020.
1. Clear your mind.
2. Make note of important days, events, holidays, deadlines.
3. Organize your thoughts.
4. Doodle and be creative.
5. Work out your weekly priorities.
6. Create habits by tracking them.
7. Break goals down into smaller goals.
8. Prioritize steps of a project.
9. Brainstorm.
10. Schedule appointments.
11. Write down daily intentions.
12. Reflect on your progress.
13. Document to remember.
14. Write down your swirling thoughts.
15. Plan for the future.
16. Manage your time.
17. Create space in your head.
18. Manage your budget.
19. Be more mindful of how you spend time.
20. Express your gratitude.
If you are looking for bullet journaling guidance, inspiration or support, head over to Bullet Journaling Tips and Tricks on Facebook.
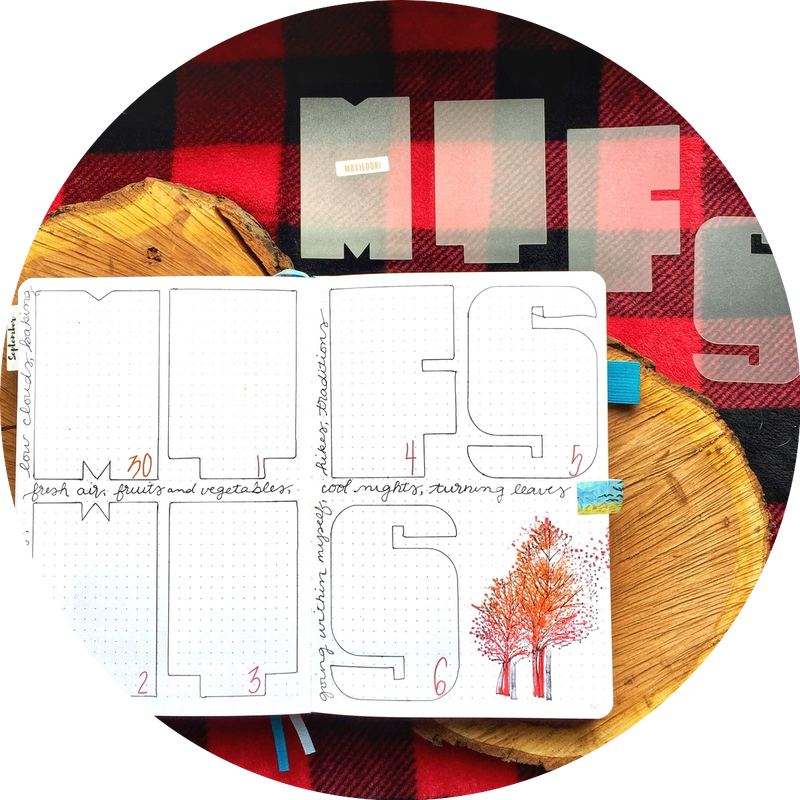
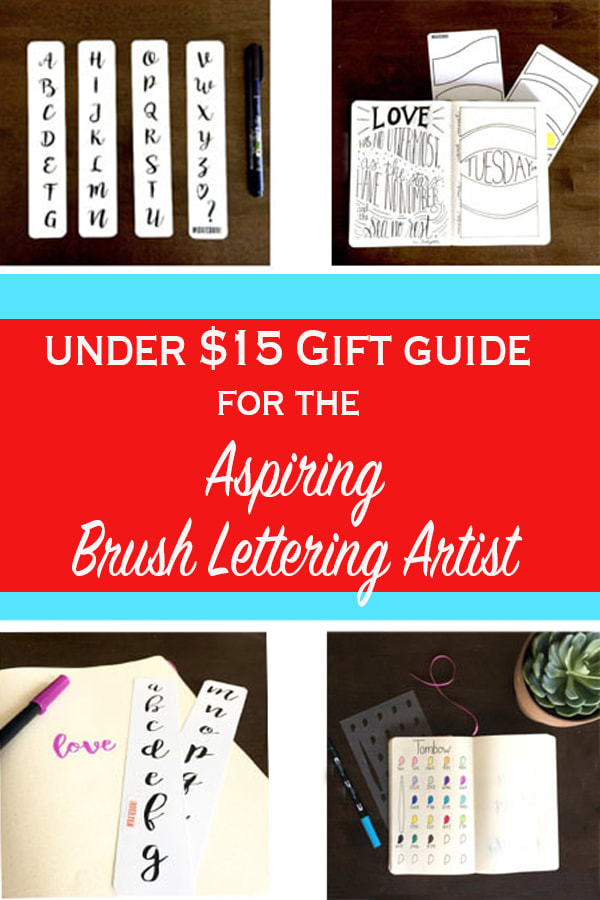
The gift giving season is soon upon us. Finding that special something for everyone on your list can be both stressful and rewarding. If you have an aspiring brush letter artist on your list, we have a unique, budget friendly guide just for you. You will find great picks under $15 you can gift for stocking stuffers or secret Santa gift exchanges.
1. Brush Lettering Tracing Strips
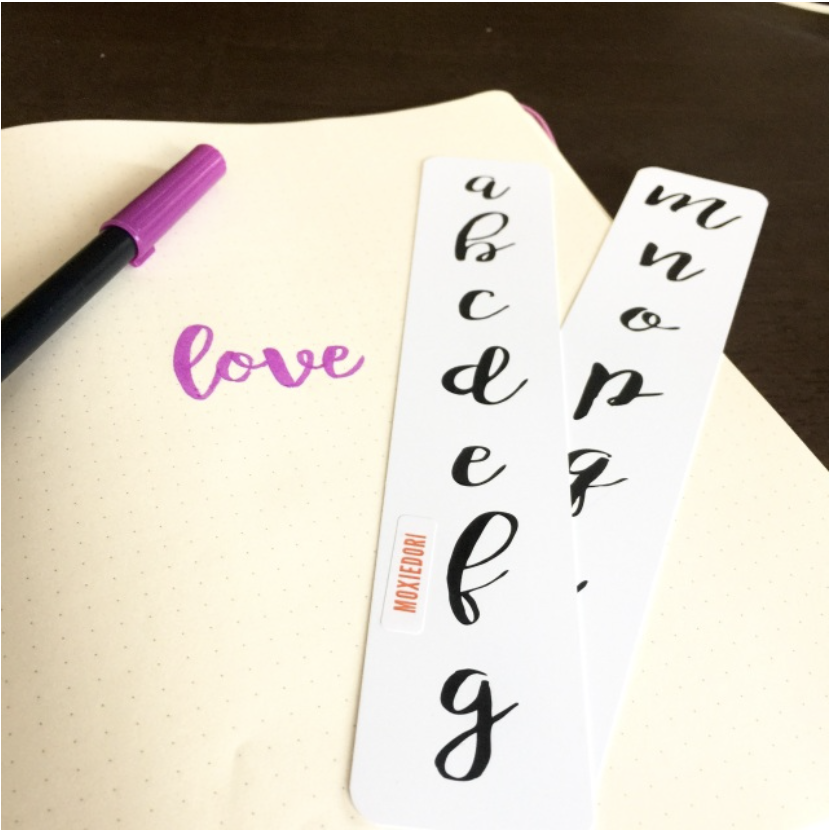
These Brush Lettering Tracing Strips are placed under your paper and traced. Not only does the user have immediate brush lettering skills but these strips train the muscles in the hand in letter formation and thin and thick strokes. In gifting these brush lettering tracing strips, you are gifting the immediate gratification of perfect brush lettering.
The tracing strips come in Cursive Lowercase and Cursive Uppercase, Mini Lowercase and Mini Uppercase. They also come in Block Uppercase for a complimentary san serif print font option. Priced at less than $5 a set, these tracing strips are an affordable and unique gift.
The tracing strips come in Cursive Lowercase and Cursive Uppercase, Mini Lowercase and Mini Uppercase. They also come in Block Uppercase for a complimentary san serif print font option. Priced at less than $5 a set, these tracing strips are an affordable and unique gift.
2. Brush Pen Pouch
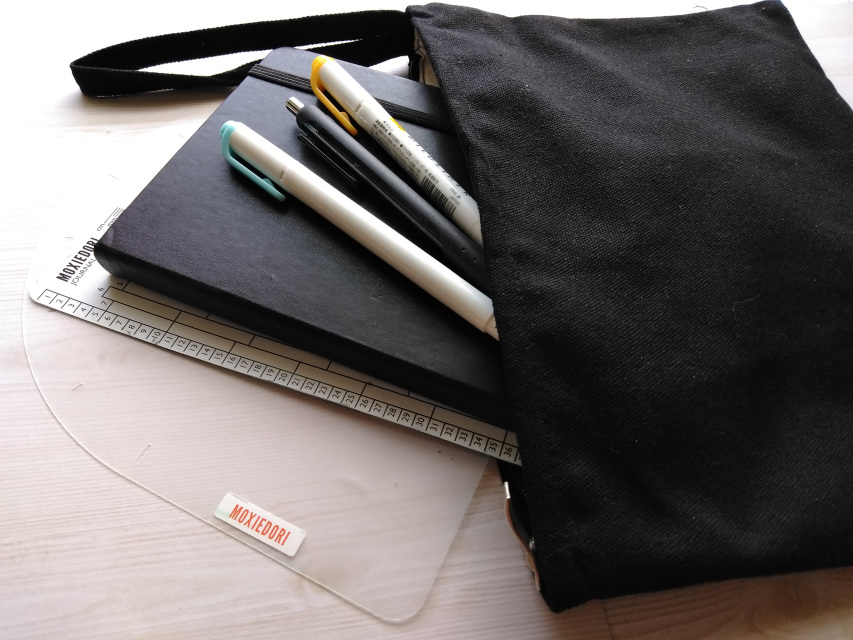
Large Journal Supplies Pouch
$8.50
This 8" by 11" (28 x 20cm) zipper journal pouch is big enough to hold both your bullet journaling supplies and your journal. The pouch is made of a black durable canvas cotton fabric, strengthened by a second natural cotton canvas lining, closes with a zipper, and features a 6 inch (15cm) wristlet strap.
Keep all of your stencils, pens, and your journal all in one place, ready to go wherever you're headed. Here's a bonus: an iPad fits in as well. Store, protect, and tote your stuff in style.
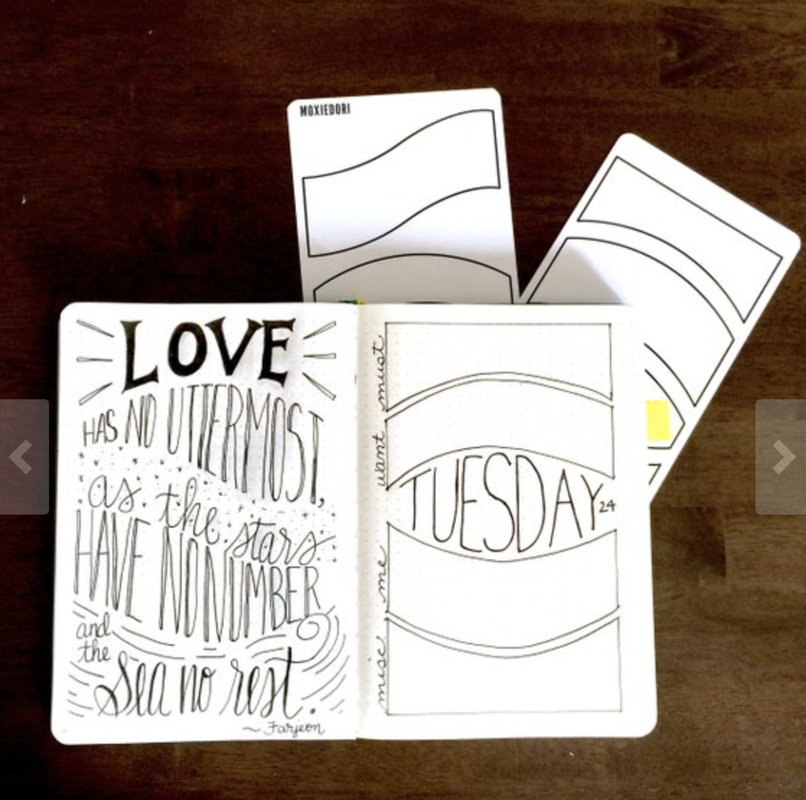
3. Word Art Tracing Cards
Creating an aesthetic composition is difficult. Use these Word Art Tracing Cards to pencil in your perfect composition before brush lettering. They slip under the page and the shape containers can be penciled in and erased after the piece is complete. This set includes two double sided vinyl cards priced at $8.
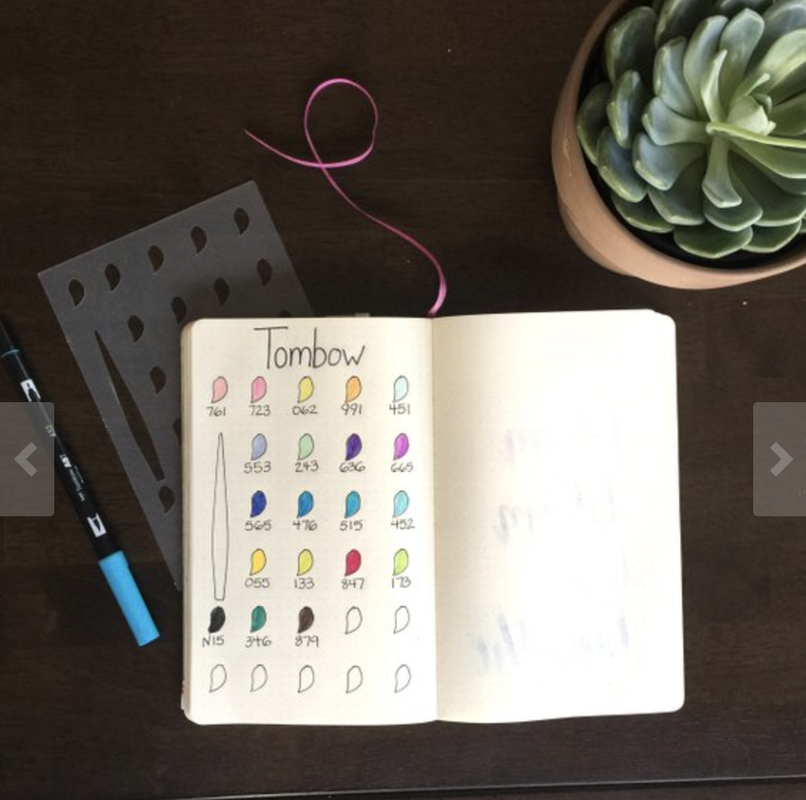
4. Brush Pen Color Swatch Stencil
Brush Letter Artists love their pens in all of their glorious colors. The Brush Pen Color Swatch Stencil creates a consistent and gorgeous layout that documents how the pigment appears on the page. At $9, this makes a thoughtful gift for that pen lover in your life.
Enjoy picking the perfect gifts for your brush letterer!
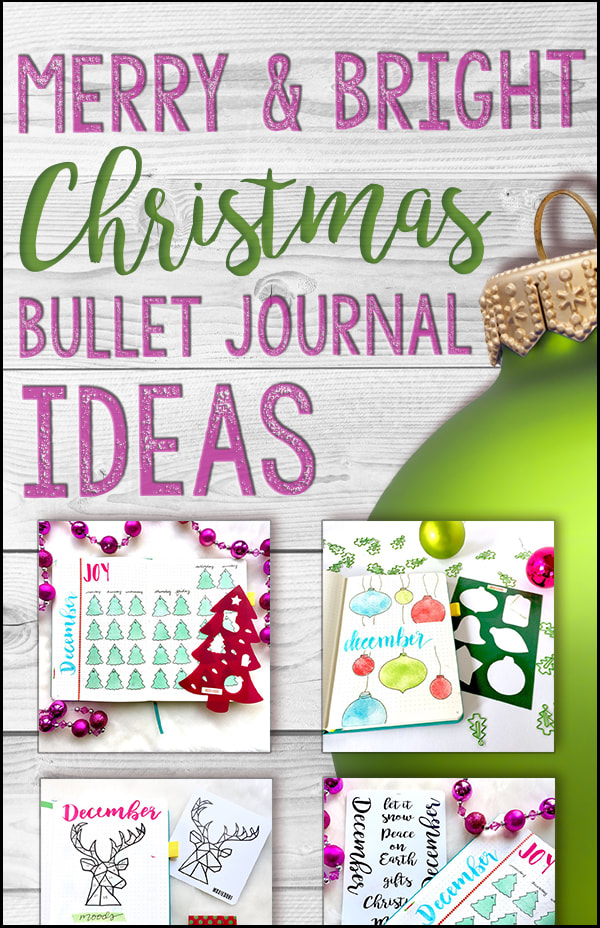
Holly, jolly Christmas bullet journal inspiration!
Enjoy some monthly layout ideas, learn about brush lettering hacks, get some geometric animal mood tracker inspo, and learn how to make your holiday card envelopes fun and gorgeous.
Hello, December!
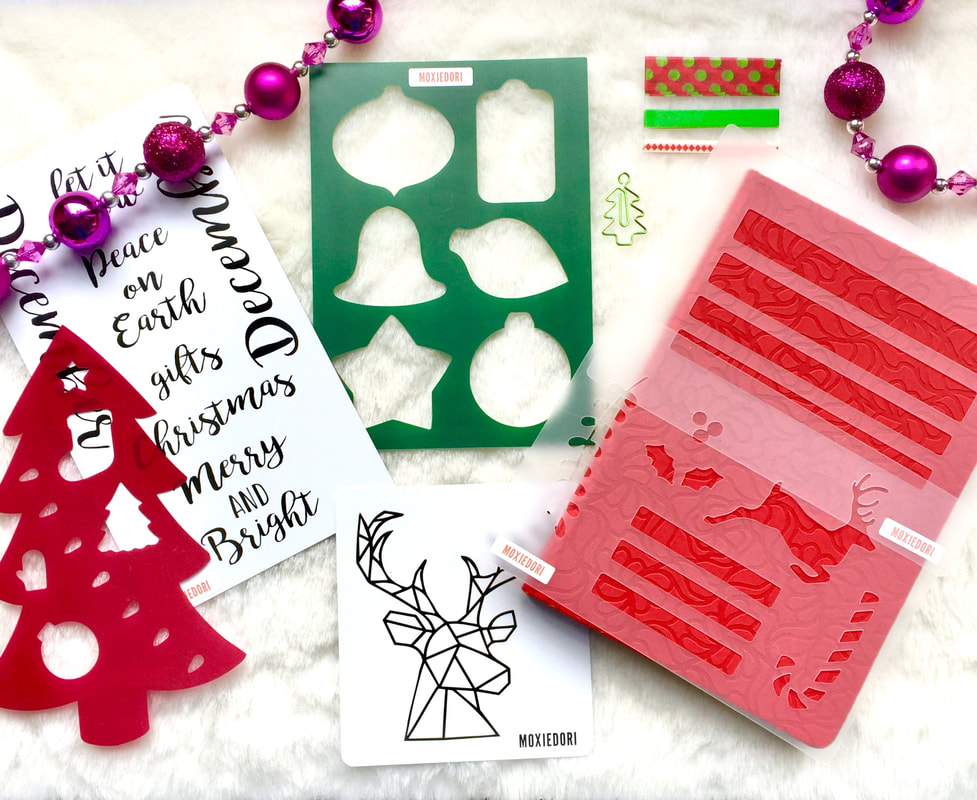
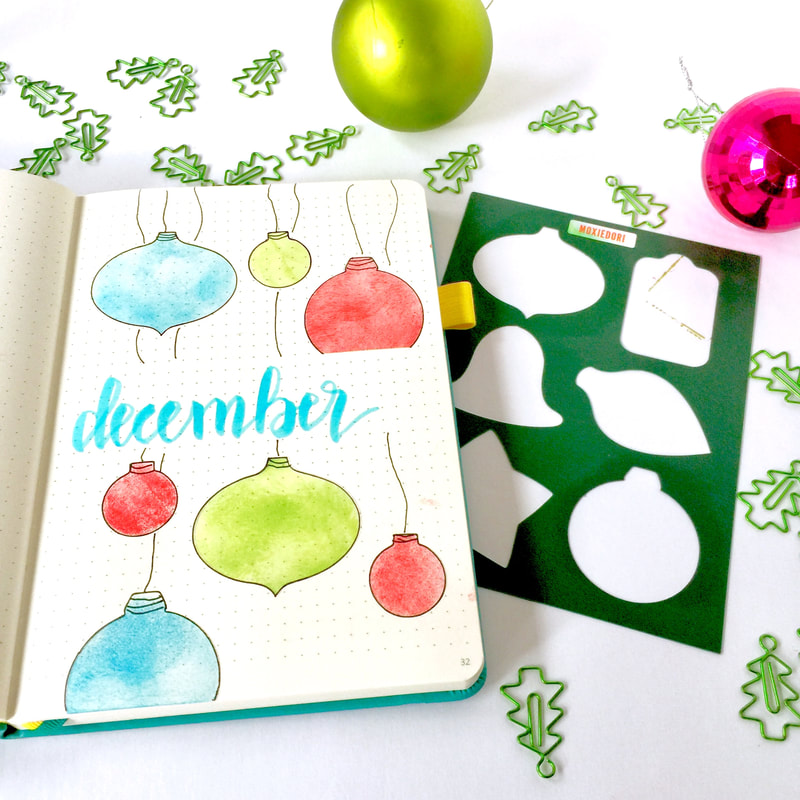
There are so many fun ways to create your opening page. The Christmas Holiday Ornament stencil is an easy and fast way to deck your opening page. With some Distressed Inks and a 03 Tombow MONO drawing pen outline, you have a clean, festive layout to set the tone for December.
December Monthly Calendar Spread
Turn your monthly calendar into a holiday spectacular by using one of the elements on this Christmas Tree Stencil. Each day can be an evergreen, a stocking, or an ornament. Just place the card under your journal page and trace the perfect lettering right onto the page.
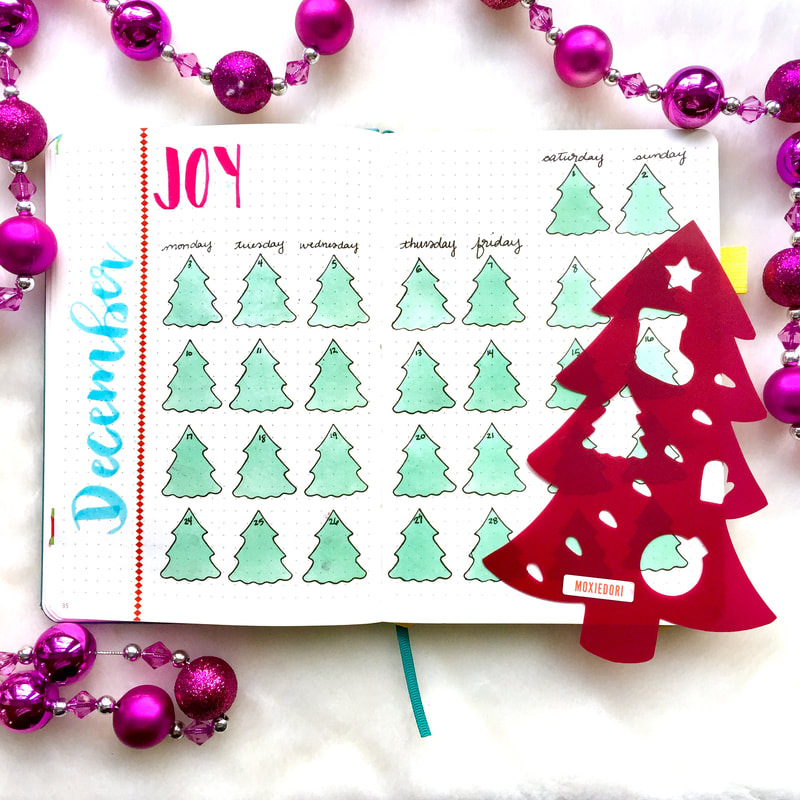
Check out this how to video.
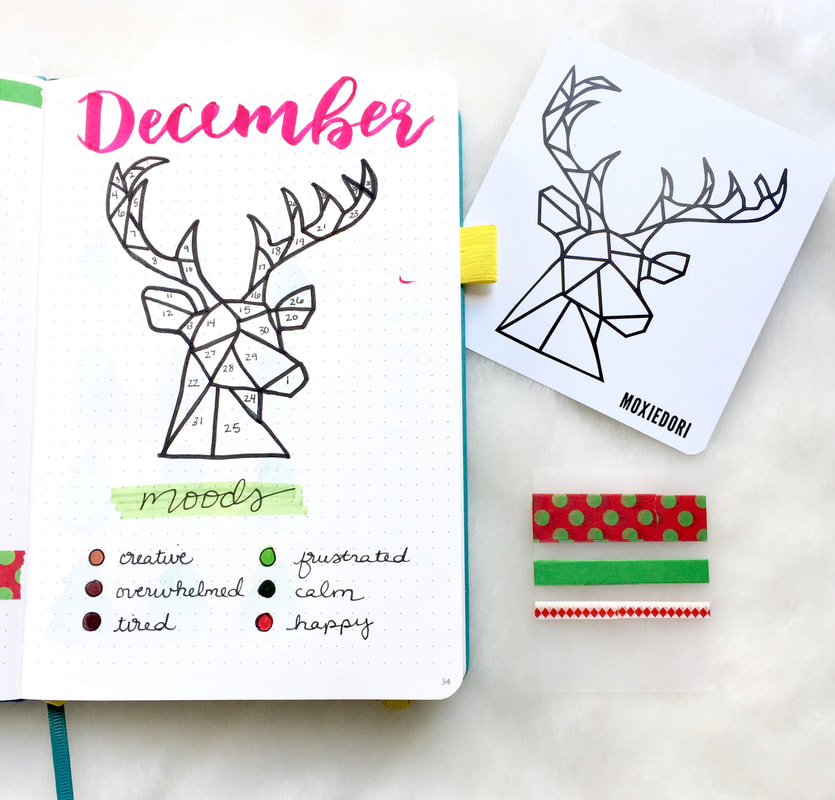
Geometric Mood Tracker
Self care is important during this busy time of the year. One way to take care of oneself is to be mindful of your moods. This double sided Geometric Animal Tracing Card has a deer on one side and a bear on the other.
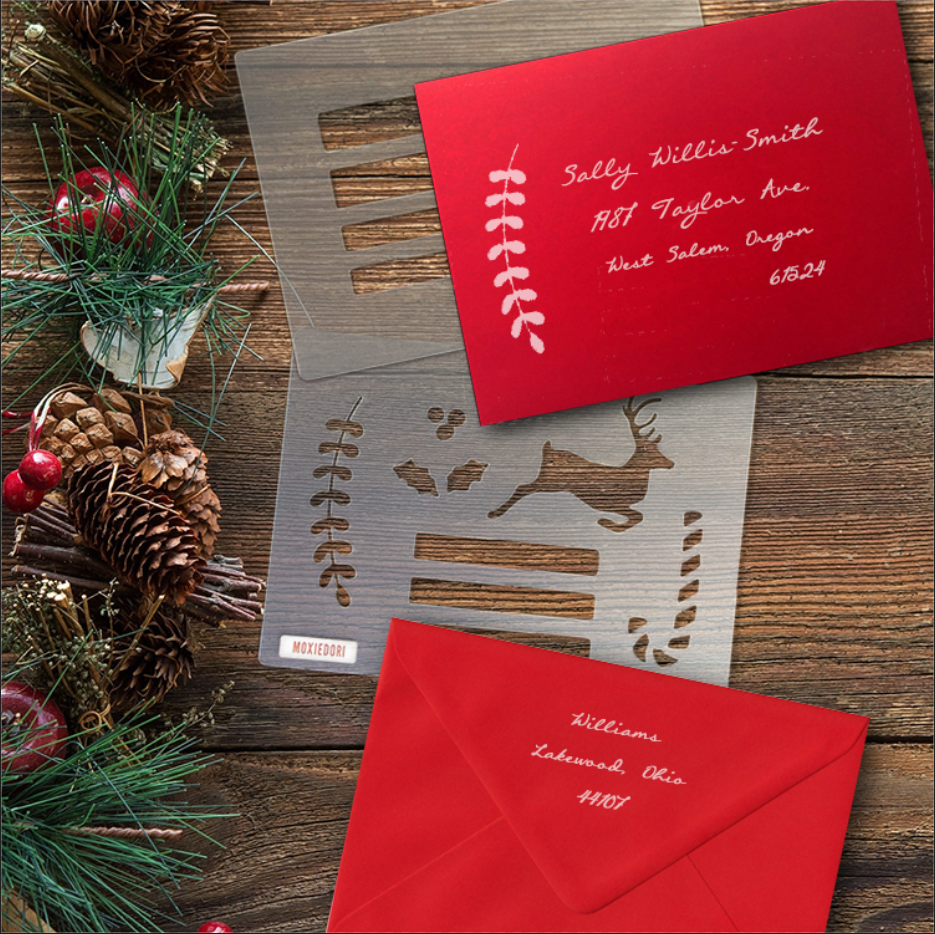
Holiday Card Envelope Decoration
Celebrate the season with a cup of hot cocoa and some snail mail. These Holiday Card Envelope Guides make the job a creative process. Your friends and family will appreciate the handmade touch and they never have to know how easy it was. ;)

If you are looking for more Christmas themed inspiration, hop on over here to this December Bullet Journal Pinterest Board. Happy Holidays!!!!

You know when loved ones ask what you want for a gift and you draw a blank? Tired of getting that fruit cake from Aunt Betty? Just because Santa doesn't entertain adult wishes, doesn't mean we can't make lists of what we want and share with those who ask.

Cat Lover Bullet Journal Supples
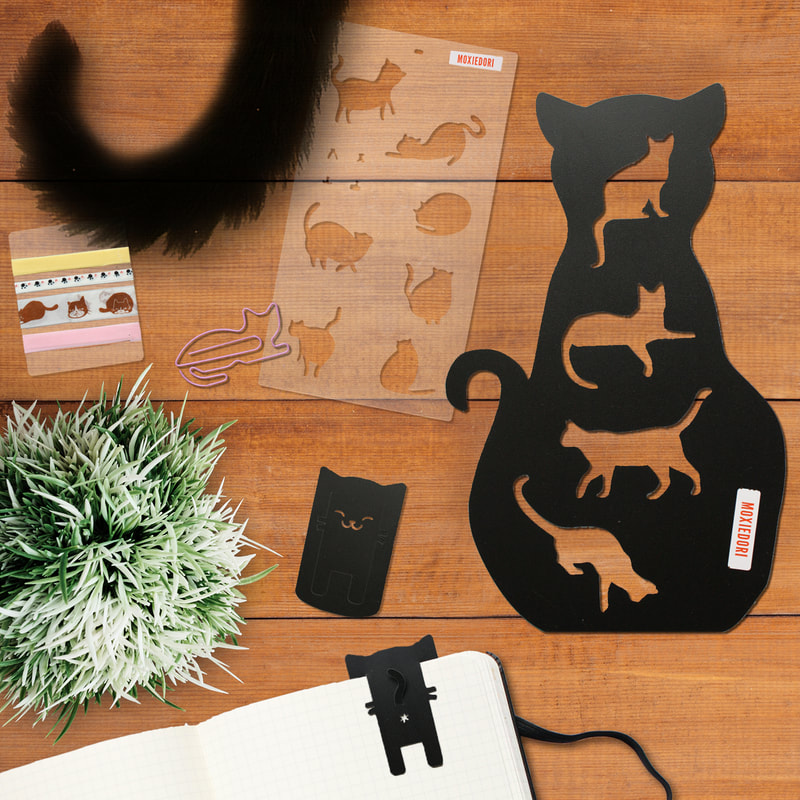
Every crazy cat lady needs to include her favorite feline in her bujo. Lucky for you MoxieDori designed the kitty goodies you want.
The Cat Doodle bullet journal stencil contains seven cat silhouettes and four kitty facial features. Mix and match to make your kitty express herself or himself in their own unique way.
The Cat Lover Stencil hosts four large cats that lounge, walk, or play on your bujo layouts. Just like real life.
The Kitty Bookmarks measures approximately 2" x 3" and made of black flexible plastic. Both front view and back view available.
2020New Year Bullet Journal Accessories
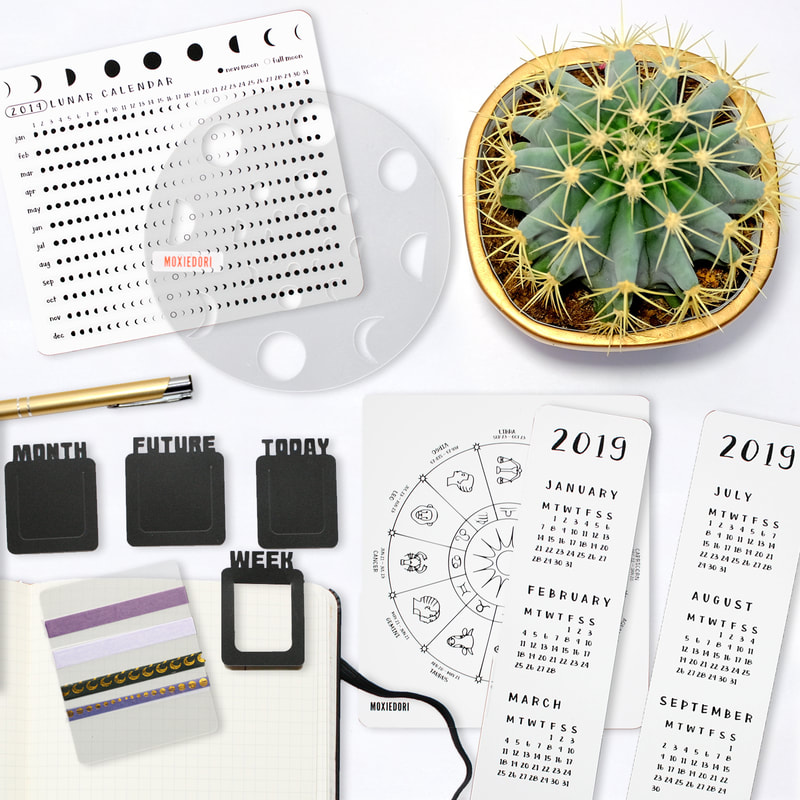
New year, new journal. Get going on your 2020 bullet journal with these supplies. .
The 2020-2021 Linear Calendar is a double-sided quick reference that shows what day falls on what date during the years 2020-2021. It's super handy when making those monthly calendar layouts.
The 2020 Lunar Calendar Card displays the moon phases for 2020.
The Planner Clips are perfect layout markers to keep track of your future log, monthly, weekly and daily layouts.
Mandala Supplies
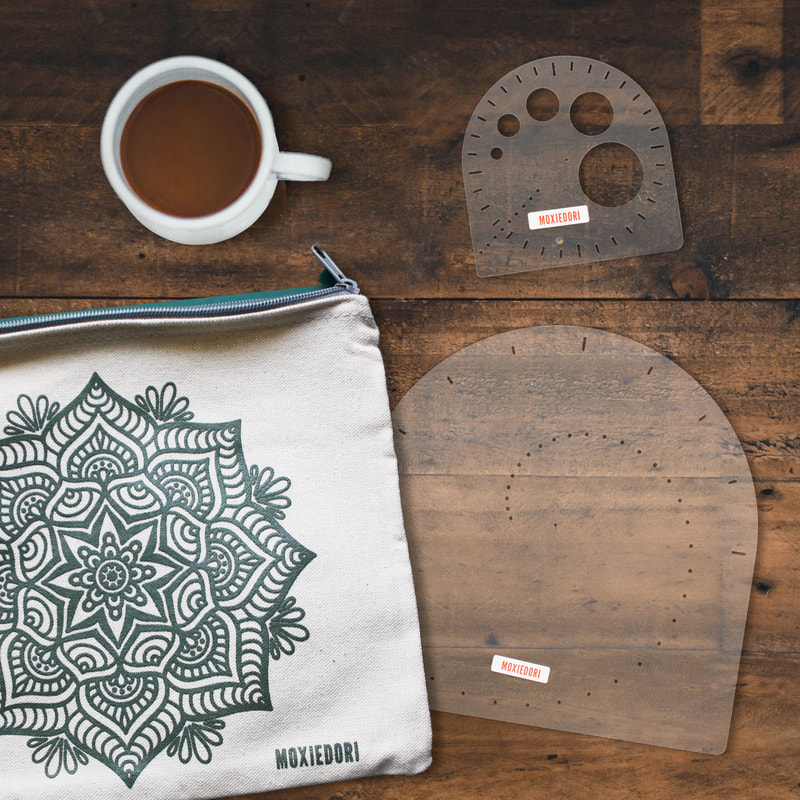
Mandala supplies are tools you need to draw a mandala with ease and precision.
The Mandala Maker Stencil is a flat compass and protractor used to make mandalas. This 8" by 8" (200mm x 200mm) transparent compass stencil makes 32 circles in 2.5mm increments. The smallest circle is 45 mm in diameter and the largest is 200 mm in diameter. It is also a protractor that divides the circles into 2, 4, 8, or 16 segments.
The Compass Protractor is a compass, a protractor and a straight edge. It makes concentric circles from 5mm to 120mm in diameter. It also measures out segments that divide the circles into 2 to 32 equal parts.
The Mandala Elements Stencil is a template of 15 basic mandala elements that can be used in conjunction with the Mandala Maker and the Compass Protractor to create mandala art.
Brush Lettering Supplies
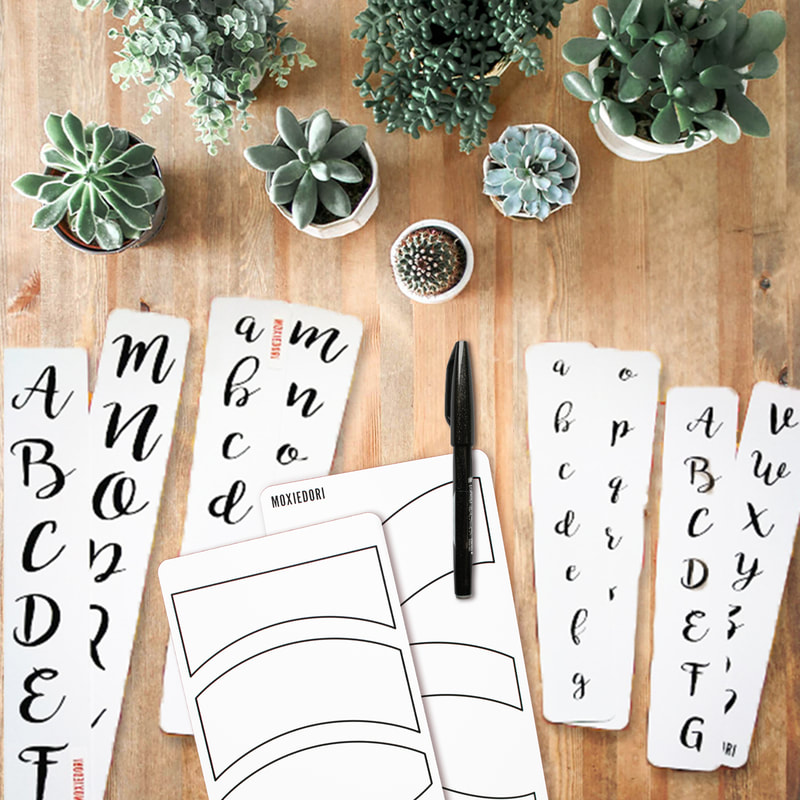
Brush Lettering Supplies are tools that assist in improving brush lettering skills.
The Brush Lettering Tracing Strips™ sets have the letters A through Z are professionally printed on waterproof plastic vinyl. The letters are easily visible through your journal's page. They are available individually or as a set and work well with all types of brush lettering pens.
Uppercase Cursive Brush Lettering Strips are 2.5 cm - 3 cm tall
Lowercase Cursive Brush Lettering Strips are 1.5 cm - 3 cm tall
Mini Uppercase Cursive Brush Lettering Strips are 1.5 cm tall
Mini Lowercase Cursive Brush Lettering Strips are 1 cm - 1.5 cm tall
Uppercase Block Brush Lettering Strips are 2.5 cm tall
Set of 5: All Brush Lettering Strips
The set of Lettering Composition Guide Cards are double sided. In all there are 14 word shape containers that act as guidelines for your creative lettering. You can mix and match the shape box guidelines to create your perfect A5 sized composition. The card is made out of a durable vinyl and is waterproof. It will not tear and is meant to last.
Beginner Bullet Journaling Starter Kit for Adults or Children
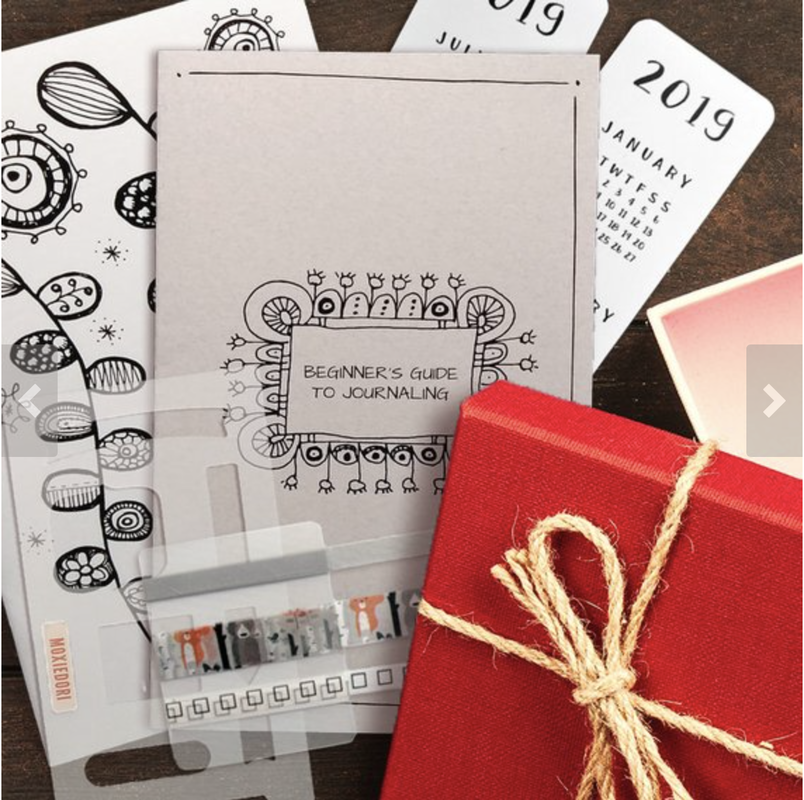
The MoxieDori Beginner Journaling Kit has everything one needs to begin bullet journaling. The journaling kit includes a Beginner's Guide to Journaling, a Practice Journal filled with dotted, grid, and plain paper, an exclusive journaling stencil, a sampler of useful, fun washi tape, and a 2020 Linear Calendar Card.
A5 Journal Rule
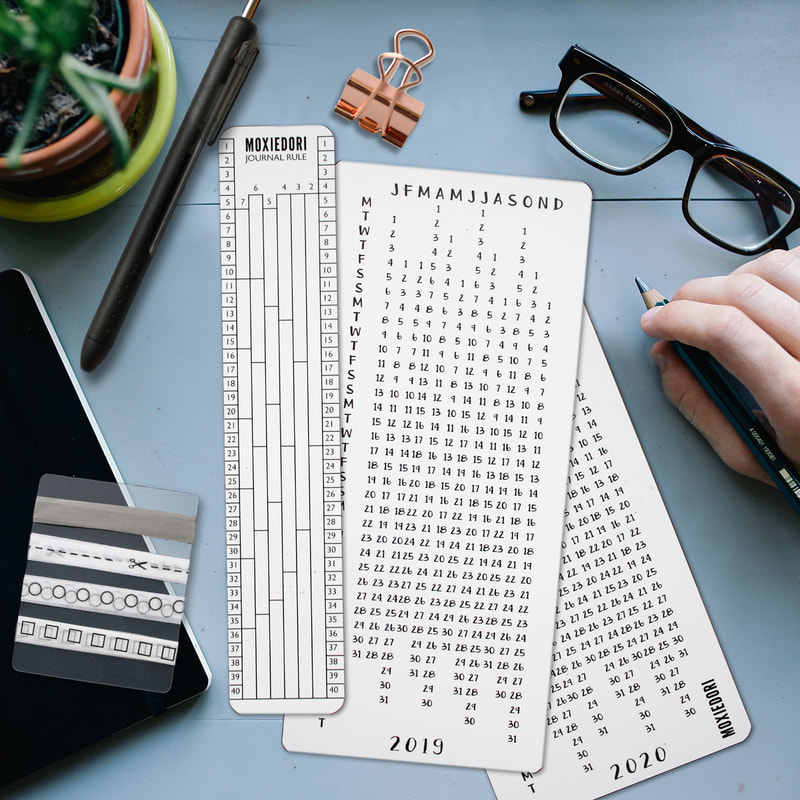
The A5 Journal Rule a straight edge, a ruler, a column and row guide, a bookmark, and likely to be one of the most useful planner accessories you own. It is made of flexible, durable, plastic, with 5mm increments printed on both edges that perfectly align with a standard 5mm grid.
Van Gogh Art Kit

The Van Gogh Kit contains a Brush Color Swatch Stencil, a double sided Van Gogh Art Tracing Card, and a card of 8 generous samples of Van Gogh washi tape.
The Brush Color Swatch bullet journal stencil allows you to track the true colors of each pen, marker, or colored pencil in your journal and eliminate the guesswork with this creative, durable 12mil matte stencil. The stencil itself is approximately 5" by 7" so it will tuck into you journal with ease.
The Van Gogh Coloring Card is a double sided durable waterproof vinyl card. One side of the card displays an image based on Van Gogh's "Starry Night." The opposite side has an image based on "Sunflowers in a Vase." The card itself measures 5 3/4" x 4 3/4".
The Van Gogh Washi card has a generous sampling of eight Van Gogh washi tapes.
MoxieDori Gift Card
The MoxieDori Gift Card is a double gift. You receive the item and the thrill of shopping for the goodies you've been eyeing.
Be nice, not naughty and get your gift list prepared for those who ask. I know I LOVE when folks provide a link to something they want. It just makes giving easier.
Is your mind in a continuous cycle of thinking, planning and organizing domestic life? You are not alone. Here are five ways you can use your bullet journal to cope with the mental load of life.
1. Make the Invisible Visible
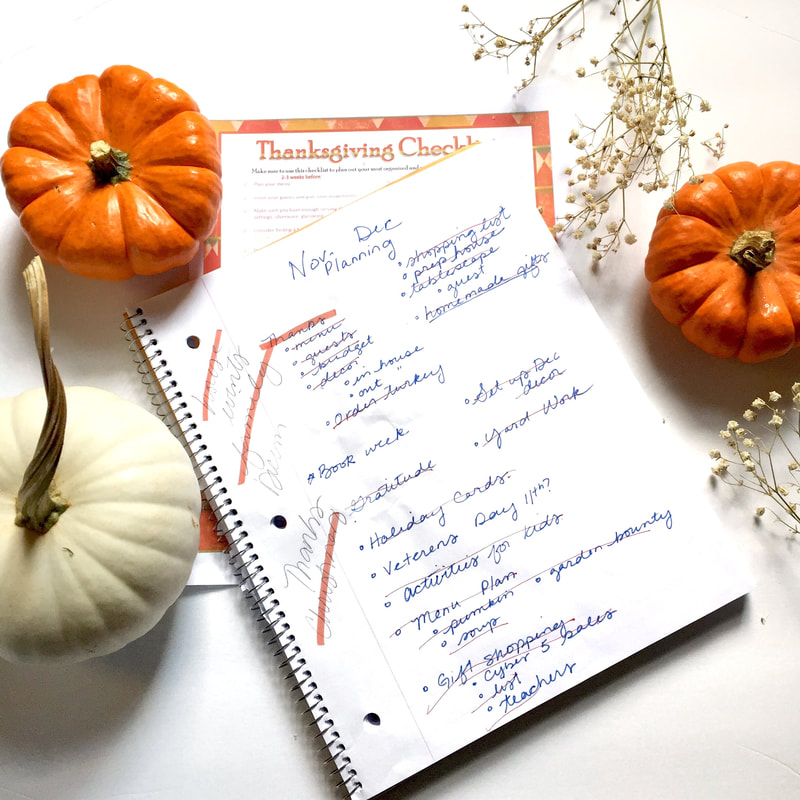 |  |
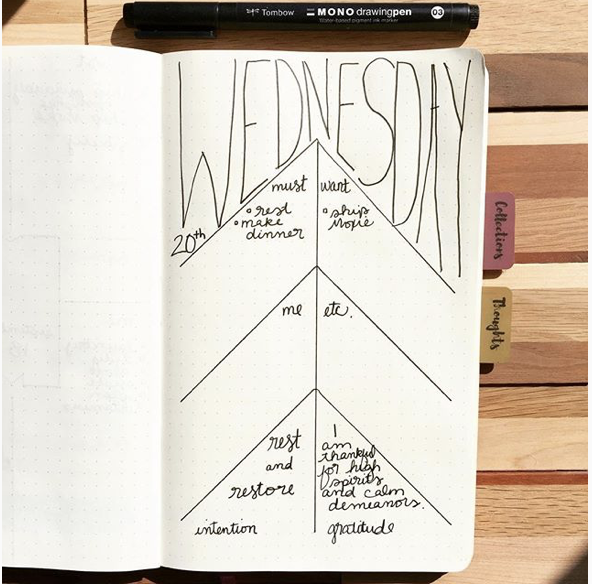
Grab your bullet journal and write down all of the things. Just get it all down on the paper and don't worry about how they connect, your handwriting, the order, whether or not the things really belong of the list. Just empty your mind onto the page.
Ok. Now that that's done, start looking for connections. Also look for ideas that aren't part of your overall goals and ditch them. Decide which items on your list are to be scheduled, which need to be fleshed out into collections pages and which are subcategories on those collections pages.
Ok. Now that that's done, start looking for connections. Also look for ideas that aren't part of your overall goals and ditch them. Decide which items on your list are to be scheduled, which need to be fleshed out into collections pages and which are subcategories on those collections pages.
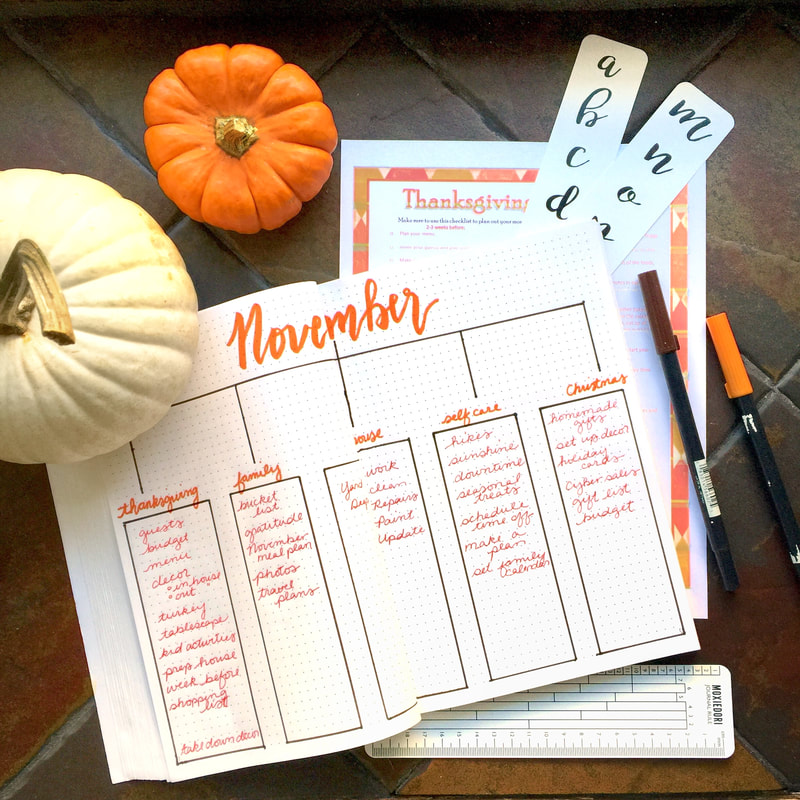
2. Plan Ahead
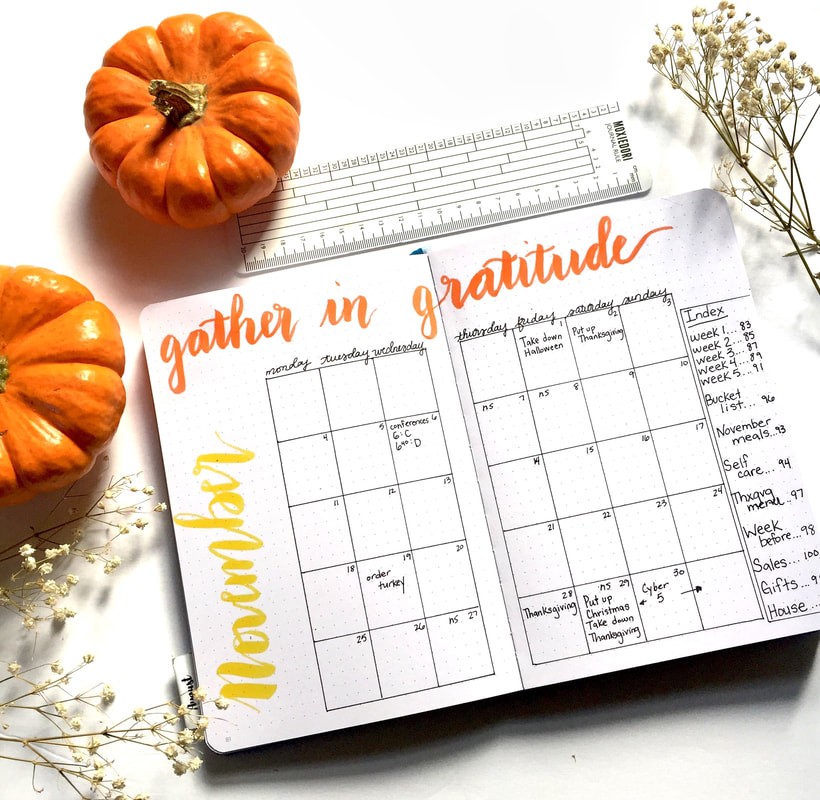 |  |
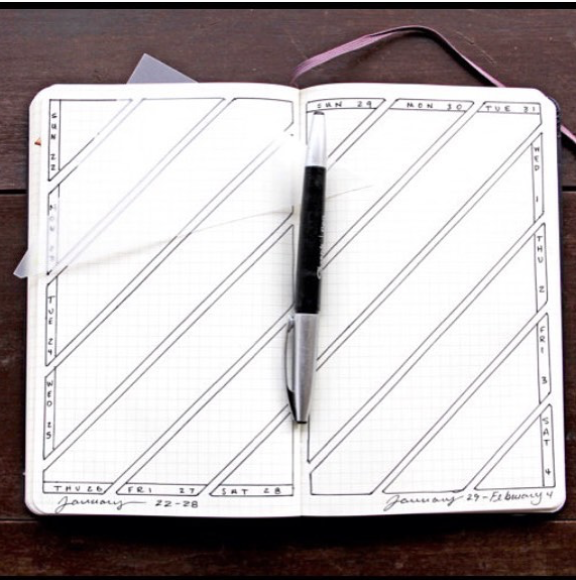
Try to create next month's calendar by the 20th of the current month. This way you will have a roadmap for upcoming events and commitments. Better yet, you'll have something concrete to sit down and share with your loved ones. More on that later.
You can use the Moxie Journal Rule to make the calendar. Each box is 5 boxes wide by 6 boxes tall. This means that the left side of the calendar itself is 15 boxes wide and 30 boxes tall. The right side of the calendar is 20 boxes wide and 30 boxes tall. The Journal Rule makes this job easy because it counts the boxes for you. Easy peasy.
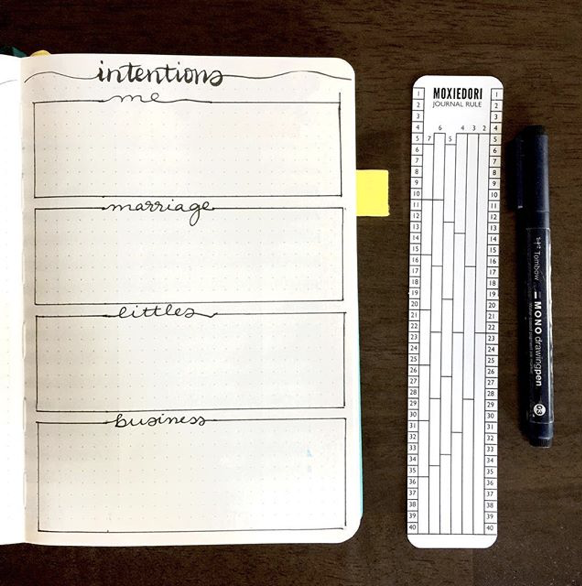
Create collections pages for your projects, plans, and events. Include the actions that keep your household running. Some of your collections could be meal planning, gift buying, household projects, cleaning checklists, birthday parties, bills, etc.
You can use the Moxie Journal Rule to make the calendar. Each box is 5 boxes wide by 6 boxes tall. This means that the left side of the calendar itself is 15 boxes wide and 30 boxes tall. The right side of the calendar is 20 boxes wide and 30 boxes tall. The Journal Rule makes this job easy because it counts the boxes for you. Easy peasy.
Create collections pages for your projects, plans, and events. Include the actions that keep your household running. Some of your collections could be meal planning, gift buying, household projects, cleaning checklists, birthday parties, bills, etc.
3. Delegate and Let Go
 |  |
Perhaps take 15 minutes to go over the month with your family, room mates, or significant other. Folks don't know what they don't know. Help them help you.
Put your scheduled items on the family calendar, the google calendar, or wherever else your people will see them. Share your collections and decide who will do what. Delegate and then let it go. Don't concern yourself if someone doesn't do things they way you would. Just. Let. Go.
Put your scheduled items on the family calendar, the google calendar, or wherever else your people will see them. Share your collections and decide who will do what. Delegate and then let it go. Don't concern yourself if someone doesn't do things they way you would. Just. Let. Go.
4. Mind the Chatter
Just because you're coping with mental load doesn't mean the chatter in your mind will stop. Your work now is to catch your thought spirals. Identify if the thought is something to be documented in your bullet journal, delegated or dropped. Then bring your mind back to center.
5. Practice Self Care
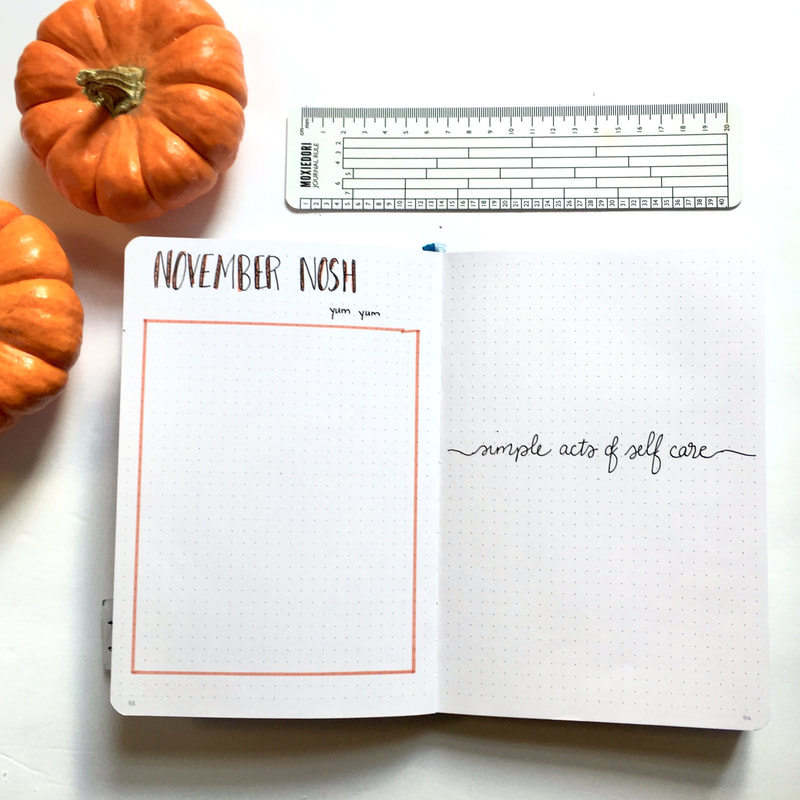
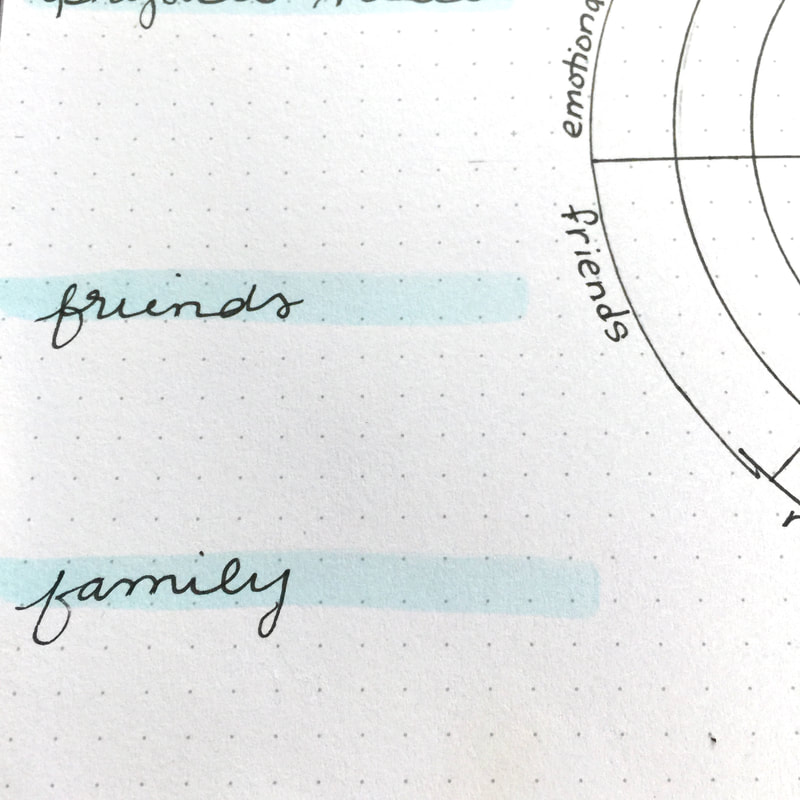
Create a self care layout in your bullet journal as a reference for quick and easy ways to take a break. List simple acts that bring you joy or pleasure. This could be bird watching, a cup of tea, lighting a candle, snuggling with your pet, hugging a loved one, taking a walk, listening to your favorite song, meditating, or anything else that fills your soul.
We would love to continue the conversation of using a bullet journal to improve life, so hop on over to our Facebook group Bullet Journaling Tips and Tricks to join us.
Amy and I make a concerted effort to carefully design products that work across a wide range of journal types. Occasionally, we get requests for tools matching a specific journal or planner line and we love it - we really appreciate when customers bring their insights and ideas to us to create.
A few years ago, a number of customers asked for tools that would work with their Hobonichi and we designed a stencil, and later, a journal rule for the Techo Planner; the English planner Hobonichi offers in a sea of otherwise Japanese products. Both the stencil and the journal rule matched the Planner's quirky A6 size and 4mm grid.
Well, it turns out that most of our Hobonichi customers use something other than the (English) Planner AND Hobonichi recently announced eagerly anticipated 2020 A6 and A5 Techo Day-Free bullet journals.
We've predicted this new Day-Free line will have a significant following, as customers are already asking us for accessories to match and they won't even be released until November 1st. The grid inside these beauties matches all the other Hobonichi products (the Techo Original, Techo Cousin, and Techo Weeks), at 3.7mm.
All this to say, we've decided to change up our Hobonichi offerings:
New MoxieDori tools for use with Hobonichi
| The Hobonichi Stencil We've redesigned our Hobonichi stencil to be a bit more stable, feature, one additional box, and fit the 3.7mm grid of most Hobonichi products - including the new Day-Free journals. |
| The HTA6 Journal Rule Sized to fit within an A6 Hobonichi, featuring the 3.7mm-based box count and page divisions. |
| The HTA5 Journal Rule Sized to fit within an A5 Hobonichi, featuring the 3.7mm-based box count and page divisions. |
| The A6 Pencil Boards Write without indenting the next page! Fits A6 Hobonichi, durable plastic, tabbed top, matte finish. Set of 2! Because we all lose things from time to time. |
| The A5 Pencil Boards Write without indenting the next page! Fits A5 Hobonichi, durable plastic, tabbed top, matte finish. Set of 2! Because we all lose things from time to time. |
| The A5 Hobonichi Bundle All of the above A5 items, together in on money-saving bundle! |
We're so excited to see how Hobonichi users work with the new 2020 Hobonichi A5 and A6 journals in combination with our products. We would love if you joined our Facebook group Bullet Journaling Tips and Tricks to share your Hobonichi layouts. Let's see what you create!
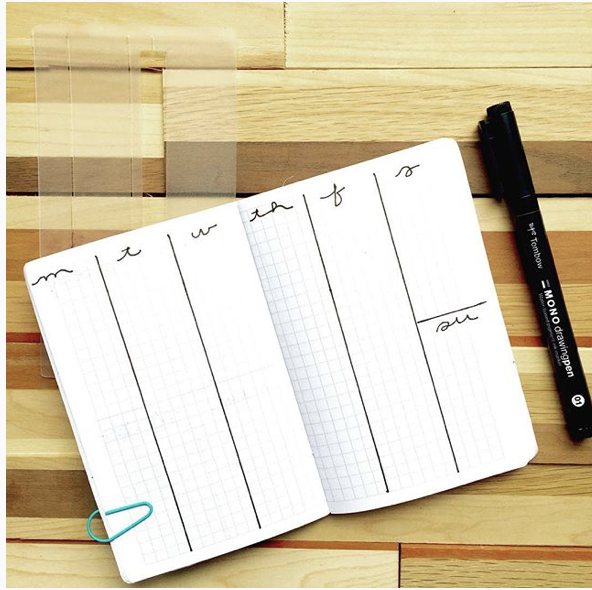
Looking for a new weekly layout for your bullet journal? The Fold Over Weekly Layout is quick to make AND facilitates task delegation and migration. All that and you can see your monthly calendex at the same time.
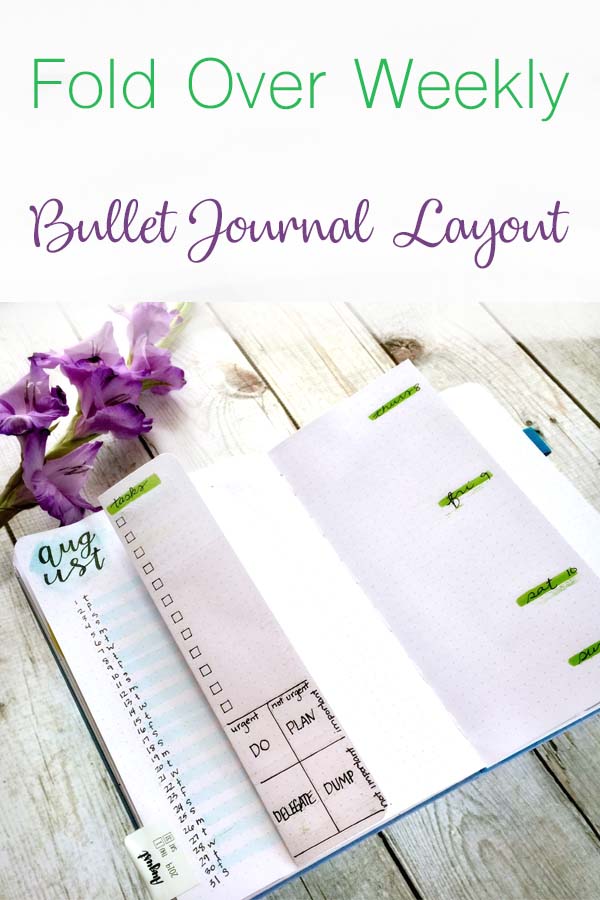
The utter beauty of the Fold Over Weekly is that you can see your monthly calendex and weekly spread at the same time. Create your weekly layout, migrating important events and appointments from your monthly layout to your weekly spread.
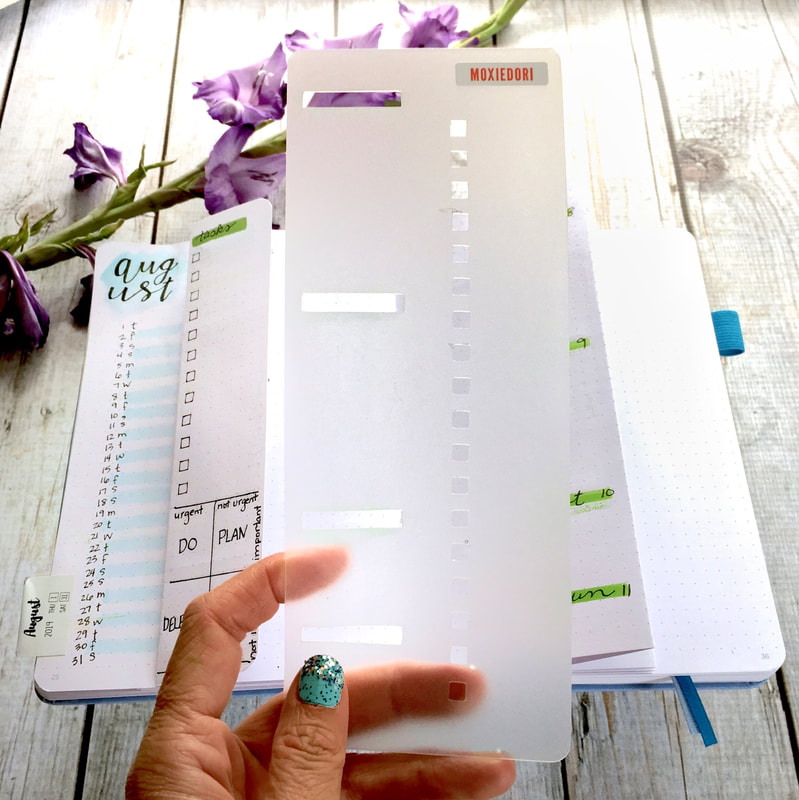
The A5 Fold Over Stencil contains a weekly template that evenly divides the pages into a weekly spread.
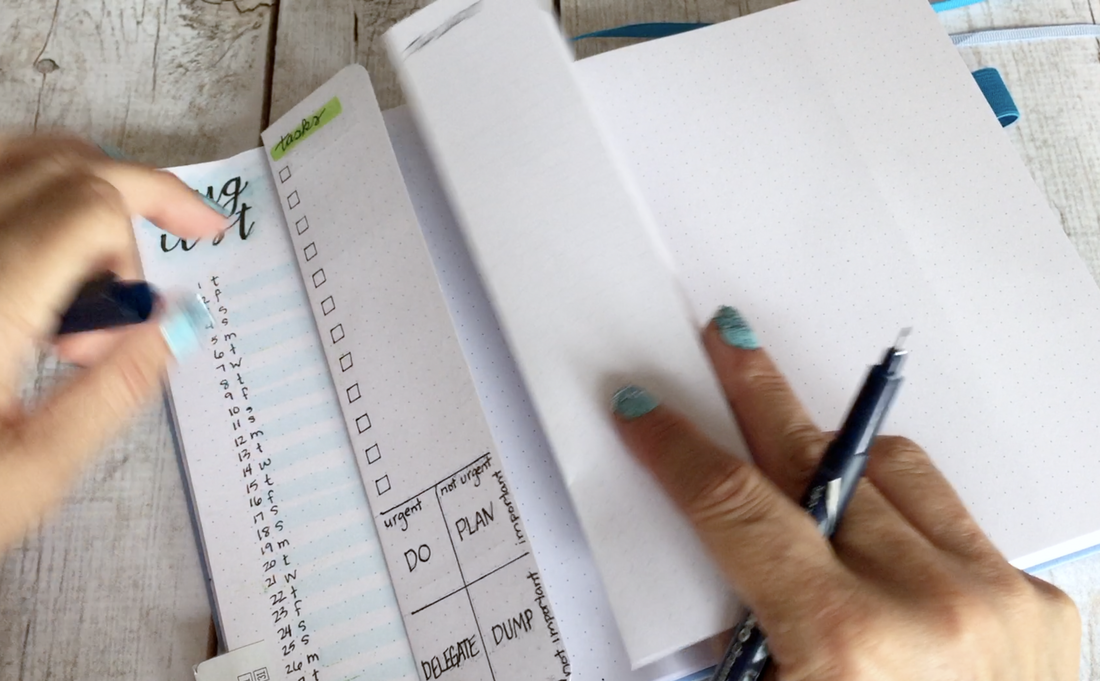
The A5 Fold Over Weekly Stencil is perfectly sized to create a 1/3 page "fold over" where your weekly tasks can reside before they are assigned to a particular day.
The stencil contains 18 tick boxes so you spend less time making the list and more time working the list.
The stencil contains 18 tick boxes so you spend less time making the list and more time working the list.
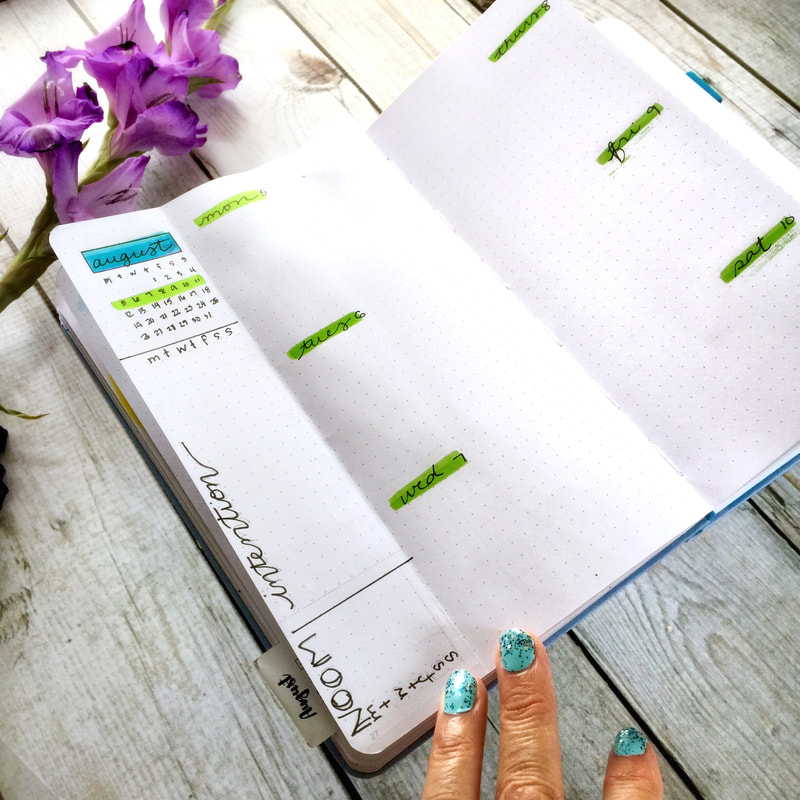
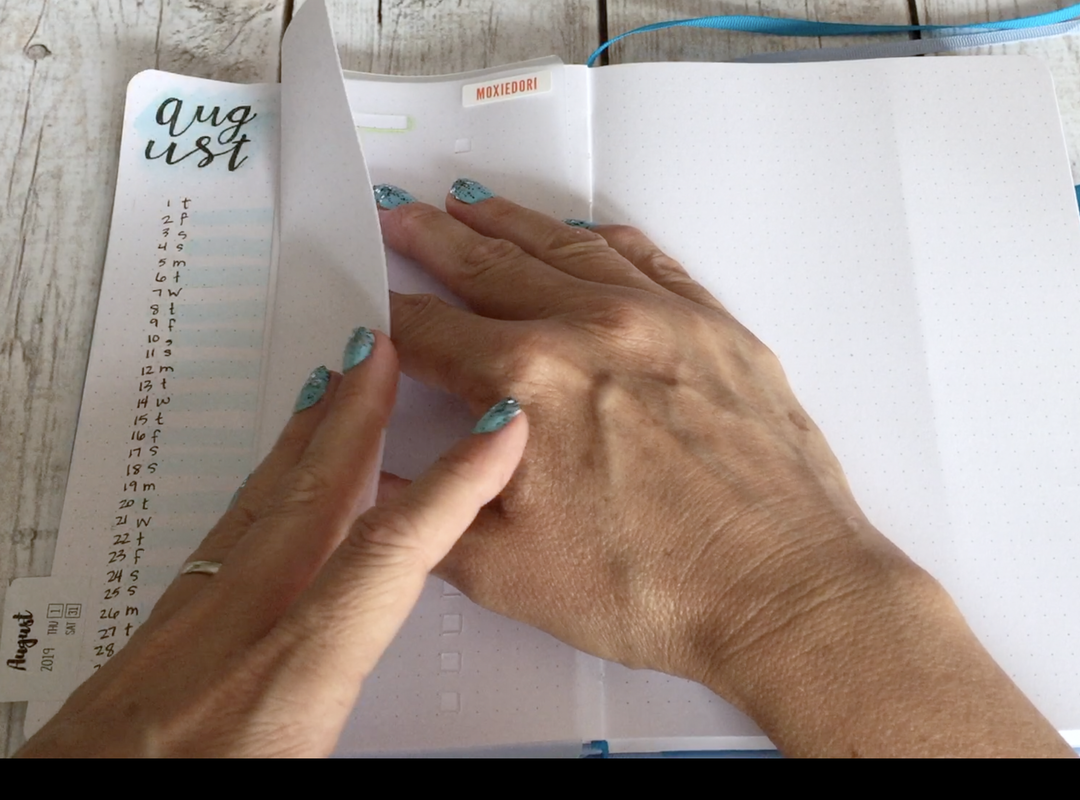
Use the underside of the fold over for trackers, mini calendars, gratitude logs, menu planning, etc.
At the end of the week, fold over the right side of the page and create the next weekly spread. Migrate any unfinished tasks from the previous week. Continue through the month. Do not fold over the last week in the month so you can make the next month's calendex on the opposite side.
If you're looking for more bullet journal ideas and inspiration, join our Facebook group Bullet Journaling Tips and Tricks.
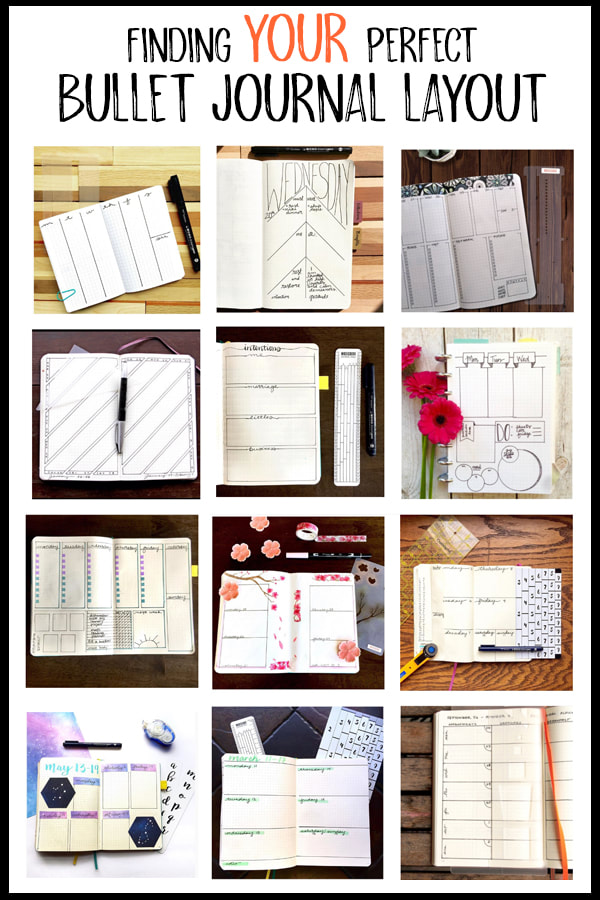
One of the strengths of using a Bullet Journal for planning over a traditional calendar or planner is that you can create and use your own customized system of planner layouts. Do you like to start your week on a Monday rather than Sunday? You can do that! Do you need more space allocated to some days over others? No problem! Often the greatest challenge is finding which layouts work best for you. Here are a variety of tips and examples to help you identify which might be your perfect fit.
Create Only the Layouts You Use
What amount of your time do you need see at a glance? Some people need a spread or two summarizing the entire year (often referred to as a future log), some like seeing an entire month across a two-page spread, others need one week per page, while others enjoy an entire page dedicated to each day. Often many end up using some combination of the above; like 12 monthly spreads, each followed by 28-31 daily layouts, or a yearly spread followed by 52 weekly layouts. There is no right answer here. The key here is to try out each type, pare down to only what you'll actually use, and forgo the rest rather than feel like all of them are somehow required.
Use the Layout Orientation that Feels Right
Each person processes information in their own way. What works for me might not work for you. This is why there are so many different options for layouts. Some are horizontal, some are vertical, some are circular, some are artsy and others are minimalist.
Pick the style that feels right and you do you. If you're not sure what style feels right, try one out. You'll quickly know if it fits the time you have to spend, whether you enjoy the process or not, and whether or not you're drawn or inspired to return to your journal regularly. The style you choose should work for you and alleviate rather than cause additional stress.
Pick the style that feels right and you do you. If you're not sure what style feels right, try one out. You'll quickly know if it fits the time you have to spend, whether you enjoy the process or not, and whether or not you're drawn or inspired to return to your journal regularly. The style you choose should work for you and alleviate rather than cause additional stress.
Layout Orientations
Take a look at the following layout/spread ideas and see how they feel to you. Does it feel natural or is it confusing? Do your eyes and mind flow naturally through the information and take it in or do you need to work a bit to absorb what's going on?
Don't overthink this. Use your intuition more than logic to identify how you best process information.
Don't overthink this. Use your intuition more than logic to identify how you best process information.
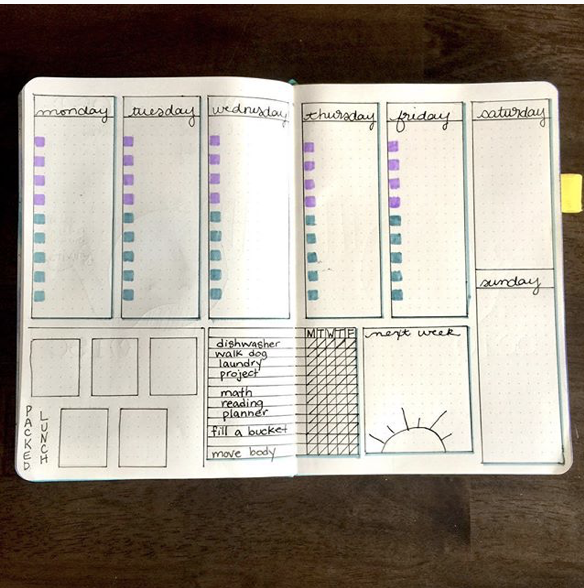
Horizontal
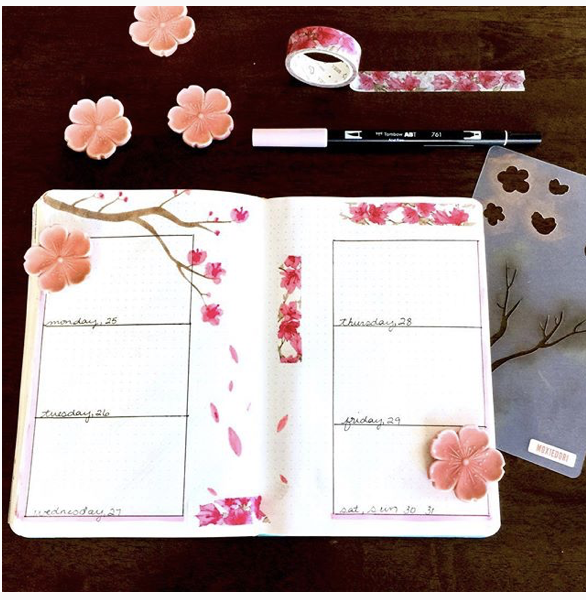 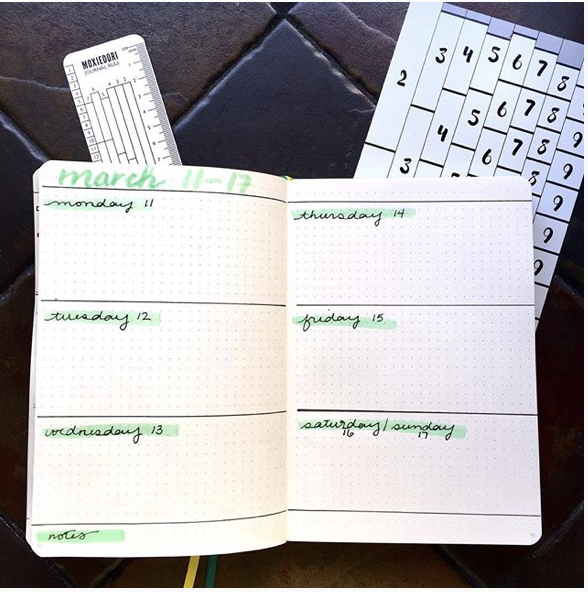 | 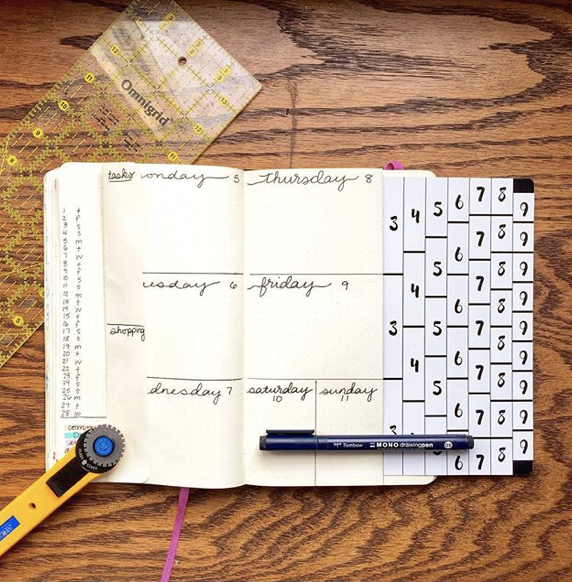  |
Tools used: Moxie Journal Rule , Cherry Blossom Stencil, Rows and Columns Tracing Card, Super Slider
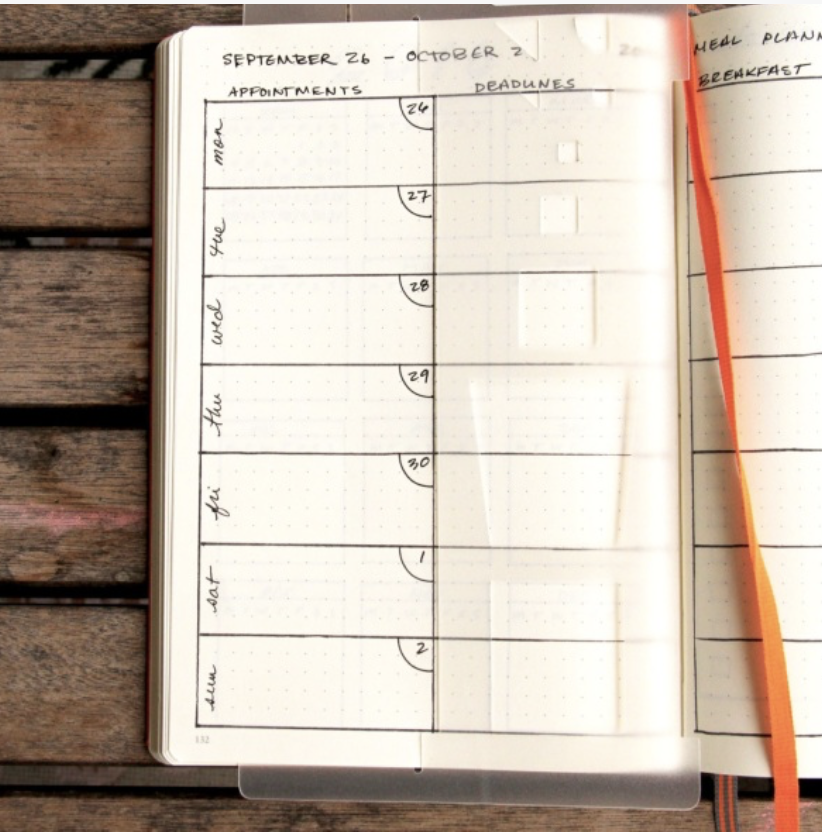
Vertical
 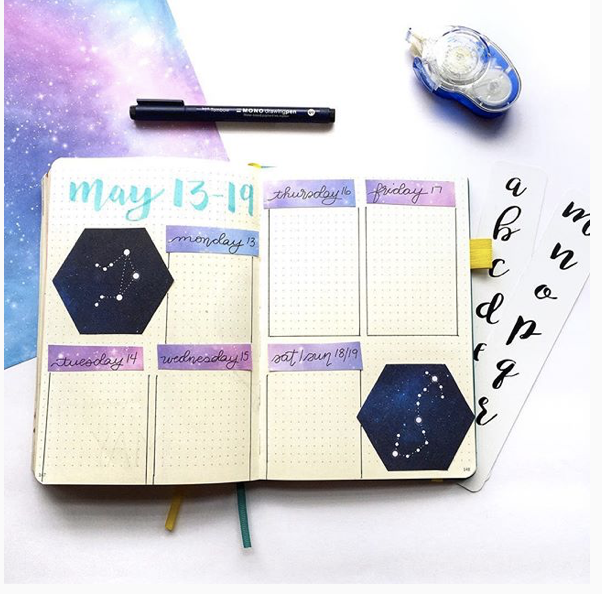 |   |
Tools used: Vertical Weekly Tracing Card, Tidy Slider Stencil, Brush Lettering Strips, Vertical Weekly Stencil
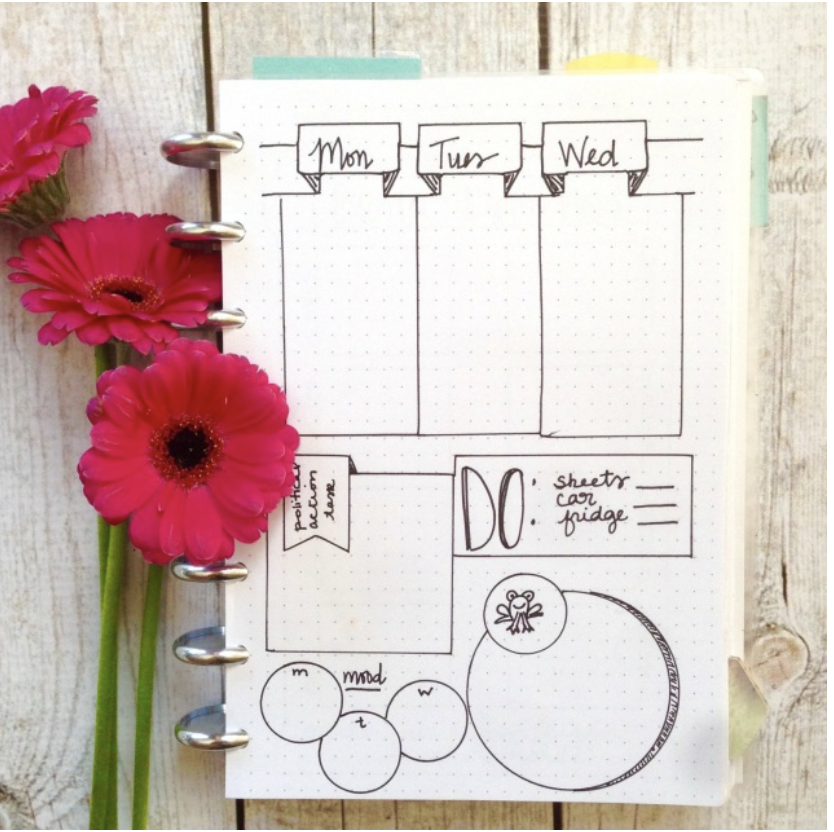
Circular
  |   |
Tools used: Compass Protractor , Mandala Maker
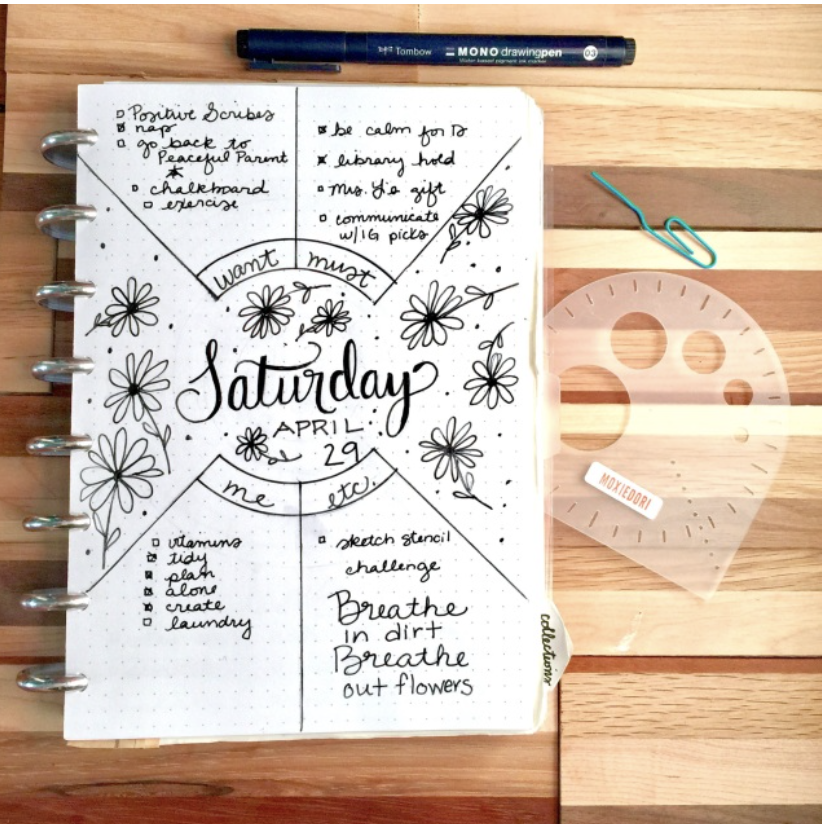
Artistic
  |   |
Minimalist
  |   |
Your Bullet Journal is All Yours
Your journal's purpose is to assist you. Choose and work the layouts that will help you and let the rest go. The layouts you see on social media should serve as options, not standards. Take the layouts that feel right to you and make them yours.
If you are looking for more inspiration, hop over to our FB group called Bullet Journaling Tips and Tricks. We host a drama free, kind and helpful bujo group of about 19,500 people
If you are looking for more inspiration, hop over to our FB group called Bullet Journaling Tips and Tricks. We host a drama free, kind and helpful bujo group of about 19,500 people
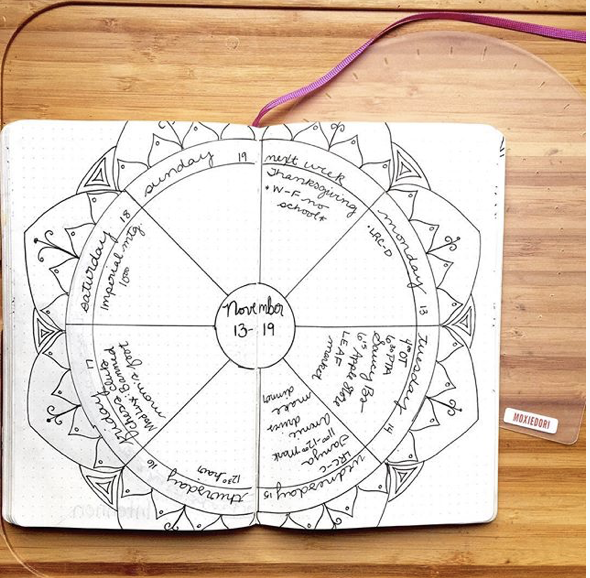
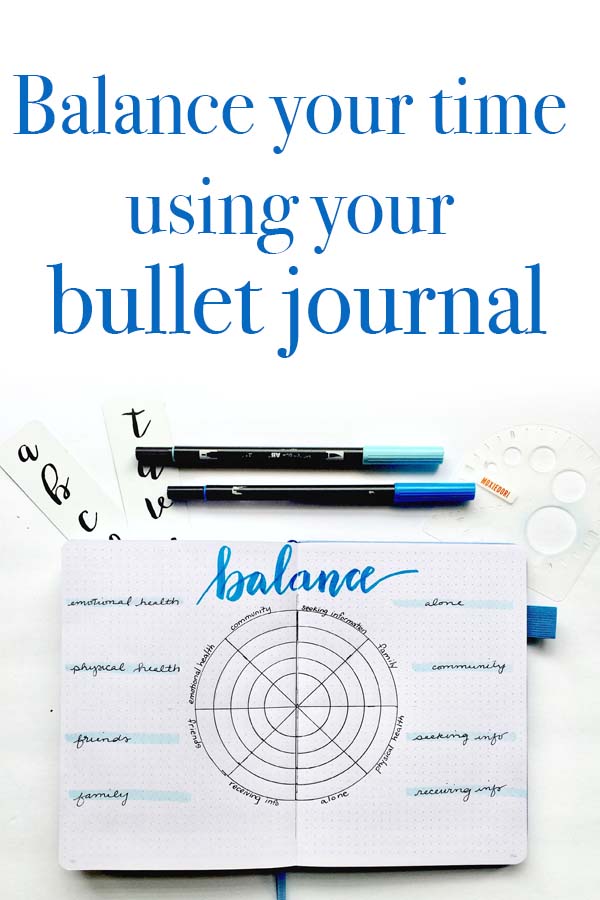
Looking for a mindful way to balance your time and energy? The Balance Wheel might be the bullet journal layout you're looking for. Read on for a complete how to tutorial. You will learn how to make a Balance Wheel and how to use it.

Time and energy are our most valuable resources. Being mindful about how you spend both is an investment in your self care.
I designed this Balance Wheel because I was weary from fussing and fighting over screen time with my children. As we rolled into summer break, I knew we needed an instructive, long term plan about how we would spend our time.
I wanted to teach my children to monitor time spent and areas that deserved more attention and care.
While this particular Balance Wheel is for the purpose of tracking and being mindful about how my family spends our long summer days, the concept can be applied to a multitude of situations.
Here is the step by step process I went through to create our Summer Time Balance Wheel:
1. Brainstorm Topics to be Balanced
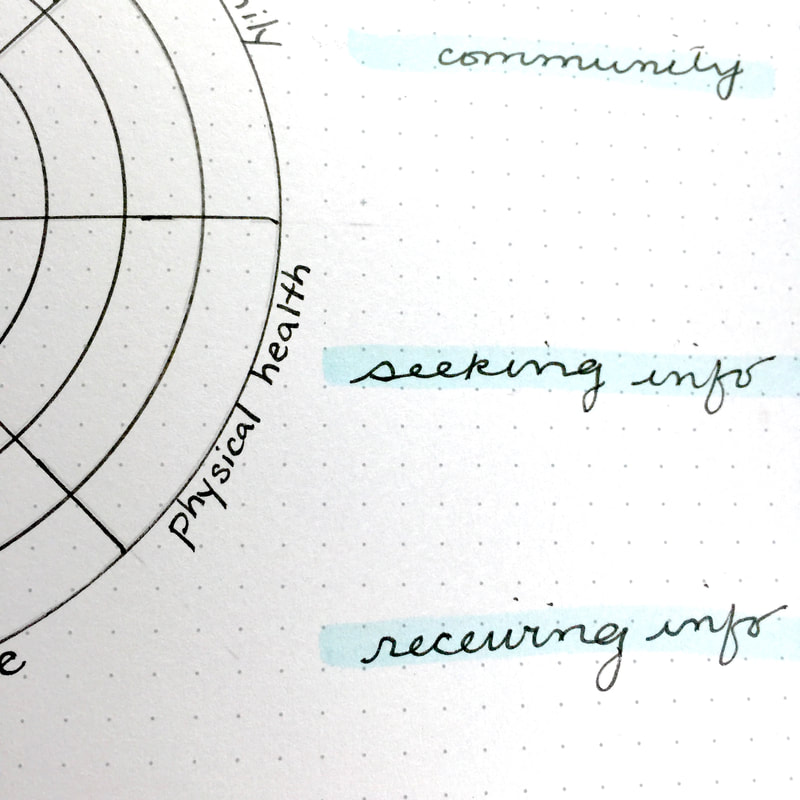
The eight areas that we are striving to balance are: Physical/Emotional Health, Alone/Community, Family/Friends, and Receiving Information/Seeking Information. (Receiving Information = screens and reading.)
Your areas might be professional in nature. They might be personal. Think about your investments in time and how they contribute to your overall goals and happiness. Once you have identified an area, think about its opposing area.
For example, social media can be countered with in face interactions. Both are important and both need to be nurtured. Are you clear about how much time you spend on either throughout the week? Would your life be improved if you balanced the two better?
 |  |
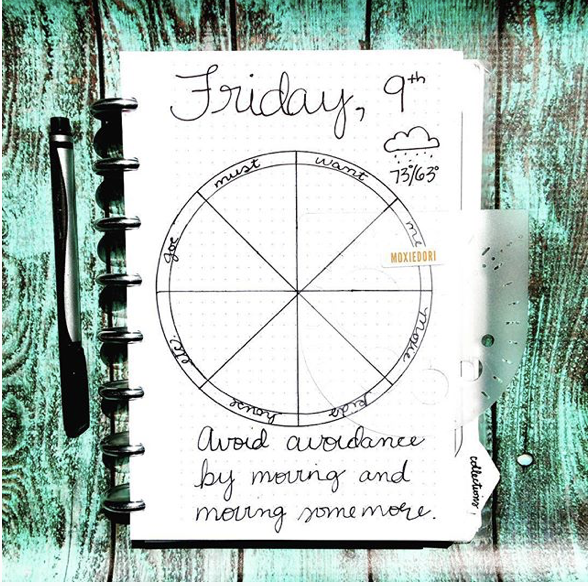
2. Create your wheel
Grab your Compass Protractor and draw five concentric circles. Each circle represents one week. Use the tick marks on the tool to divide your circles into equal pieces. In my case, I divided my circles into six pieces.
Next label the sections of the wheel, placing opposing concepts opposite one another.
Next label the sections of the wheel, placing opposing concepts opposite one another.
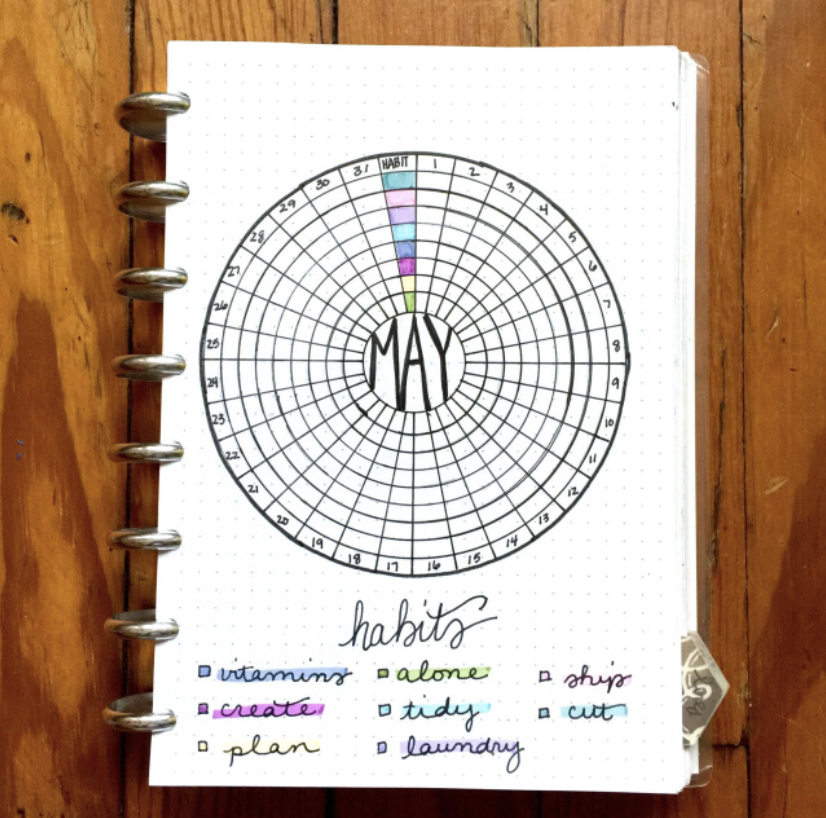
3. Use your Balance Wheel
Each circle represents a week. Start using the Balance Wheel from the inside out. When you complete an activity that falls into a particular category, make a tick mark in that pie piece.
Tracking your time forces you to monitor time spent and to be mindful of the areas that need more tending.
Tracking your time forces you to monitor time spent and to be mindful of the areas that need more tending.
If you have questions about this layout or any other questions, please don't hesitate to contact us. You can find lots of bullet journal support, tutorials and inspiration in the Video Vault and also in the Facebook group Bullet Journaling Tips and Tricks.
Follow
 RSS Feed
Index
September 2023
March 2023
November 2022
February 2022
December 2021
January 2021
September 2020
July 2020
May 2020
April 2020
February 2020
January 2020
December 2019
November 2019
October 2019
August 2019
July 2019
June 2019
May 2019
March 2019
February 2019
November 2018
October 2018
September 2018
August 2018
January 2018
November 2017
September 2017
August 2017
July 2017
April 2016